
Ever finished a graphite sketch that looks perfect on the page, only to watch a stray finger smudge the delicate tones minutes later?
You’re not alone – many of the students we coach in Mumbai and the art majors in Delhi tell us the same story: the masterpiece disappears before it even sees the light of day.
That’s why learning how to seal graphite drawings is the missing piece between a good sketch and a lasting artwork. A proper seal locks in the layers, protects against humidity, and keeps the paper from yellowing over time.
There are three basic routes you can take: a quick workable fix with a spray fixative, a brush‑on archival medium, or a DIY household solution using hairspray. Each method has its own trade‑off between convenience, finish quality, and archival safety.
For example, Priya, a freelance illustrator in Bangalore, tried a cheap aerosol from a hardware store and ended up with a cloudy sheen that dulled the subtle gradients. When she switched to a professional fixative and followed the step‑by‑step guide we publish, the same drawing retained its velvety shadows for months.
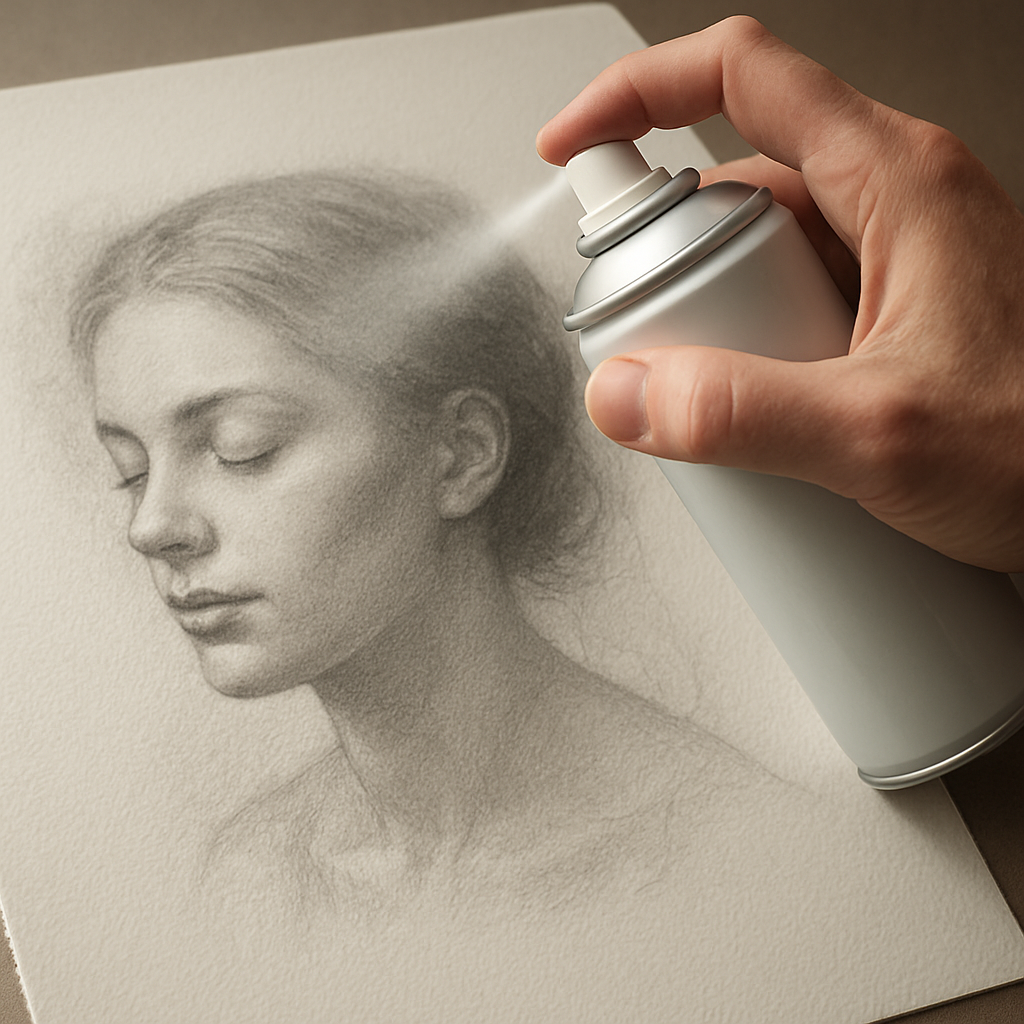
Here’s a simple three‑step routine you can start tonight: 1️⃣ Choose a fixative that matches your paper weight – a matte finish for textured Bristol, a glossy one for smooth vellum. 2️⃣ Work in a well‑ventilated space, hold the can about 12‑18 inches away, and apply thin, even coats, letting each layer dry for at least five minutes. 3️⃣ Once the final coat feels dry to the touch, store the artwork flat in a portfolio or frame it behind UV‑protective glass.
If you need a visual walkthrough of the spraying technique, check out our detailed tutorial on How to Use Fixative Spray on Graphite Drawings.
A quick tip we’ve learned: test the fixative on a scrap piece of the same paper first. That way you can see if the finish shifts the tonal balance before committing to the final piece.
When the seal is set, you might consider displaying the piece at a local studio – we’ve partnered with Gratitude Studios, which offers framing and exhibition space for emerging artists.
Bottom line: sealing doesn’t have to be intimidating. With the right product, a few mindful strokes, and a bit of patience, your graphite drawings will stay crisp, vibrant, and ready for any gallery or portfolio review.
TL;DR
Sealing your graphite drawing is as simple as spraying thin, even coats, letting each dry, and storing the piece flat or behind UV‑protective glass for long‑term preservation.
Follow our quick three‑step routine and your artwork stays crisp, vibrant, and ready for galleries, portfolios, or everyday display without fear of smudging.
Step 1: Choose the Right Sealing Medium
Okay, you’ve just finished that graphite piece you’ve been polishing for hours, and now you’re staring at it, wondering how to protect those delicate values. The first decision you’ll make is what kind of sealing medium actually suits your drawing’s paper and finish.
There are three main camps: a spray fixative, a brush‑on archival medium, and the occasional DIY hack like hairspray. Each has its own personality, just like the different grades of graphite we love to play with. If you’ve ever tried a cheap aerosol and ended up with a cloudy glaze, you know why picking the right product matters.
Spray Fixatives – Quick, Even, and Consistent
Spray fixatives are the go‑to for most artists because they lay down a thin, even veil without disturbing the underlying layers. Look for a product labeled “matte” if you want to keep the subtle gradients intact, or “gloss” if you prefer a slight sheen that can bring out deeper shadows.
When you’re in a bustling studio in Delhi or a quiet dorm room in Mumbai, the convenience of a spray is huge – just hold the can 12‑18 inches away, use short, sweeping motions, and let each coat dry for about five minutes. The key is thin layers; a heavy coat will turn your paper soggy and the graphite will smudge.
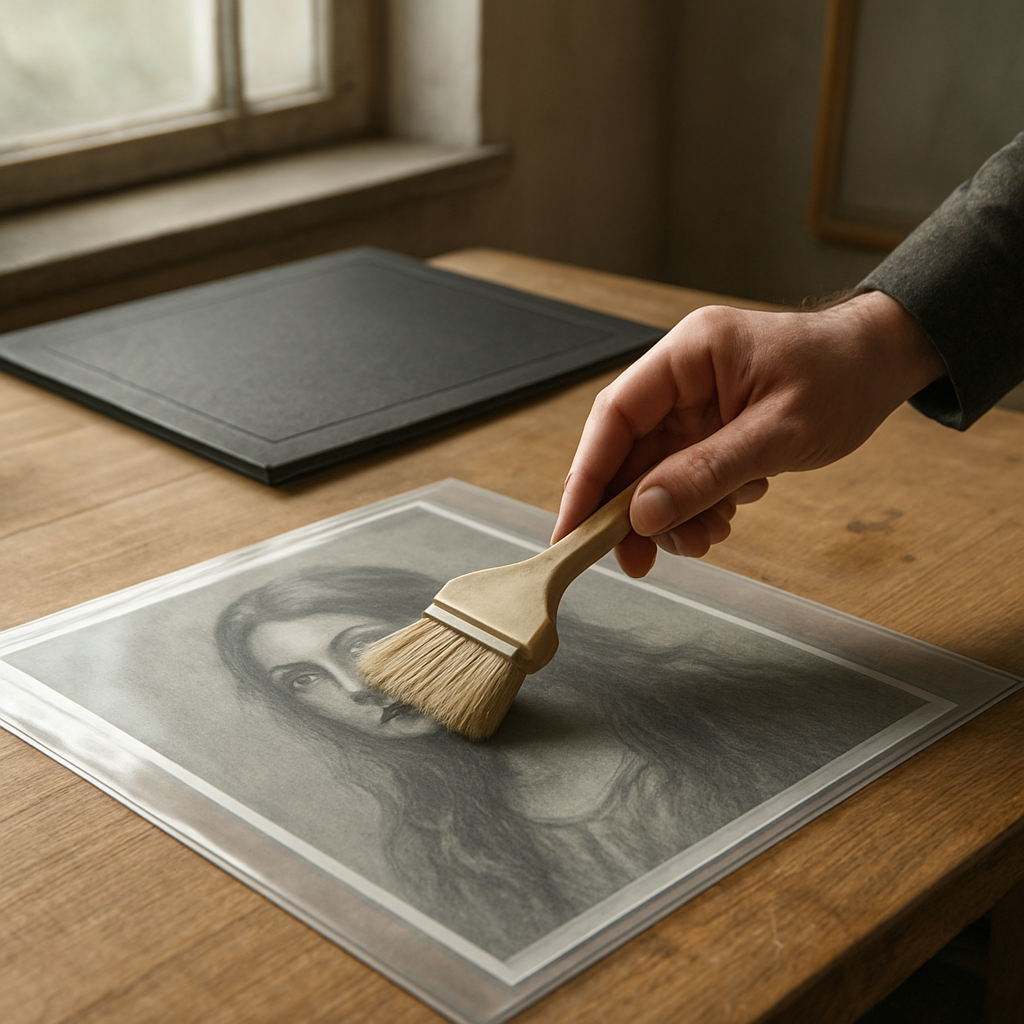
Brush‑On Archival Mediums – Control and Longevity
If you’re working on a heavy Bristol board or a vellum sheet that loves a bit of heft, a brush‑on medium gives you more control. You can feather the edges, build up opacity where you need it, and even blend the fixative into the paper fibers for a truly archival finish.
We often recommend a water‑based acrylic varnish that dries clear and won’t yellow over time. Test it on a scrap piece first – that tiny experiment can save you from a costly mistake later.
DIY Options – When Budget Calls
Some artists in student housing resort to household hairspray. It can work in a pinch, but the chemicals aren’t designed for art preservation, so expect a shorter lifespan and possible odor issues. If you go this route, keep the room ventilated and apply a single light coat.
So, how do you decide? Ask yourself three quick questions:
- What’s the paper weight? Light paper = spray, heavier = brush‑on.
- Do you need a matte or glossy finish?
- How much time do you have for drying?
Answering these will point you to the right medium without over‑thinking.
Here’s a little secret we’ve learned from teaching art students across India: the same fixative that works on a 200‑gsm sketch pad might be overkill for a delicate newsprint sheet. Adjust the product choice to the paper, not the other way around.
Once you’ve picked your seal, give it a quick test on a corner of the same sheet. Watch how the tones shift – if they stay true, you’re good to go.
After the video, take a moment to think about storage. Even the best seal can’t protect a drawing that’s tucked in a damp bag.
Store your sealed piece flat in a portfolio or slip it behind UV‑protective glass. This extra step keeps the seal from cracking and the paper from yellowing, especially in humid Indian climates.
And remember, the seal is only as good as the preparation. A clean, dust‑free surface, a well‑ventilated workspace, and patience between coats are the unsung heroes of a lasting graphite masterpiece.
Ready to pick your sealing medium? Grab a spray can, a brush, or a can of hairspray, and let’s get that drawing locked in for the long haul.
Step 2: Prepare Your Graphite Drawing Surface
Before you even think about spraying, the surface of your drawing has to be ready. You’ve spent hours building those subtle gradients, and the last thing you want is a stray dust particle or a warped sheet ruining the seal.
The first thing to do is give the paper a gentle wipe. Use a soft, lint‑free brush – think of the little brushes we use to dust off charcoal sketches in our Delhi workshops. Sweep away any loose graphite, eraser crumbs, or stray charcoal bits. If you have a static‑free cloth, give the sheet a light pat; this removes static that can attract dust later.
Next, look at the texture of your paper. Heavy Bristol board (300 gsm or more) can handle a couple of spray layers without curling, while a light sketch pad (around 180 gsm) will buckle if you apply too much moisture. A quick flex test: hold the sheet by the short edge and give it a gentle bend. If it springs back smoothly, it’s sturdy enough for spray. If you feel resistance, consider a brush‑on medium instead.
Humidity is the silent enemy in many Indian studios, especially during the monsoon season in Mumbai. Aim for a relative humidity of 40‑50 % and a temperature around 22‑24 °C. You can check this with a cheap hygrometer – a tool we keep on our studio bench. If the air feels sticky, turn on a fan or place the artwork near a dehumidifier for 15 minutes before you start.
Now, do a test swatch. Cut a 5 cm square from the same batch of paper, draw a tiny graphite patch, and spray a light coat of your chosen fixative. Let it dry for five minutes. Examine the swatch under daylight; you should see no shift in tonal value and no fogging. If the patch looks milky, either thin your spray distance or switch to a matte, archival‑grade product.
Tip from our team at Drawing Pencils Guru: when you’re using an aerosol, shake the can for a full 30 seconds – the rattling sound should be steady. This ensures the propellant is evenly mixed, which prevents streaks on the surface.
If you’re working on a textured surface like vellum or pastel paper, you might want to add a thin layer of a clear acrylic medium with a brush before spraying. This acts like a primer, sealing the texture and giving the spray something smooth to cling to. Our Delhi students often use a diluted acrylic (one part acrylic to three parts water) applied with a soft sable brush.
While the surface is drying, protect the surrounding area. Lay down a sheet of clean newsprint or a reusable silicone mat. This catches any overspray and keeps your studio floor free of graphite dust, which can otherwise settle back onto the artwork.
Finally, give yourself a short break before the actual sealing step. A 2‑minute pause lets the paper temperature equalise after the humidity treatment, reducing the risk of warping when the fixative lands.
Putting it all together, here’s a quick checklist you can pin to your easel:
- Clean the surface with a lint‑free brush or static‑free cloth.
- Verify paper weight and flexibility – heavy board for spray, light paper for brush‑on.
- Adjust studio humidity to 40‑50 % and keep temperature around 22‑24 °C.
- Perform a test swatch to confirm no colour shift.
- Apply a thin acrylic primer on very textured papers, if needed.
- Set up protective covering for the workspace.
Once you’ve checked off each item, you’ll feel confident that the drawing surface is primed for a flawless seal. It’s a small ritual, but it makes the difference between a drawing that looks as crisp in a gallery as it did on your desk, and one that fades under a cloudy coat.
Step 3: Apply the Sealant Properly
Okay, you’ve prepped the paper, you’ve picked the right fixative – now comes the part that feels a bit like threading a needle in a windstorm. Don’t worry, we’ve been there. The key is to treat the sealant like a gentle rain, not a downpour.
Set up your workspace for consistency
First, clear a 3‑foot radius around your easel. Lay a silicone mat or a sheet of newsprint – whatever catches stray mist without sticking to the paper. Turn on a fan or open a window; good airflow keeps fumes low and the spray from pooling.
Next, give your can a good shake. We recommend 30 seconds of steady rattling so the propellant and the fixative blend evenly. If you skip this step, you’ll end up with those dreaded splotchy streaks that look like a bad weather forecast on your drawing.
Does it sound like a lot? Think of it as a short ritual that saves you from re‑doing the whole piece later.
Spray technique: distance, motion, and overlap
Hold the can about 12‑18 inches away – the sweet spot we mention in our workshops in Delhi. Too close and you’ll get a glossy puddle; too far and the coating becomes watery and uneven.
Start with a light “M” motion. Imagine you’re painting a cloud in the sky: move the can horizontally, then tilt slightly up and down, overlapping each pass by about 30%. This overlap prevents thin spots where the graphite could still smudge.
Here’s a quick checklist you can keep on the side of your easel:
- Shake for 30 seconds.
- Hold 12‑18 inches from surface.
- Use a steady “M” sweep, overlapping 30%.
- Apply a thin, invisible coat – you should barely see the spray.
And remember, one thin coat is better than two heavy ones. You can always build up later.
Layering & drying – the patience part
After the first pass, wait at least five minutes. That’s the time our humidity‑controlled studio in Mumbai needs for the solvent to evaporate fully. If you rush and add a second coat while the first is still tacky, you’ll trap moisture and cause the paper to warp.
When the surface feels dry to the touch, repeat the “M” motion for a second coat. Most artists find two coats give a uniform matte finish; three coats are only needed if you’re working on a highly absorbent paper like newsprint.
Real‑world example: A student in Pune once applied three heavy coats on 180 gsm sketch pad and ended up with a bubbled texture that looked like a cracked pond. The fix? Peel off the excess, flatten the paper under a heavy book, and start again with lighter layers.
Common mistakes and quick fixes
Notice a streak? Lightly brush it with a clean, dry sable brush before the next coat – the bristles will feather out the line without removing the underlying graphite.
Got a cloudy sheen? It usually means the can was too warm or you sprayed from too close. Let the can sit in a cool room for ten minutes, then re‑spray from the correct distance.And if you see a faint rainbow‑like edge around the border, that’s overspray hitting the mat. Just lift the artwork carefully, tap off the excess, and re‑position the mat for the next pass.
Final check and storage
When the final coat feels dry, give the drawing a gentle press with a clean sheet of parchment paper for a minute. This evens out any microscopic ridges and ensures the seal is flush with the surface.
Finally, store the sealed piece flat in a portfolio or a rigid sleeve. If you’re framing it, choose UV‑protective glass – the sealant does its job, but UV rays can still yellow the paper over years.
Need a visual reference? This short tutorial walks through the exact spray distance and motion we just described professional spray technique guide. Pause at the 1:20 mark to see the artist’s hand movement – it’s a great way to visualise the “M” sweep.
So, what’s the bottom line? Treat the sealant like a gentle, even rain, respect the drying time, and keep your workspace tidy. Follow these steps, and your graphite drawings will stay crisp, vibrant, and ready for any gallery or portfolio review.
Step 4: Drying and Curing Techniques
You’ve just laid down that final, feather‑light coat of fixative. Now the real secret sauce is giving it time to set without rushing. Think of it like letting a cake rise – if you poke it too early, the whole thing collapses.
Control the environment
Ideal drying temperature sits between 20 °C and 24 °C (68 °F‑75 °F). Anything hotter will make the solvent evaporate too fast, leaving a hazy film; anything cooler slows the reaction and can trap moisture in the paper. Keep the room humidity around 40‑50 % – a cheap hygrometer on your desk does the trick.
In Indian studios, the monsoon can push humidity above 70 %. When that happens, turn on a dehumidifier or place a portable fan a few feet away. A gentle breeze helps the solvent escape evenly without creating a draft that blows particles onto your still‑wet surface.
Timing is everything
Most archival‑grade aerosol fixatives need at least five minutes of “touch‑dry” time before you can safely handle the sheet. That doesn’t mean the seal is fully cured – full cure often takes 30 minutes to an hour, depending on the product and layer thickness.
Mark your calendar or set a phone timer for the first five‑minute window. After the initial dry, give the piece a quick visual check: the surface should look matte, with no visible wet spots. If you see any tackiness, add another two‑minute pause.
Use a protective overlay
Before you move the artwork, lay a clean sheet of parchment or wax paper over the top and press lightly for 30‑60 seconds. The paper absorbs any residual solvent and flattens microscopic ridges, leaving the seal flush with the drawing surface.
Don’t press too hard – you just want a gentle kiss, not a crush. This step also prevents accidental fingerprints from ruining the still‑soft film.
Layer‑by‑layer curing
If you’re applying a second or third coat, repeat the five‑minute “touch‑dry” rule between each layer. Remember, each additional coat adds a bit more thickness, so the final cure may stretch toward the 45‑minute mark.
When you finish the last coat, let the drawing rest undisturbed for at least 30 minutes before you stack it or place it in a portfolio. This extra patience pays off when you later frame the piece – the seal will stay clear and won’t yellow.
What if you need faster curing?
For artists on a tight deadline, a low‑heat hairdryer set to “warm” (never “hot”) can speed up solvent evaporation. Keep the dryer at least 30 cm away and sweep it across the surface in short bursts. Too much heat will cause the fixative to crack, so watch the finish closely.
Some specialised sealants, like intumescent fire‑stop products, actually rely on heat to activate. Protecta FR Graphite expands when it reaches 150 °C, creating a fire‑resistant barrier. While you’ll never use that exact product on artwork, the principle shows how different formulations cure in very different ways – and why matching the right cure method to the right sealant matters.
Quick drying checklist
- Room temperature: 20‑24 °C.
- Humidity: 40‑50 %.
- First touch‑dry: 5 minutes.
- Overlay with parchment for 30‑60 seconds.
- Repeat timing for each additional coat.
- Final rest: ≥30 minutes before handling.
- Optional gentle warm air for speed, never >40 °C.
By respecting these simple drying and curing steps, you’ll lock in the graphite tones without fogging, cracking, or attracting dust. Your sealed drawing will stay crisp, vibrant, and ready for any exhibition or portfolio review – all because you gave the fixative the time it deserved.
Step 5: Finishing Touches and Long-Term Care
Congratulations – the seal is dry, the tones are locked in, and your graphite drawing looks exactly how you imagined it on that late‑night sketch session. Now comes the part most artists skim over: what do you do after the spray dries?
First thing’s first, give the surface a gentle once‑over with a soft, lint‑free brush. Even though the fixative forms a protective film, dust loves to settle on any still‑wet spot. A quick brush‑off before you touch the paper removes those specks without disturbing the underlying graphite.
And what about the edges? If you sprayed right up to the border, you might notice a slightly thicker rim where the spray pooled. Lightly feather that area with a dry sable brush or a piece of clean parchment – it smooths the edge and prevents the seal from cracking when the paper flexes.
Storing flat and protected
Think of your sealed drawing like a photograph you’d keep in an album – it wants to stay flat. Slide it into a rigid portfolio sleeve or a large‑format archival box. Avoid rolling it, even if you’re short on shelf space; the weight of the fixative can cause the paper to curl over time.
For artists who like to display their work right away, framing behind UV‑protective glass is the sweet spot. The seal does a great job of keeping moisture out, but ultraviolet light can still yellow the paper after a few years. UV glass adds an extra layer of defence without altering the matte or glossy finish you chose.
Transport tips for the travelling artist
Got a portfolio to take to a college exhibition in Delhi or a client meeting in Bangalore? Pack the sealed sheet between two pieces of acid‑free tissue and then into a cardboard mailer with a snug fit. If you’re moving a larger board, use a flat cardboard box, cushioned with kraft paper, and label it “Do Not Bend”.
And remember, temperature swings are the silent culprits behind warping. Keep your artwork out of direct sunlight and away from heating vents – a stable 20‑24 °C environment is ideal, even during India’s summer heat.
Long‑term humidity management
Humidity is the enemy of any paper‑based art, sealed or not. A hygrometer on your studio shelf will tell you if you’re drifting above the 50 % sweet spot. If the air gets sticky, run a dehumidifier for an hour or place a silica‑gel packet in the storage box. It’s a tiny habit that pays off with a crisp, un‑yellowed drawing years down the line.
For students and academics who keep sketchbooks in dorm rooms, a simple trick is to store the sealed pages in a zip‑lock bag with a small desiccant pouch. Change the pouch every few months and you’ll avoid that dreaded damp, musty smell.
When to re‑seal
Even the best archival fixatives can wear thin after years of handling. If you notice the surface feeling tacky or the graphite beginning to lift when you lightly rub a fingertip, it’s time for a light touch‑up. The good news? You don’t have to start from scratch – just spray one thin coat in a well‑ventilated corner, let it cure for 30 minutes, and you’re back to a fresh finish.
Most artists find a re‑seal every 2–3 years keeps the work looking gallery‑ready, especially in humid climates like Mumbai’s monsoon season.
| Finish Type | Recommended Storage | Maintenance Tip |
|---|---|---|
| Matte archival spray | Flat in archival sleeve, UV‑protective glass if framed | Re‑seal every 2‑3 years; keep humidity 40‑50 % |
| Glossy brush‑on medium | Flat in rigid box, avoid direct light | Wipe surface gently with dry brush; check for gloss loss annually |
| DIY hairspray fix | Store in zip‑lock with desiccant | Replace hairspray can after 1 year; consider upgrading to archival spray |
Bottom line: the seal is only half the battle. By treating your finished piece like a fragile artifact – dust‑free brushing, flat storage, UV shielding, and humidity control – you guarantee that the graphite tones you worked so hard to perfect will stay vibrant for exhibitions, portfolios, or a quiet night on your studio wall.
So, what’s the next move? Take a moment to set up that flat storage system, slip your drawing into a protective sleeve, and give yourself a pat on the back. You’ve just turned a fleeting sketch into a lasting piece of art.
Conclusion
We’ve walked through every step of how to seal graphite drawings, from picking the right fixative to giving it the proper cure time. By now you know that a little bit of patience and the right storage routine can turn a fragile sketch into a piece that lasts.
So, what’s the next move? Grab a flat archival sleeve, slip your sealed sheet inside, and give yourself a quiet pat on the back. It feels good to know your work is protected from smudges, humidity, and the relentless passage of time.
Key takeaways
- Test on a scrap piece before committing.
- Apply thin, even coats 12‑18 inches away.
- Allow at least five minutes touch‑dry per layer and a final 30‑minute rest.
- Store flat, keep humidity around 40‑50 %, and use UV‑protective glass if you frame.
Remember, sealing isn’t a one‑off chore; a light re‑seal every couple of years keeps the graphite lively, especially in India’s monsoon‑prone studios. If you ever feel stuck, the Drawing Pencils Guru community is always ready to answer quick questions – just drop a line on our forum.
In short, mastering how to seal graphite drawings gives you confidence to showcase your art anywhere, from a college portfolio to a gallery wall, without the fear of a stray finger ruining months of work.
FAQ
What’s the first step when I’m figuring out how to seal graphite drawings?
Before you even pick up the can, give the paper a quick clean with a soft brush or lint‑free cloth. That removes stray graphite and dust that would otherwise get trapped under the seal. Next, do a tiny test swatch on a scrap piece of the same paper – spray a light coat and let it dry. If the tones stay true, you’re ready to move on to the real piece.
How many coats of fixative should I apply and why?
Most artists find two thin coats give a uniform matte finish without a glossy buildup. The first coat seals the surface; the second fills any micro‑gaps so the graphite stays locked in. If you’re working on very absorbent paper, a third feather‑light coat can help, but avoid heavy layers – they can cause the paper to warp, especially in humid Mumbai studios.
Do I need to wait between coats, and what’s the ideal drying time?
Yes, patience is part of the process. A touch‑dry time of at least five minutes lets the solvent evaporate enough to prevent tackiness. For archival‑grade aerosols, aim for a full 30‑minute cure before handling the sheet. If you’re in a cooler room, add a few extra minutes; if it’s warm and dry, the five‑minute rule usually holds.
Can I use a brush‑on medium instead of spray, and what are the pros and cons?
Brush‑on sealants give you more control over thickness, which is great for delicate vellum or textured pastel paper. They tend to dry slower, so you have a bigger window to smooth out brush marks. The downside is a bit more mess and the need for a clean brush each time. Sprays win on speed and even coverage, but they can create a faint sheen if you’re too close.
How should I store a sealed drawing to keep it from yellowing over time?
Slip the artwork into a rigid, acid‑free archival sleeve and store it flat in a cool, dark cabinet. Aim for 40‑50 % relative humidity; a small hygrometer on the shelf does the trick. If you must frame it, choose UV‑protective glass – the seal blocks moisture, but UV light can still yellow the paper after years.
Is it safe to frame a sealed graphite drawing with regular glass?
Regular glass won’t damage the seal, but it won’t stop UV rays either. Over a decade, even a well‑sealed piece can develop a slight amber tint under plain glass. For gallery‑ready work, we recommend UV‑filtering glass or acrylic; the extra cost is tiny compared to the peace of mind that your drawing stays as bright as day one.
How often should I re‑seal my artwork, especially in humid Indian studios?
In most Indian climates, a light re‑seal every two to three years keeps the surface from getting tacky. If you notice dust clinging or the graphite lifting slightly when you run a fingertip across it, it’s time for another thin coat. Just repeat the same thin‑spray routine, let it cure fully, and you’ll extend the life of the piece for years.
