
Hook: The best pencils for drawing on illustration board aren’t always the soft graphite you expect. On a smooth board, hard leads can dampen shine and keep lines crisp longer. This guide walks you through how to pick, test, and use pencils on illustration board so your drawings stay sharp and clean. You’ll learn how the board’s tooth matters, how to pick the right lead, and how to layer and erase without wrecking the surface. You’ll also see real testing steps you can do at home, plus pro tips for long sessions. By the end, you’ll know how to choose the best pencils for drawing on illustration board for your style in 2026.
What you’ll learn: how to pick hardness, how to test on the board, how to mix mechanical and wood pencils, how to layer and erase, and how to care for your board. We’ll mix simple steps with practical demos so you can pick the right pencil for your illustration board work.
Let’s get started. You’ll see how this tool set fits Drawing Pencils Guru’s approach to making drawing easy and fun, with clear steps and no fluff. And yes, we’ll link to a few solid resources so you can dive dee.
Step 1: Understand the Illustration Board Surface and Tooth
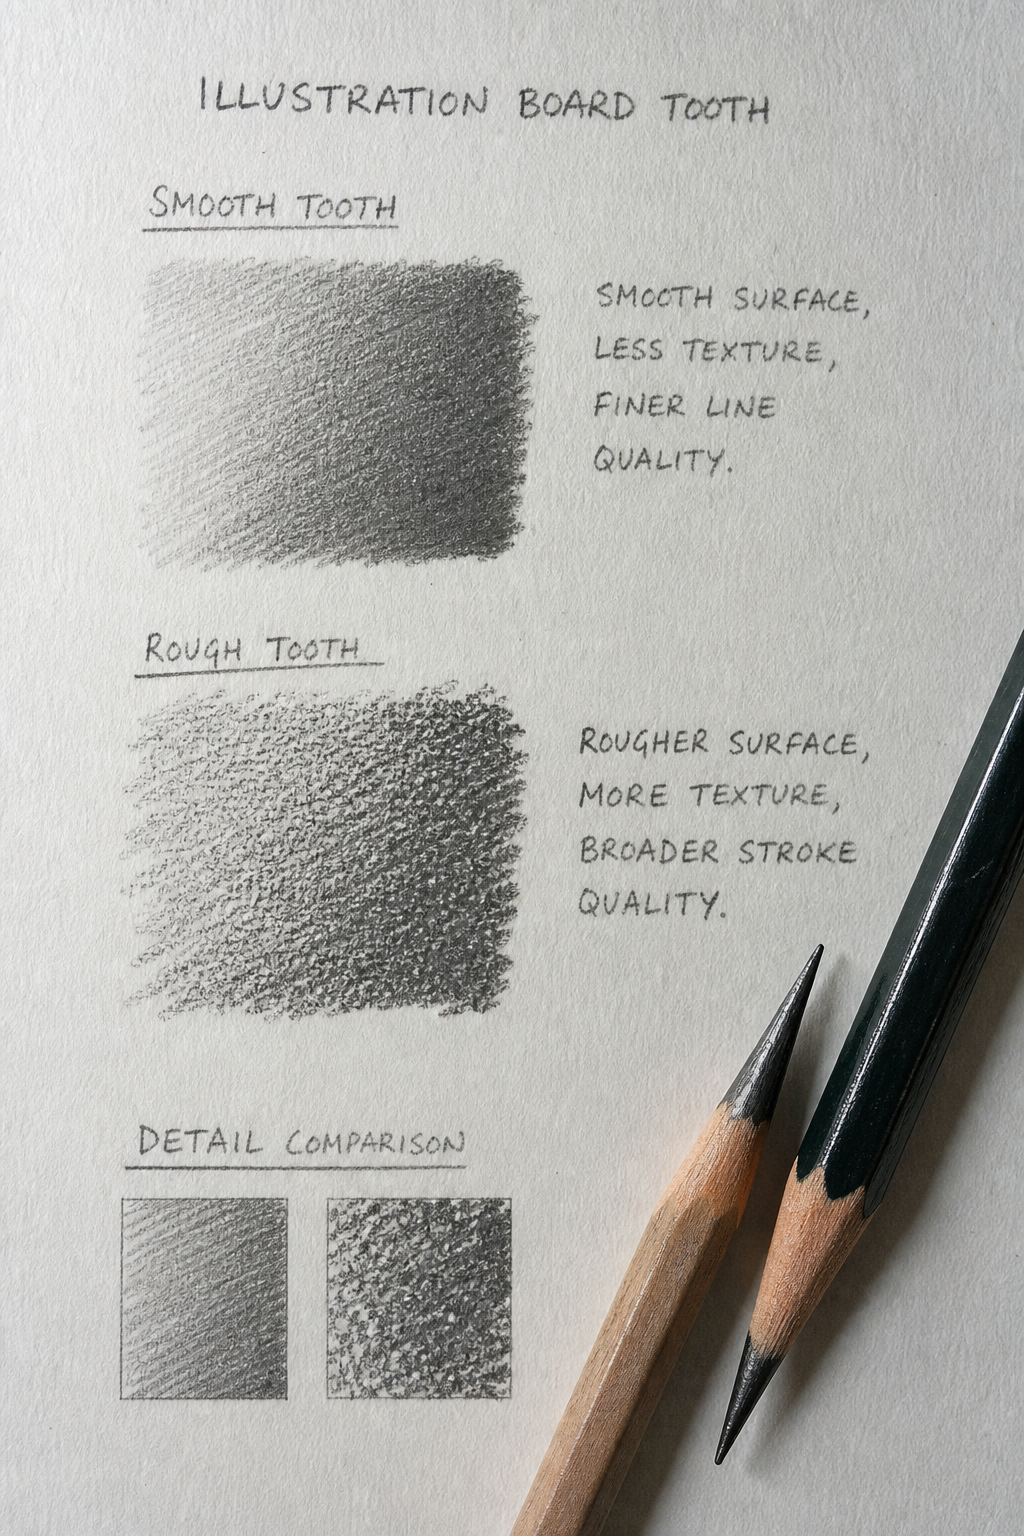
Illustration board has a very smooth surface, but most brands still show a touch of tooth. Tooth is the tiny grooves or roughness that lets graphite grip paper. On illustration board, that grip is key. Too smooth a surface can make lines look flat. Too rough can grab charcoal or graphite and pull it in uneven ways. In practice, you want enough bite to hold a line, but not so much that you drag fiber or leave stray specks. This matters when you pick the best pencils for drawing on illustration board because the lead type and hardness react to tooth differently.
First test at home. Put a light line with a mid-range graphite (HB to 2B) and then do a light cross-hatch across a tiny area. See if the line sits flat or if it grabs and fuzzes. Now try a hard charcoal lead. You’ll notice it adheres in a finer, crisper way on illustration board. That contrast matters when you want clean edges. You can also test with erasing. On a smooth board, a hard graphite line often erases cleaner, while a soft lead may smear and leave a halo. This is the core reason you might favor a hard charcoal lead for illustration board in some cases. The board’s surface can push you toward a different choice than you’d make on toned paper or hot press watercolor paper.
Why it matters for best pencils for drawing on illustration board? Because the edge of your line and your shading blend rely on how well the lead sits in the surface. When you know your board’s tooth, you pick the pencil that gives you the look you want without sanding the surface. The goal is crisp marks that stay put, yet are easy to adjust with a clean eraser.
“The board’s tooth can decide your lead choice more than you think.”
Now, a quick example. If you’re doing fine lines, you’ll lean toward harder graphite or charcoal that won’t smear when you layer. For broad shading, you might pick a softer lead, but you’ll test how well it holds on your specific board. This is where the board meets the pencil in a real way. It’s not just about the lead. It’s about how the lead and surface interact under your hand. The key is to test on your exact illustration board before you commit to a big piece. Xin Bowen hard charcoal pencils page shows how a hard charcoal lead can behave on similar textures, which is a useful data point when you’re deciding what to buy for your board.
Bottom line: On illustration board, the surface tooth guides your lead choice. Start with a light test strip on your board to see how pencil sits, and then pick a pencil family that gives you clean edges and good control.
“To get true control on illustration board, test the tooth first, then choose your pencil.”
Pro Tip
Keep a tiny scrap of your board to test edges at the start of any session. It saves you from guessing later and helps you pick the right pencil quickly.
Bottom line: Understanding the board’s tooth makes you pick the right pencil faster and gives you better results in your drawings on illustration board.
Step 2: Choose the Right Hardness Grade for Illustration Board
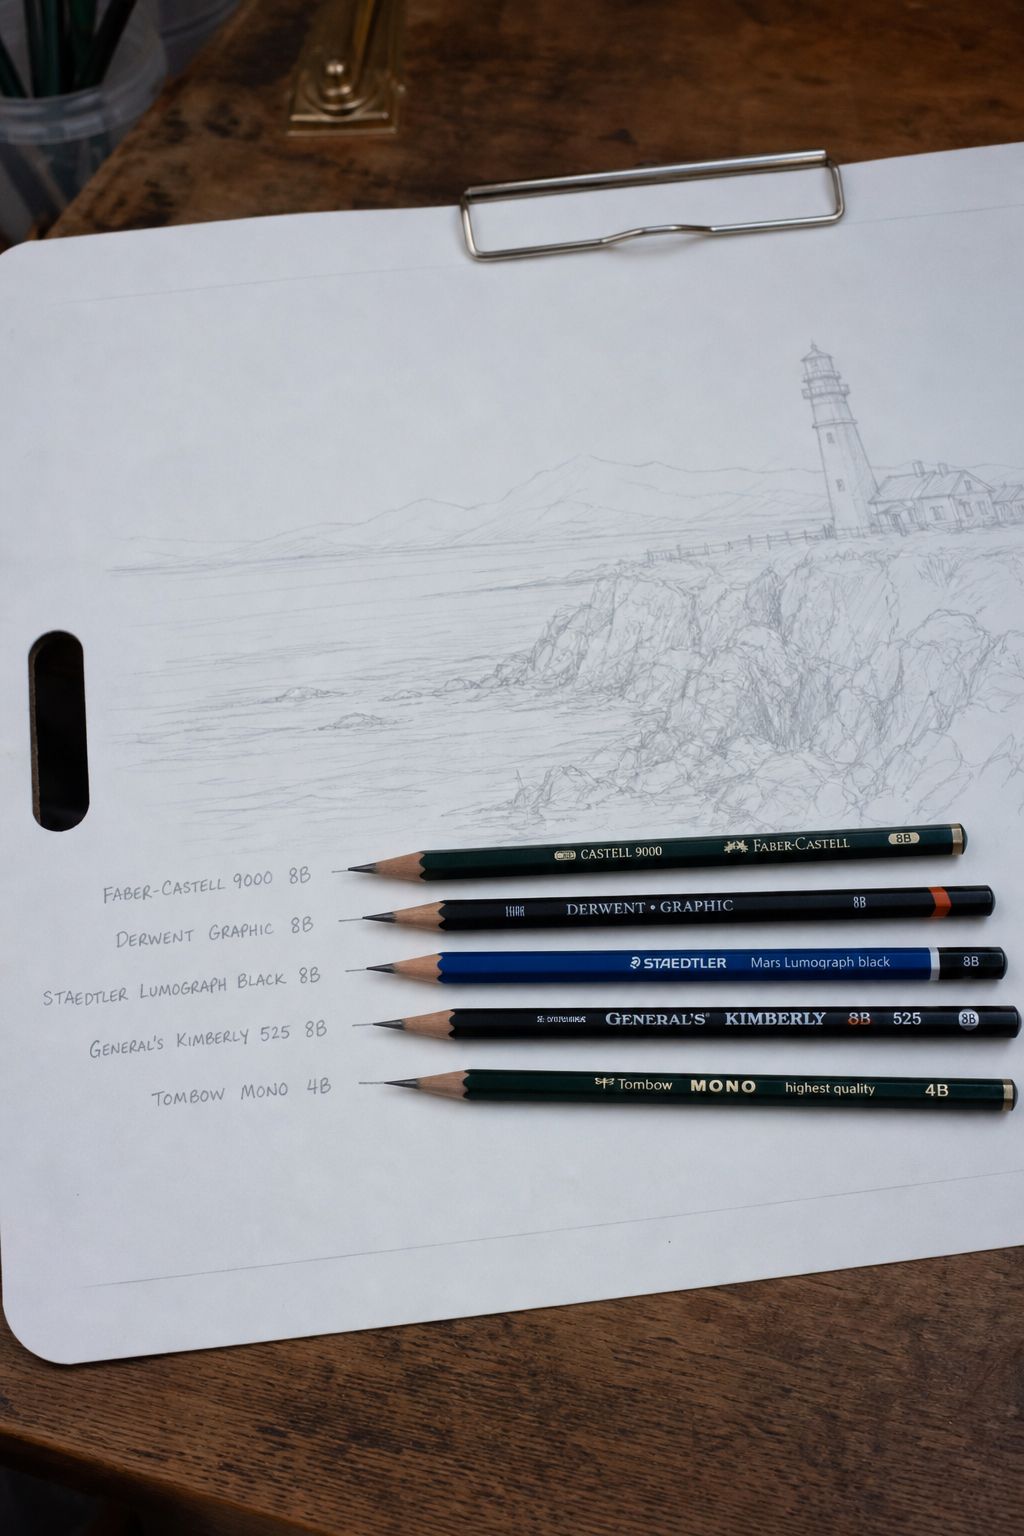
Now we pick hardness. The hardness grade tells you how dark the mark is and how long it lasts before you erase or smudge. A common mix is graphite with HB, 2B, 4B, and 6B for shade. But on illustration board, you may find a hard lead works better for crisp lines and clean erasing. The board’s surface does not trap graphite as well as some papers, so a harder lead can stay sharp and help you keep edges neat. The best pencils for drawing on illustration board often include a mix: an HB or 2H for fine lines, and a 4B or 6B for shading. Tone and value build come from how you apply pressure and how you layer.
When you go to test hardness, start with a standard line and a cross-hatch next to it. Compare how the line holds up when you blend and erase. You’ll notice that a harder lead sits lighter but holds its edge, while a softer lead gives a deeper tone but can smear if you lift or shade too broadly. On illustration board, the goal is value control without breaking the surface or leaving a shiny smear. If you’re new to best pencils for drawing on illustration board, try a set that includes HB, 2B, and 6B to feel the range.
For a practical test, shade a small square in three steps: light, mid, and dark with HB, 2B, and 6B. Then erase the top corner of each square to see how clean the erase is. This is where your board shows its face: some surfaces erase cleanly, others smear. The results guide your choice for the main project. A good rule: for fine work, use harder leads; for bold shading, mix in a softer lead. And remember to test the exact board you’ll use before you commit to big pieces. best pencils guide from Wirecutter highlights how different desks and boards demand different leads, which lines up with this approach.
Bottom line: pick a baseline of HB/2H for lines and 4B/6B for shading, then test on your board to see how the lead adheres and erases before you start a large piece.
Bottom line: On illustration board, matching hardness to the board’s tooth helps you keep edges crisp and shading smooth.
