
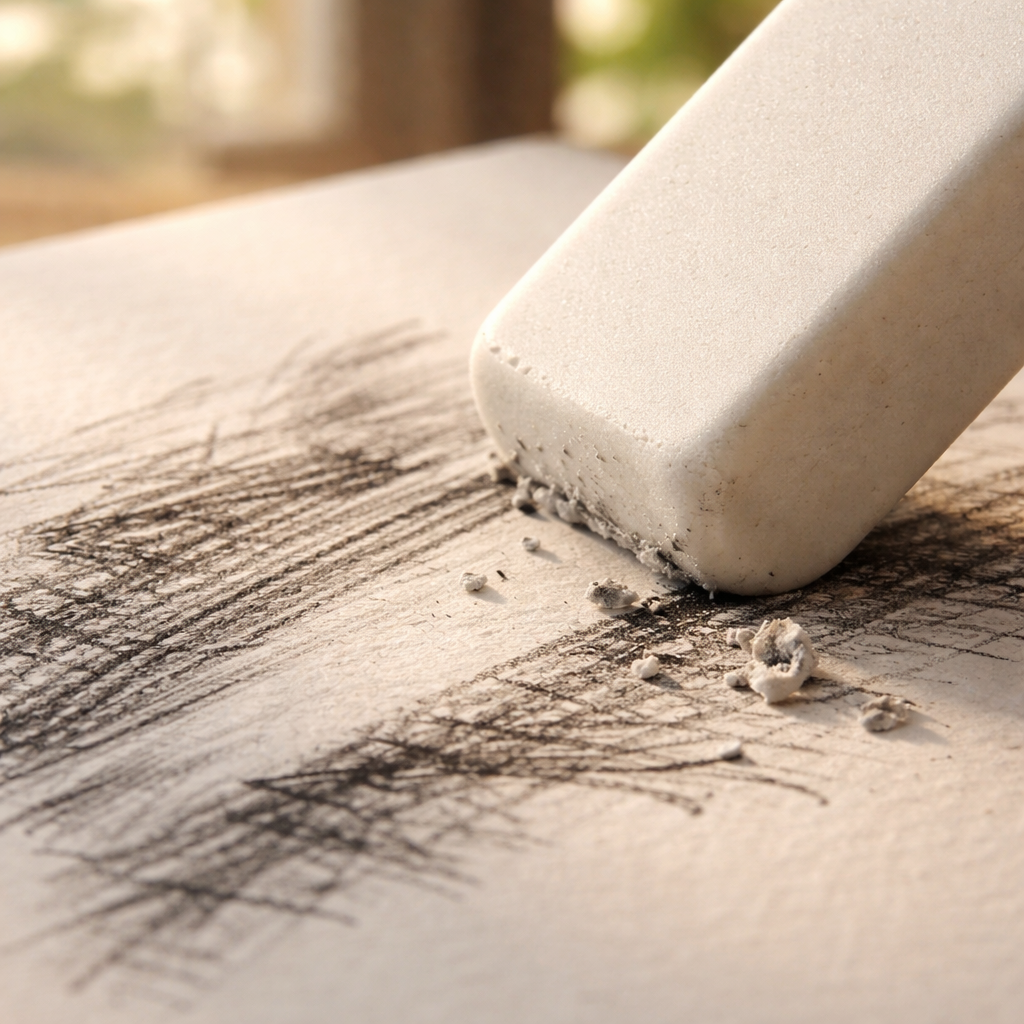
Ever stared at a graphite sketch and watched a stubborn smudge cling to the paper like a stubborn stain on a fresh shirt? You’re not alone – we’ve all been there, mid‑drawing, wishing we had a magic eraser that could lift the mark without turning the whole page into a ghost.
At Drawing Pencils Guru we spend hours testing every kind of eraser, from soft vinyl to firm rubber, because we know artists in India, students in classrooms, and hobbyists at home need tools that actually work. That’s why finding the best erasers for graphite pencils is more than a shopping list; it’s about preserving the delicate tones you worked so hard to build.
Think about the last time you tried to erase a heavy shading line. Did the eraser crumble, leave a gray halo, or smudge the surrounding strokes? Those tiny frustrations add up, especially when you’re layering tones for a realistic portrait or a detailed architectural sketch.
So, what should you look for? First, the eraser’s material. Vinyl erasers are pliable and great for lifting light lines, while kneaded erasers act like soft putty, letting you shape them to a point and lift graphite without any residue. Then, consider the hardness – a too‑soft eraser will tear the paper, a too‑hard one will scratch.
We’ve found that pairing a firm rubber eraser for heavy corrections with a kneaded eraser for subtle highlights gives the smoothest results. It’s a bit like having a fine‑tuned brush set: each tool has its moment, and switching between them keeps your drawing clean and your workflow flowing.
And here’s a tip that often gets overlooked: store your erasers in a small airtight tin. Moisture is the silent enemy that makes them crumble faster, especially in the humid climates many Indian cities experience.
By the end of this guide, you’ll know exactly which erasers deserve a spot in your pencil case, why they matter, and how to use them so your graphite work stays crisp, clean, and ready for the next layer.
TL;DR
Choosing the best erasers for graphite pencils means matching material and hardness to your drawing style, so you can lift stray marks without tearing paper or leaving gray halos.
In this guide we break down vinyl, kneaded and firm rubber options, show how to store them properly, and give quick tips so every sketch stays crisp and clean.
1. Soft Vinyl Erasers – Gentle on Paper
Picture this: you’ve just laid down a delicate feather‑stroke on a 140 gsm sketch paper and a stray graphite line pops up like an unwanted guest. You reach for the eraser, but it crumbles, smears, and leaves a gray halo that screams ‘oops’. That’s where a soft vinyl eraser shines – it’s like a gentle rain that washes away the mark without eroding the paper’s fibers.
Why do we, at Drawing Pencils Guru, keep a soft vinyl block front‑and‑center in our kits? Because it’s pliable enough to hug the paper’s surface, lifting graphite cleanly while staying firm enough to avoid tearing, even in the humid climates of Mumbai or Delhi.
What makes a soft vinyl eraser “soft”?
Soft vinyl erasers are made from a polymer blend that includes a higher proportion of plasticizers. The result is a sponge‑like texture that conforms to the paper grain. In practice, you’ll notice a subtle give when you press down – that’s the eraser’s way of saying, “I’ve got you.”
Here’s a quick list of the traits that matter most:
- Low dust production: Less mess means fewer stray specks on your drawing surface.
- Consistent lift: It removes graphite without crushing the paper, which is crucial for fine detail work.
- Durable core: Even after hours of use, the eraser holds its shape, unlike cheap rubber erasers that crumble.
And if you’re wondering how a soft vinyl stacks up against other eraser types, check out our Top 5 Best Eraser for Graphite Pencils Reviewed for a side‑by‑side comparison.
Best ways to use a soft vinyl eraser
1. Light touches for highlights. Gently roll the eraser tip over the area you want to lift. Think of it like polishing a small spot on a marble statue – you’re not scraping, you’re smoothing.
2. Layered shading correction. When you’ve built up a mid‑tone and need to pull back a bit, use the eraser’s flat side to swipe across the region. It lifts without creating a hard edge, keeping the transition seamless.
3. Quick clean‑ups. A stray stray mark on the margin? A quick dab with the eraser’s corner will vanish it, saving you from a full‑blown redo.
Pro tip: keep a small piece of blotting paper in the same tin as your eraser. When the vinyl gets a little oily from graphite, the paper absorbs excess, extending the eraser’s life – especially useful in the monsoon season.
Storage matters – especially in India
Humidity is the silent enemy of vinyl erasers. Store them in an airtight tin with a silica gel packet, or even a zip‑lock bag. We’ve seen artists in Bangalore keep their erasers fresh for months with this simple trick.
And while you’re prepping your toolbox, consider setting a timer for focused erasing sessions. A short, timed burst helps you stay mindful of pressure and prevents over‑erasing. The Pomodoro schedule for freelancers is a great way to segment sketching, shading, and erasing phases.
Watch the short demo above to see how a soft vinyl eraser tackles a typical portrait shading error without leaving a trace.
After you’ve perfected your erasing technique, you might want to showcase your finished work. If you’re looking for inspiration or a place to display your sketches, the limited edition wildlife art prints guide offers ideas on how high‑quality prints can motivate your next drawing session.
Finally, a quick checklist before you close your eraser tin:
- Is the eraser free of cracks?
- Is the storage container airtight?
- Did you set a timer for the next erasing sprint?
Follow these steps, and you’ll find that soft vinyl erasers become the quiet heroes of your sketchbook, keeping lines clean and paper pristine.
2. Kneaded Erasers – Shape‑Your‑Shade Solution
Kneaded erasers are the stealth tool in every artist’s kit when you want to lift graphite with care. They aren’t the go-to for big corrections, but for shaping light highlights and delicate textures, they shine in the best erasers for graphite pencils category.
In our experience, kneaded erasers behave like soft putty you can mold into a point, wedge, or cloud. You can press into a tiny corner for a razor-thin highlight or roll into a blunt edge to lift a broader area. That versatility is exactly why many Indian students and artists keep one in their pencil case.
What makes kneaded erasers special is their texture and method. They pick up graphite by adhesion, not abrasion, so they don’t grind the lead into dust. You can shape a precise tip for fine lines or flatten it to lift a gentle haze across a whole shadow. And yes, you can keep reusing them for a surprisingly long time if you clean them between lifts.
But the technique matters. Here’s how to get the most out of kneaded erasers in your daily practice.
- Shape on the fly. Pinch a small wedge for sharp highlights; roll a point for tight edges; flatten into a blotting pad to lift a broader area.
- Lift, don’t press. Think of it as a soft sponge; pressing pushes graphite around, lifting is gentler and preserves tone.
- Keep it clean. Kneaded erasers don’t shed like vinyl; they collect graphite. Tap them on scrap paper to release debris before your next lift.
- Total control practice. Use light, circular motions to lift shadows and midtones. If you over-lift, switch to a soft vinyl eraser for fine-tuning.
One common mistake is trying to erase heavily with a kneaded eraser in one go. It won’t work as well as a two-step: lift with kneaded, then refine with a vinyl or firm rubber eraser. This two-tool dance keeps the surface clean and saves paper.
So, what should you pair with your kneaded eraser for the best erasers for graphite pencils? A firm rubber block or a soft vinyl eraser is a perfect partner. The firm block tackles bold corrections; the vinyl handles light lines without tearing. It’s like having a tiny toolkit in one pencil case.
For a broader look at eraser types and how they fit into a complete drawing setup, check out Toad Hollow Studio’s beginner guide to drawing pencils erasers and blenders. It offers deeper context on eraser types and how they fit into a complete drawing setup.
In the end, practice with your kneaded eraser on scrap paper first. The more you experiment—pinching, rolling, dotting—the more controlled your lifts become. Soon you’ll see crisper highlights, smoother textures, and fewer unwanted marks. That’s the real payoff—the payoff that makes kneaded erasers indispensable in your toolkit.
Humidity and storage matter. Kneaded erasers stay pliable, but high humidity can alter their texture or encourage grit to cling. Store them in a dry tin, away from heat, and consider a small desiccant pack in tropical climates like Mumbai or Bengaluru.
Real-world workflow tip: keep a damp cloth near your desk to clean hands and keep the kneaded eraser from picking up oily residues. Use it mid-session rather than at the very end to preserve the fidelity of tones.
3. Mechanical Erasers – Precision on the Go
And then there’s the tiny powerhouse that fits right into the barrel of a pencil: the mechanical eraser. If you’ve ever wished you could erase a stray line without rummaging through a toolbox of blocks, you’ll instantly get why we love these compact gems.
Mechanical erasers give you pinpoint control, especially when you’re working on a bustling campus in Delhi or a cramped studio in Mumbai. They’re engineered to pop out a fresh tip with a click, so you never have to worry about a dull edge ruining a delicate highlight.
Why Choose a Mechanical Eraser?
Consistent hardness. Because the eraser material is molded inside a metal housing, each click delivers the same firmness. No more surprise softness that smudges your work.
Portability. They’re the size of a standard pencil, which means you can slip them into any pencil case, backpack, or even the side pocket of a college bag.
Less dust. The sealed design keeps graphite particles from scattering across your sketch, a real lifesaver when you’re sharing a table in a busy art class.
Real‑World Scenarios in Indian Studios
Picture a student at the Indian Institute of Technology, Kanpur, sketching a complex circuit diagram. A stray line appears right in the middle of a trace. With a mechanical eraser, they can click, shave off the mark, and continue without smearing the surrounding ink.
Or think about a freelance illustrator in Bengaluru who’s juggling client revisions on a deadline. The mechanical eraser’s quick‑click mechanism lets them clean up a misplaced hatch line in seconds, keeping the workflow fluid and the client happy.
Even traditional artists in Jaipur, who love working on textured handmade paper, appreciate that the eraser’s tip can be rotated to match the grain direction, preserving the paper’s delicate surface.
Step‑by‑Step: Getting the Most Out of a Mechanical Eraser
Step 1 – Load the eraser correctly. Pull the barrel out, insert a fresh eraser stick, and snap it back in. A snug fit prevents wobble.
Step 2 – Click to expose a fresh tip. Each click advances the eraser by about 1 mm, giving you a clean edge. If the tip feels dull, click again – it’s that simple.
Step 3 – Use a light, rolling motion. Gently roll the tip over the unwanted mark. Think of it as a tiny roller‑blade that lifts graphite without grinding it into the paper.
Step 4 – Refresh the tip. When you notice gray residue, pull the eraser out and tap it on a scrap sheet. This removes built‑up graphite and restores performance.
Step 5 – Store it dry. Keep the barrel capped when you’re not drawing. In humid cities like Kolkata, a dry environment stops the eraser from softening or swelling.
Expert Tips for Longevity and Precision
We’ve found that rotating the eraser tip between strokes reduces uneven wear, extending the life of each stick by up to 30 %.
For ultra‑fine work, try shaping the exposed tip with a tiny pair of tweezers – you can get a point narrower than 0.5 mm, perfect for cleaning up line art on a 200 gsm Bristol board.
If you’re layering dark graphite on a light background, use the mechanical eraser to lift just the top layer before you blend. This preserves depth while keeping the underlying tones intact.
And remember, a fresh tip works best on the first pass; trying to erase a thick line with a worn tip just pushes the graphite deeper, creating a halo.
Want to see a quick demo of these tricks in action? watch this short video that walks you through the click‑and‑erase routine.
Bottom line: mechanical erasers are the go‑to choice when you need speed, precision, and a clean workspace. Whether you’re a student in Pune, a professional illustrator in Hyderabad, or a hobbyist sketching in a cozy café in Delhi, they fit right into your creative rhythm and keep your graphite looking crisp.
4. Rubber vs. Vinyl – Quick Comparison Table
When you’re hunting for the best erasers for graphite pencils, the rubber‑vs‑vinyl showdown is the one that keeps coming up in our studio. We’ve tried both on everything from thin 120 gsm sketch paper to heavyweight Bristol, and the differences are worth a quick side‑by‑side glance.
Why a comparison matters
Think about that moment you accidentally press too hard on a line and the graphite smears. A rubber block might gobble it up, but it could also leave a faint halo. A vinyl block is gentler, yet sometimes it crumbles under heavy correction. Knowing which tool to reach for saves time, paper, and frustration.
Quick cheat‑sheet
- Rubber erasers: firm, great for bold fixes, can be a bit abrasive.
- Vinyl erasers: soft, excellent for light lifts, stay pliable even in humid Indian climates.
Rubber vs. Vinyl – At a glance
| Feature | Rubber Eraser | Vinyl Eraser |
|---|---|---|
| Hardness | Firm, often graded 2‑4 on a scale; holds shape well. | Soft‑medium; flexes under light pressure. |
| Best Use Case | Heavy‑line corrections, deep graphite removal. | Light line cleanup, gentle shading adjustments. |
| Paper Impact | Can compress paper fibers if pressed too hard. | Leaves paper surface intact; minimal grain disturbance. |
| Dust Production | Generates more graphite dust; needs frequent tapping. | Less dust; easier to keep workspace clean. |
| Durability | Lasts many weeks; can become hard over time. | Reshapes easily; may wear faster on rough surfaces. |
Now that you’ve seen the data, let’s break down how each performs in real‑world scenarios you’ll recognize from classrooms in Delhi or home studios in Pune.
1. The firm friend – Rubber eraser
Imagine you’re sketching a cityscape and you’ve just laid down a dark, confident line for a building edge. Oops, a stray mark sneaks in. A rubber eraser will bite into that graphite, lifting it in one decisive swipe. Because it’s firm, you don’t need to rub for long – perfect when you’re racing against a deadline for an art exam.
But there’s a catch: press too hard and you’ll see a faint gray halo. That’s why we advise a light‑touch, rolling motion. Think of the eraser as a tiny roller‑blade that glides, not a sandpaper disc.
Tip from our Drawing Pencils Guru lab: keep a clean scrap sheet nearby. Tap the eraser on it after each major lift to shake off dust. It keeps the tip sharp and the paper pristine.
2. The gentle giant – Vinyl eraser
Now picture you’re adding a delicate feather‑stroke on a portrait and you need to lift just a whisper of graphite. A soft vinyl eraser behaves like a plush fingertip – it conforms to the paper’s texture and lifts without grinding.
Because vinyl stays pliable even in the humidity of Mumbai’s monsoon season, you won’t notice it hardening or crumbling. That’s a huge win for artists who store their tools in a tin rather than an air‑conditioned drawer.
Our go‑to trick: shape the vinyl eraser’s edge with a fingernail or a tiny craft knife. A pointed tip lets you erase tiny highlights without affecting surrounding tones.
3. When to combine them
In practice, most of us end up using both. Start with a rubber eraser for the big, bold mistakes. Then switch to vinyl for the finishing touches – the subtle highlights that make a portrait pop.
This two‑step workflow mirrors what we teach in our workshops across Indian art colleges. It gives you the confidence that you won’t over‑erase or damage delicate paper fibers.
And here’s a small habit that can extend the life of both tools: store them in a small airtight tin with a silica packet. The dry environment prevents rubber from drying out and vinyl from getting sticky.
Bottom line
Both rubber and vinyl have a place in the toolbox of anyone hunting the best erasers for graphite pencils. Rubber brings power; vinyl brings finesse. Knowing when to reach for each turns a frustrating correction into a smooth part of your creative flow.
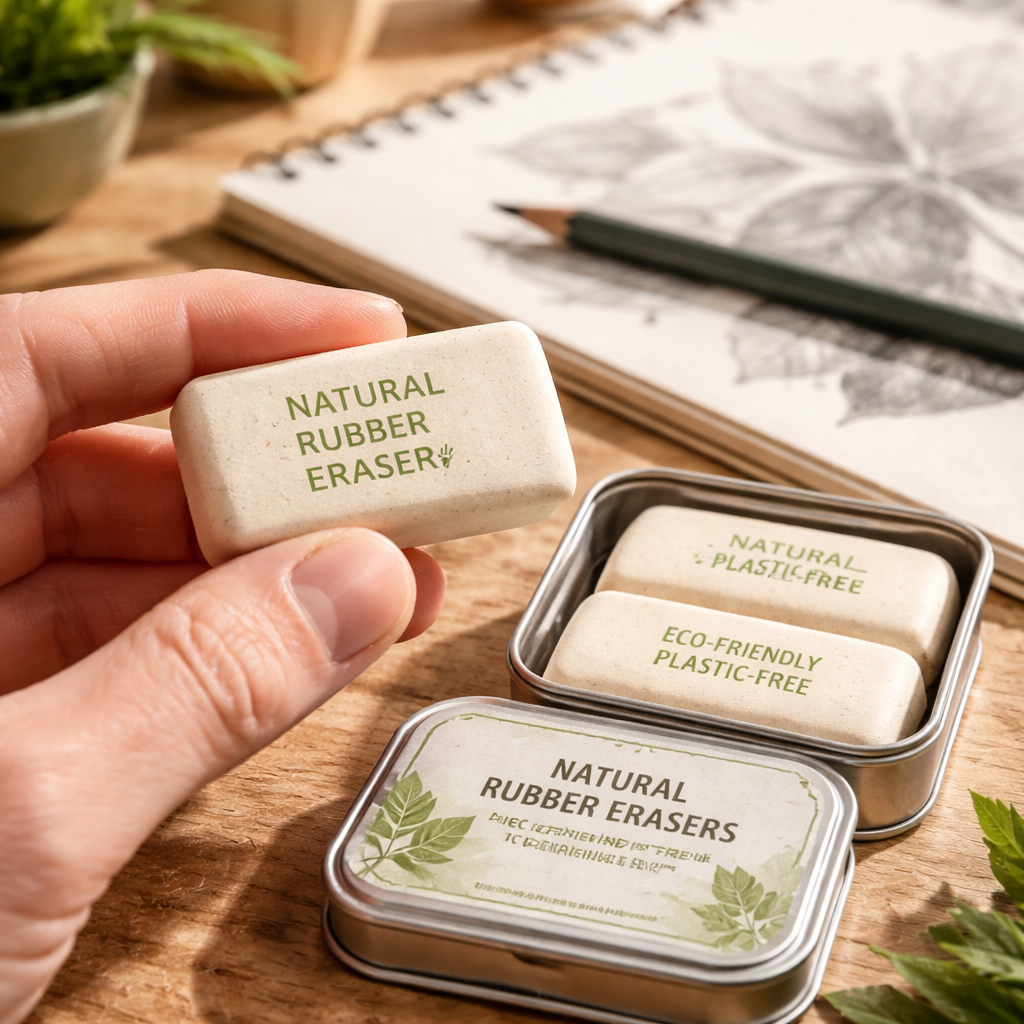
5. Eco‑Friendly Erasers – Sustainable Clean‑Up
Ever wonder if the little eraser you tap after a mistake could be harming the planet as much as a plastic water bottle? You’re not alone. We’ve all felt that tiny pang of guilt when a cheap rubber block flakes apart in a humid Mumbai studio.
Good news: you can keep your sketches crisp and your conscience clear. Below are five practical ways to choose the best erasers for graphite pencils while staying green.
1. Pick erasers made from recycled or natural rubber
Some brands now use reclaimed rubber from industrial waste instead of virgin latex. The result is an eraser that feels just as firm but leaves a smaller carbon footprint. In fact, the same circular‑economy mindset shows up in products like Perpetua’s recycled graphite pencils, which repurpose electrode waste into solid cores demonstrating how sustainability can be stylish. Look for “recycled rubber” or “natural rubber” on the packaging.
And if you can, give the eraser a quick press on a scrap sheet before you start – it removes any leftover particles and extends its life.
2. Choose refillable mechanical erasers
Those tiny click‑through erasers aren’t just convenient; they’re also waste‑smart. Instead of tossing the whole block when the tip wears down, you simply pop in a new stick. That means fewer plastic casings end up in landfills.
Pro tip: keep a spare refill in the same airtight tin you use for your vinyl erasers. One click, and you’re back to clean‑cut highlights without buying a whole new tool.
3. Favor erasers without synthetic binders
Some cheap erasers contain PVC or other synthetic binders that release micro‑plastics when they crumble. A plain‑rubber or natural‑gum formulation stays pure and won’t add invisible junk to your studio dust.
Think about the air you breathe in a cramped classroom in Delhi – fewer micro‑plastics mean a healthier environment for you and your peers.
4. Store them in reusable, airtight containers
We’ve already mentioned tins with silica packets for humidity control, but make them count. Reusable metal or bamboo tins are sturdier than disposable zip‑pouches and can be passed down to younger students.
Every time you close that lid, you’re keeping moisture out and preventing the eraser from breaking down into waste.
5. Support brands that practice circular design
Just like the Perpetua pencils, some eraser makers design their products to be taken apart, recycled, or even composted after use. When a brand talks about “closed‑loop manufacturing,” that’s a green flag.
It’s a tiny decision, but when thousands of Indian artists choose those brands, the cumulative impact adds up – cleaner studios, less landfill, and a stronger message to manufacturers.
So, what’s the next step? Grab a recycled‑rubber eraser, pop it into a reusable tin, and watch your sketches stay sharp while your footprint shrinks.
6. Premium Artist Erasers – Professional Finish
Let’s talk about the best erasers for graphite pencils when you’re aiming for a professional finish. In our experience at Drawing Pencils Guru, premium erasers do more than remove marks — they protect the surface, cut down dust, and give you confident corrections without wrecking your shading.
1. Staedtler Mars Plastic Erasers – Clean, precise, dependable
These plastic erasers glide, lift graphite cleanly, and leave little residue. They’re ideal for tight highlights or clean corrections on mid‑weight paper. The bevel on the ends helps you control every swipe, so you won’t smear a gradient you spent minutes building.
In real studio use here in India, they’re a go‑to when you’re under time pressure and need predictable performance. The downside? They can crumble a bit if you press too hard — keep your pressure light in initial passes.
For a broader look at premium graphite erasers, Blick’s graphite erasers catalog shows top brands and models.
Blick’s graphite erasers catalog
2. General’s Factis Premium Erasers – Soft yet sturdy
Soft enough for lifting light graphite, firm enough to hold shape through a session, these erasers strike a nice balance for shading work. They’re especially handy for precise corrections on smooth 80–120 gsm papers used in classrooms across Indian art schools.
Think of them as your reliable all‑rounder when you don’t want to trade control for gentleness. A quick pass with a fresh tip keeps lines crisp and prevents halos from forming around a dark stroke.
3. Faber‑Castell Dust‑Free Vinyl Erasers – Dust free, surface friendly
Vinyl erasers stay pliable and lift graphite with minimal surface disturbance. The dust‑free design means less airborne grit in crowded studios in cities like Mumbai and Pune, which is not just nicer to clean up — it’s healthier for you over long sessions.
Shape the edge for tiny nudges or broad swipes, depending on how heavy your shading is. That versatility makes them a staple in many graphite artists’ kits.
4. Cretacolor Caramel Fine Art Gum Eraser – Gentle, broad lifts
Gum erasers provide a soft lift, ideal for neatening highlights without chewing into the paper. They’re fantastic for adjusting midtones and smoothing textures in portraits and architectural drawings alike.
Tip: keep gum erasers clean by pinching off surface grime and using scrap paper to test lifts before touching your main sheet.
5. Staedtler Mars Plastic Retractable Stick Eraser – Precision on the go
Retractable stick erasers give you a precise edge in a compact form. They’re excellent for erasing tight areas on busy projects — think tiny corrections on a cityscape or a detailed architectural sketch.
Two shapes and sizes, plus a slim profile, make them a favorite for students moving between desks and classrooms. For a quick look at this kind of product on Blick, see this page.
Staedtler Mars Plastic Retractable Stick Eraser on Blick
6. Derwent Battery‑Operated Eraser – Ultra‑fine cleanup
If you’re doing really fine line work or making tiny refinements, an electric eraser can be a game changer. It gives you controlled, consistent passes without the hand fatigue that comes with manual erasing. Use it sparingly for final touches or to lift a narrow highlight after the shading is in place.
This is a premium pick for serious illustrators who want every last line to sit perfectly. It’s not a beginner’s tool, but if you’re building a professional kit, it belongs in the bag.
Does this help you feel confident about choosing the right eraser for graphite pencils? The key is to pair a firm, precise eraser for bold removals with a softer one for subtle highlights. Keep a small tin of these premium picks so you’re never stuck with a crumbling edge mid‑sketch. And if you’re looking for more context on brand performance, Blick’s catalog is a solid, side‑by‑side resource.
Pro tip: store erasers in airtight tins to guard against humidity in Indian cities; a little care goes a long way toward lasting performance.
Conclusion
After wandering through soft vinyl blocks, kneaded putty, click‑away mechanical sticks, and the premium picks from Staedtler to Derwent, you’ve seen why the best erasers for graphite pencils aren’t a one‑size‑fits‑all.
In short, match the eraser’s material to the job: a firm rubber block for bold fixes, a gentle vinyl for light lifts, a kneaded eraser for shaping highlights, and a mechanical tip when you need pinpoint control in a cramped studio.
And don’t forget the little habits that keep those tools alive – store them in a dry, airtight tin, tap off dust on a scrap sheet, and give them a quick reshape before each session. A simple silica packet can make the difference between a crumbly eraser in Mumbai’s monsoon and a reliable partner in Delhi’s dry heat.
So, what’s the next step? Grab the eraser combo that feels right for your workflow, test each on a spare page, and let your graphite breathe without unwanted halos.
If you’re still unsure which trio fits your style, check our other guides on the site or drop a comment – the Drawing Pencils Guru team loves to help.
Remember, the best eraser is the one you trust enough to use without hesitation. Keep a small tin in your bag, swap tips as they wear, and you’ll notice smoother transitions and cleaner shadows in every piece.
FAQ
What makes an eraser the best for graphite pencils?
It’s all about matching the eraser’s texture to the paper and the type of mark you’re trying to lift. A soft‑vinyl block grabs light strokes without crushing fibers, while a firm rubber block bites into darker lines. Kneaded erasers give you the freedom to shape a tip for tiny highlights, and mechanical sticks keep the tip fresh for pinpoint work. In short, the best erasers for graphite pencils are the ones that let you erase cleanly without leaving gray halos or paper dents.
We’ve found that keeping a small trio – vinyl, rubber, and kneaded – covers 90 % of the situations you’ll face in a studio or a classroom in Delhi, Mumbai, or Bangalore.
How do I prevent my erasers from getting crumbly in humid Indian climates?
Humidity is the silent enemy of most erasers. Store every piece in an airtight tin with a silica packet; the dry environment stops the rubber from absorbing moisture and softening. If you can’t get a tin, a zip‑lock bag works in a pinch, but be sure to squeeze out as much air as possible before sealing.
Give the eraser a quick tap on a scrap sheet before each session – that removes surface dust and lets the material regain a little bite.
Can I use the same eraser for both graphite and colored pencil work?
Generally you can, but the results vary. Vinyl erasers are gentle enough for most colored pencils, yet they may leave a faint waxy residue on heavily saturated areas. A firm rubber block is great for graphite but can lift pigment unevenly, creating streaks. If you switch between media often, keep a dedicated vinyl eraser for color and a rubber or kneaded one for graphite to avoid cross‑contamination.
That way you preserve the vibrancy of your colored layers while still enjoying crisp graphite corrections.
How often should I reshape or clean my kneaded eraser?
Every few minutes of active use, give it a quick roll between your thumb and forefinger to expose a fresh surface. When you notice the eraser turning gray, press it gently against a clean scrap sheet to release the trapped graphite. If the texture feels gummy, a brief tumble in a dry tin with a silica packet will revive its pliability.
Regular reshaping not only extends the life of the eraser but also keeps your highlights sharp and your paper untouched.
Is there a quick way to test whether an eraser is too hard for my paper?
Grab a spare corner of your sketch paper and make a light swipe with the eraser. If you see the paper fibers compress or a faint halo appear, the eraser is too firm for that weight. Switch to a softer vinyl or kneaded piece for that particular sheet. It’s a simple trick that saves you from accidental damage during a crucial sketch.
Remember, the goal is to lift graphite, not grind it into the surface.
What should I do if my mechanical eraser tip becomes uneven?
Rotate the barrel a few clicks so a fresh section of the stick is exposed. If the tip still feels blunt, use a tiny pair of tweezers to trim it down to a needle‑fine point – this works especially well for line‑art on 200 gsm Bristol.
Store the barrel capped after each session, and keep a spare refill in the same airtight tin you use for your other erasers.
How do I choose the right size of eraser for my drawing style?
If you’re a detail‑oriented illustrator, a small vinyl stick or a mechanical tip under 5 mm gives you control over fine highlights. For larger, expressive sketches, a block‑size rubber eraser (about 2 × 2 cm) lets you clear big mistakes in one swipe without multiple passes.
Experiment with a couple of sizes on scrap paper; the one that feels natural in your hand will become your go‑to for that particular workflow.
