
Ever stared at a portrait and thought, “I want to capture that subtle smile in pastel?” You’re not alone. Pastel pencils give you that buttery softness that makes skin look almost alive, but the trick is knowing which sticks do the job best.
When I first tried pastel, I used the same set I’d used for charcoal. The result? A flat, muddy face that looked more like a foggy memory than a living person. It was a wake‑up call: pastel pencils aren’t all created equal, and the right grade can turn a rough sketch into a warm, luminous portrait.
Softness is king—look for 4B‑to‑6B range if you want rich, blend‑able flesh tones, while 2B‑3B works great for fine lines around the eyes and mouth. But softness alone isn’t enough. Layering is where the real magic happens: start with a light wash, then build depth with darker strokes, letting the paper absorb each pass. This technique is why many portraitists swear by a textured pastel paper; it keeps the color from bleeding too fast.
Choosing the right paper can make or break your portrait. A heavier, slightly rough surface holds pigment better and lets you blend without smudging. If you’re unsure about paper, check out our Finding the Best Pencils for Portrait Drawing guide for a deeper dive into paper selection.
Practical steps to get started: 1) Pick a calm lighting setup—soft daylight or a key lamp works well. 2) Warm up with a neutral gray or flesh tone on a test sheet; this lets you gauge your pressure before committing to the face. 3) Sketch the head lightly, then layer skin tones, moving from light to dark. 4) Use a blending stump or a cotton swab to soften edges, and finish with a white pastel for highlights. Practice these steps daily, and watch your portraits grow sharper.
Want to see a finished pastel portrait up close? The work at Gratitude Studios showcases how pastels can bring emotion to life, and their portfolio is a great source of inspiration.
So, ready to pick your first pastel pencil? Grab a 4B or 5B, lay a paper that can handle it, and start layering. Remember: patience and practice are your best tools.
TL;DR
If you’re hunting for the best pastel pencils for portraits, choosing the blend of pigment density deep unlocks skin tones that feel alive and true.
This guide breaks down top grades, compares results, and offers a checklist so you can pick the perfect set and start creating portraits that wow.
Choosing the Right Pastel Pencil Brand for Portraits
So you’ve already decided pastel pencils are the medium for your next portrait, but now you’re staring at a wall of colors and hard‑to‑read brand names. Don’t worry—we’ve boiled this down into a quick list that keeps the science out of the way and the art in front.
1. Stabilo CarbOthello – The “starter‑friendly” range
Stabilo’s CarbOthello is a cult classic because it’s super cheap and surprisingly soft. The cores feel almost buttery, which lets you lay down layers in a heartbeat. If you’re just dipping your toes in, start with the 4B–6B set. You’ll notice that the pigment stays on the paper without bleeding too quickly. The flip‑side? Many of the lighter pinks and greens aren’t light‑fast, so if you’re planning to display the work, mix them with sturdier hues.
2. Faber‑Castell PITT – The fine‑detail champion
For those times when you need razor‑sharp lines around the eyes or a subtle blush, Faber‑Castell’s PITT line steps up. The cores are slightly firmer, which means they don’t snap as often when you sharpen. You can even use a standard desk crank sharpener without the blades wearing out fast. This makes the PITT set a solid middle‑ground: more precision than Stabilo, yet still affordable.
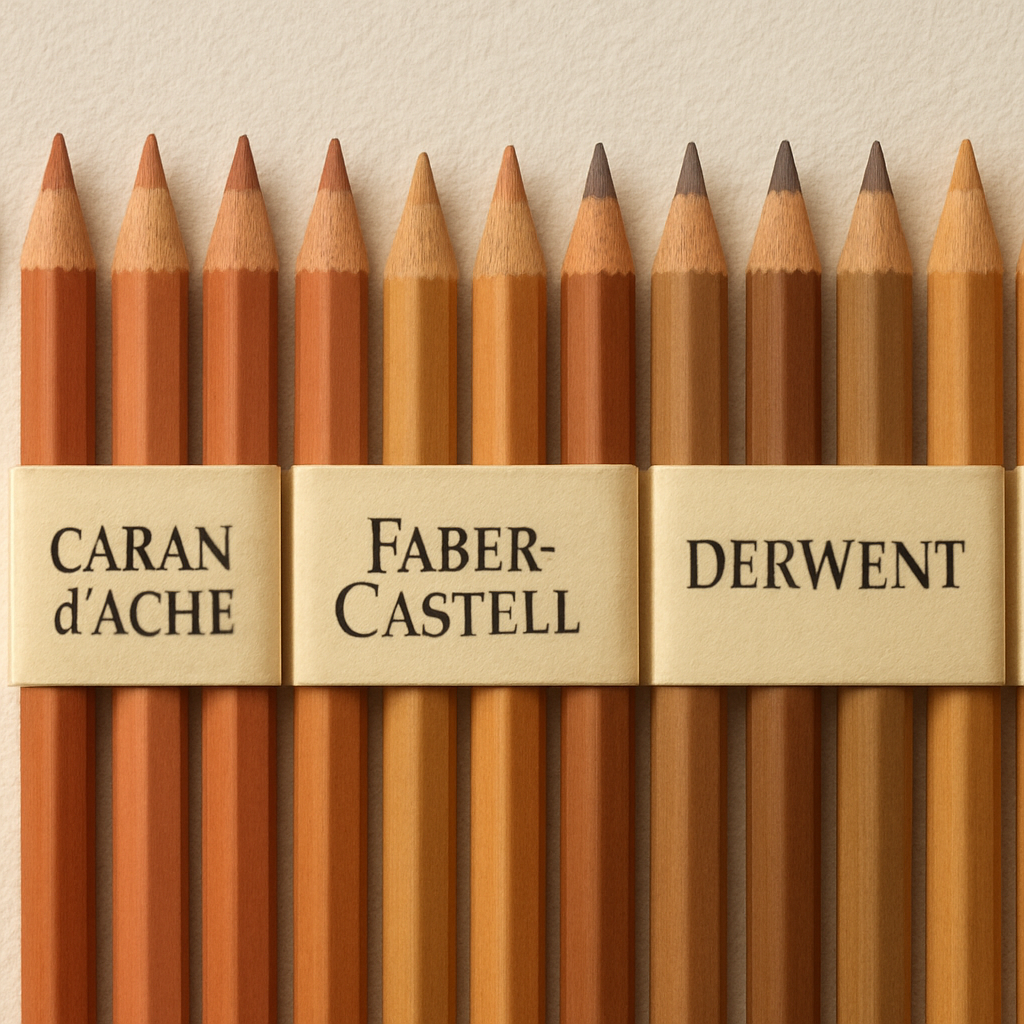
3. Derwent – The “all‑rounder” for texture lovers
Derwent offers a middle‑spectrum of softness that sits between Stabilo and Faber‑Castell. They’ve built a reputation for neutral, earthy tones—great for shadows and skin undertones. The cores are easy to sharpen and hold a good amount of pigment, which is handy when you’re layering to build depth. If you’re looking for a palette that can handle both light washes and darker, richer tones, Derwent is a safe bet.
4. Caran d’Ache – The premium, light‑fast heavyweight
Caran d’Ache is the high‑end brand that gives you the best light‑fastness ratings on the market. Their cores are a touch firmer, but they don’t feel as gritty as you might worry. The price is higher—think two‑to‑three times more than Stabilo—but if you want a set that will last a lifetime and still look vibrant, this is where you’ll end up. It’s a great choice for artists who plan to sell their portraits or display them for years.
5. Conte – The budget‑friendly, “try‑before‑you‑buy” option
Conte’s pastels are priced lower than most, making them tempting if you’re on a tight budget. However, the larger diameter means you’ll need to sharpen with a bit of patience. They’re also more prone to breakage, so the learning curve can be steeper. If you’re just experimenting, grab a small set and see how the colors feel on your paper.
Now that you’ve got a quick snapshot of the top brands, it’s time to test a few. Pick two or three that match your budget and the level of detail you need. Grab a light‑to‑dark gradient on a test sheet and see which feels the most natural under your hand. The tactile feel—how the pigment lands, how it blends—can be more telling than any price tag.
Here’s a short checklist you can use every time you shop:
- Budget: Are you willing to spend a premium for light‑fastness?
- Softness: Do you need a softer core for broad washes or a firmer one for fine lines?
- paper compatibility: Does the brand’s pigment sit well on your paper’s texture?
- Sharpening: Will the core hold up to your chosen sharpening method?
- Longevity: Does the pigment maintain color when exposed to light?
Use this checklist, and you’ll soon feel confident picking the set that fits your style. If you’re still unsure, reach out to communities or check out user reviews—real artists often share honest takes that go beyond brand hype.
After you’ve had a look at that quick tutorial, grab a sheet of your favorite paper and run a quick test. You’ll find that the right brand can make the difference between a flat portrait and a vibrant, lifelike rendering.
Ready to dive in? Pick a brand, lay down your first layer, and watch how the pigment comes alive under your hand. Remember, the best pastel pencils for portraits are the ones that feel like an extension of your own brushstrokes.
For more in‑depth comparisons and user experiences, check out our detailed review of pastel pencils or the guide on choosing the right pastels for pet portraits.
Essential Materials and Setup for Portrait Work
We’ve already talked about the colors that make skin pop, so now let’s get into the nuts and bolts that turn those colors into a portrait that feels alive.
Paper
First thing’s first: the paper. Pastel works best on a surface that holds pigment without turning it into a mush. Look for a weight of at least 250 g/m² and a texture that’s rough enough to grip but not too gritty. A high‑quality art stock with a linen texture works well, and if you’re on a budget, a heavyweight watercolor paper can be a good alternative.
Lighting
Lighting is your invisible partner. Use a softbox or large window with diffused daylight. Avoid harsh direct light that creates unflattering shadows on the paper. A key lamp with a soft shade at 45° keeps the pastel vibrant and details sharp.
Workspace
A sturdy table with a flat surface keeps your pencils steady. Place a small stand or a folded paper towel so you can prop your paper at a slight tilt. That tilt helps you see the light on the paper and adjust the angle of your strokes.
Tools
Now let’s talk tools. Here’s a quick checklist of the essentials you’ll need every time you sit down to paint a portrait:
- Pastel pencils: a 4B–6B range for flesh, 2B–3B for fine lines.
- Blending stumps or a cotton swab.
- A kneaded eraser to lift pigment.
- A set of sharpener tools—either a hand crank or an electric sharpener with a fine burr.
Setup Checklist
We’ve seen that a clean, organized workspace speeds up the creative flow. If you keep the rest tucked away, you really won’t waste time hunting for a tool mid‑stroke.
Sharpening is where many portraitists trip. Use a fine‑bit burr or a sharpening block to keep the core smooth. Don’t over‑sharpen; a too‑sharp tip can split the pastel and create unwanted white lines. A small, dedicated pencil case keeps the pencils from jostling and protects the cores from breakage.
Maintenance matters because pastel sticks are fragile. Store them in a drawer with a paper towel that’s dampened just enough to keep the pigment from drying out. When you’re not using a pencil, wrap it in a clean cloth or use a pencil sleeve to prevent dust buildup.
Finally, here’s a quick setup checklist you can run through before you start each session:
- Paper: 250 g/m², rough texture.
- Lighting: soft, 45‑degree angle.
- Workspace: flat table, paper stand, water bowl.
- Tools: pastel pencils, eraser, stumps, sharpener, ruler.
- Storage: damp cloth, pencil case.
Follow these steps, and you’ll create a stable foundation that lets the pastel do what it does best—capture light, shadow, and emotion in a single stroke.
Techniques for Shading and Blending Pastel Pencils in Portraits
Start with a light foundation
Before you even touch the face, lay a thin wash of the lightest flesh tone. Think of it as a sky that lets you see the horizon. The goal is to map values without committing pigment yet. You’ll feel the paper’s texture and gauge how much pressure each stroke needs.
Build from light to dark
Once you’ve sketched the basic outline, dip into a 4B or 5B and work from the brightest highlights down to the deepest shadows. Remember that pastels sit on the paper, so each layer adds body. When you layer, the earlier strokes get a little richer, giving depth that looks like real skin.
Use a blending stump sparingly
Stamps of a soft stump can smooth edges, but over‑blending turns a portrait into a mush. Keep it light; a quick dab across the jaw line is enough to soften the transition. If you feel a line too harsh, lift a little pigment with a kneaded eraser before you blend again.
Control pressure, not intensity
Pastel pencils feel like walking on a powdery field. The more force you put, the more pigment you deposit. Try varying pressure on a test sheet: a gentle tap for lips, a firmer push for cheekbones. You’ll notice that subtle pressure changes can make a face feel alive without smudging.
Blend with your hand, not a tool
When you use your fingers, you get a softer spread and a more natural look. Just a quick swipe of the thumbnail over the cheek is often all you need. Fingers can also help you mix colors—blend a pink blush with a warm beige to match that subtle undertone.
Lift to refine
After a layer, lift the unwanted pigment with a cotton swab or a soft cloth. This is your chance to sharpen a nose tip or restore a sharp eye line. It also gives you a chance to see the paper’s natural texture and decide if a second layer is needed.
Finish with a crisp highlight
For that final pop, use a white pastel or a very light gray. Apply it gently with a cotton swab, letting the pigment sit for a moment before adding the final stroke. This step mimics the way light hits a wet skin surface, giving the portrait a realistic glow.
So, what’s the key takeaway? Keep your strokes deliberate, layer light to dark, and blend with touch. Practicing these habits turns a simple pastel set into a portrait that feels like a living memory. Give yourself time, experiment with pressure, and watch the skin come to life right before your eyes.
If you’re just starting, keep a small test sheet handy. Shade a simple circle in each shade, then blend with a stump, eraser, and finger. Notice how the color spreads and fades. Repeat this each session and you’ll see a steady improvement in control and finish daily practice.
Top 5 Pastel Pencils for Portraits – Comparison Table
When you’re hunting for the best pastel pencils for portraits, the first thing you notice is the feel of the core under your hand. It’s like a tiny roller – the softer the roller, the richer the color you can lay down. But softness is only one side of the coin; you also need light‑fastness, pigment density, and a price that won’t break the bank.
Below is a quick snapshot of the five brands that keep our students’ palettes humming. We’ve distilled the pros and cons into a table so you can eyeball the differences before you hit the shop.
| Brand | Typical Grade | Key Strengths | Ideal Use | Price Range (per set) |
|---|---|---|---|---|
| Stabilo CarbOthello | 4B‑6B | Ultra‑soft core, buttery pigment, great for beginners | Layering flesh tones, quick washes | $20‑$30 |
| Faber‑Castell PITT | 2B‑3B, 4B‑6B | Harder core, fine‑line precision, durable | Detail work around eyes, sharp linework | $35‑$45 |
| Derwent | 3B‑6B | Balanced softness, neutral earth tones, good pigment yield | Blending shadows, mid‑tone depth | $25‑$35 |
| Caran d’Ache | 2B‑6B | Premium light‑fastness, smooth core, long‑lasting color | Fine portraits, archival work | $60‑$80 |
| Conte | 3B‑6B | Economical, decent pigment, good for trial sets | Experimentation, practice sheets | $15‑$25 |
What you’ll see at the table is that there’s no one‑size‑fits‑all. If you’re just dipping your toes into portrait pastels, the Stabilo range feels like a friendly hand that won’t bite. Their cores release pigment slowly enough that you can build those soft, layered flesh tones without fear of bleeding.
On the other hand, if you’re an artist who needs crisp detail around the irises or the subtle creases at the mouth, the Faber‑Castell PITT line’s slightly firmer core gives you that razor‑sharp line without the pencil snapping in the middle of a stroke.
For those who love a bit of earthiness in their shadows, Derwent offers a sweet spot between softness and control. The pigment sits well on textured paper, and you get enough depth to give your portrait a natural, lived‑in feel.
When your goal is to create a piece that will stay vibrant for decades, Caran d’Ache is the go‑to. Their light‑fastness ratings mean you can display a portrait in a gallery or keep it on a wall for years without the colors fading. It’s a bit pricier, but you’re investing in longevity.
If budget is the main driver, Conte’s pencils are a solid start. They’re inexpensive, and the larger diameter means you can sharpen them quickly, which is handy when you’re in the middle of a session and need to keep the flow going.
So, how do you pick the right set? Think about the stage of your practice. New artists benefit from the forgiving nature of Stabilo. Intermediate artists who want to refine their line work should look at Faber‑Castell. Advanced portraitists who want a set that will last a lifetime lean toward Caran d’Ache. And if you’re just testing the waters, Conte gives you a low‑risk entry point.
Another quick tip: test a handful of shades on a scrap sheet before you commit. Lightly swipe each color across the paper, press down with varying pressure, and see how the pigment behaves. Notice which cores blend smoothly, which lay down clean lines, and which start to feather out too quickly. That little experiment can save you a lot of frustration later.
Once you’ve made a decision, remember that the right paper can amplify the quality of these pencils. A heavyweight, slightly rough surface will hold the pigment better and keep the colors from bleeding too fast, giving you more room to play with layering.
In short, the best pastel pencils for portraits come down to your comfort with the core’s softness, your need for detail, and how long you plan to keep the piece. Take the table, give each brand a quick test, and you’ll find the set that feels like an extension of your own hand.
Common Pitfalls When Using Pastel Pencils for Portraits and How to Avoid Them
We’ve all stood in front of a fresh sheet, eyes wide, pencil poised, and wondered if that first stroke will bring the subject to life or just blur into a mush. The truth? A few sneaky habits can turn a promising portrait into a headache. Let’s unpack the most common missteps and how to sidestep them.
1. Skipping a clean line drawing
It feels like a good idea to start straight into colors, but if the underlying outline is shaky, the whole piece can feel unstable. A tidy, accurate base gives your pastels a roadmap to follow.
Remedy: Use a light sketch with a hard lead or a tracing grid before you lay down pigment. The common mistakes with pastel pencils article notes that a solid line foundation prevents later adjustments from looking sloppy.
2. Choosing too dark a pastel paper
Dark stock makes colors look heavy and can cause pigments to bleed into each other, especially with softer grades.
Remedy: Pick a lighter, slightly textured paper—something like a light linen or a 250 g/m² watercolor stock. The grain should grip pigment without turning the sheet into a watercolor puddle.
3. Light over dark—an inverted layering habit
Applying the brightest hues over darker tones can muddy values and throw off the portrait’s overall balance.
Remedy: Work from light to dark. Lay a faint wash of skin tone first, then build darker shadows, and finish with highlights. This simple sequence preserves depth and keeps the paper’s natural texture visible.
4. Not keeping the pencil sharp enough
A dull tip squishes pigment and makes fine detail feel like smudged charcoal.
Remedy: Sharpen at the tip of every pencil before each session, and keep a small hand crank or electric sharpener handy. A sharp point gives you clean lines and reduces the need to over‑pressure the paper.
5. Pressure control gone awry
Too light and you miss coverage; too hard and you create a shine that looks like over‑worked wax.
Remedy: Test pressure on a scrap sheet. For lips, a gentle tap works best; for cheekbones, a firmer push. Notice how the pigment sits—if you see a shiny sheen, step back and lighten the force.
6. Layering without restraint
Pastels love to build, but piling layers indiscriminately can turn a portrait into a glossy mess.
Remedy: Keep layers thin and intentional. If you feel shine creeping in, use the hard end of a double‑ended eraser to lift a bit of pigment and reset the surface.
By recognizing these pitfalls early and applying the remedies above, you’ll keep the process fluid and the portrait vivid. Think of each step as a conversation with the paper—listen to its texture, respect its limits, and your portrait will answer back with real, lifelike warmth.
Where to Buy Pastel Pencils for Portrait Artists and Price Ranges
Finding the right set of pastel pencils can feel like hunting for a rare gem, especially when you’re juggling budgets, paper choices, and the ever‑present pressure to make every brushstroke count. Let’s break it down into three clear steps: where to shop, what to look for, and how the price translates into real‑world value.
1. The Retail Landscape for Pastel Pencils
There are two main arenas where portraitists shop for pastel sticks: specialized art supply stores and online marketplaces that carry a wide range of brands. Local art boutiques give you a chance to feel the core, test the softness, and talk to staff who can share first‑hand tips. Big‑box art chains, on the other hand, often bundle pastel pencils with other drawing tools, making it a convenient one‑stop shop.
When you’re in a big city like Mumbai or Chennai, the local art shops usually stock the staples we’ve mentioned—Stabilo, Faber‑Castell, Derwent, Caran d’Ache, and Conte—plus a few niche brands. If you prefer online, a site like Utrecht Art Supplies (Utrecht Art) carries a solid selection of pastel pencils and offers detailed product descriptions that help you decide which grade matches your workflow.
2. What to Inspect Before You Buy
Pastel pencils come in a spectrum of softness—from hard 2B to soft 6B. The grade you pick shapes how pigment lays on paper and how you’ll layer. Here’s a quick cheat sheet:
- Hard (2B–3B): Great for fine lines, detail work around the eyes, and subtle shading.
- Medium (4B–5B): Balances line and color; ideal for flesh tones and mid‑tones.
- Soft (6B): Rich, buttery pigment that builds depth quickly; perfect for dramatic shadows.
Another factor is the core’s texture. A smooth, even core spreads pigment evenly; a rougher core can create interesting textures but may also trap air, leading to uneven coverage. Brands like Stabilo and Faber‑Castell are known for consistent core feel, while Caran d’Ache offers a slightly firmer feel that still feels smooth to the touch.
Don’t forget to consider paper compatibility. A heavy, 250 g/m² textured paper will hold pigment from a 6B core better than a lightweight watercolor stock. If you’re unsure, test a set on a scrap sheet before committing.
3. Decoding the Price Ranges
Pastel pencils range from affordable starter sets to premium archival options. Here’s a quick snapshot of what you might expect in India, converted roughly from US dollars to INR for clarity:
- Starter Sets (₹500‑₹1,200): Usually 8‑12 sticks in a soft range (4B‑6B). Good for beginners or those testing the medium.
- Mid‑Tier Bundles (₹1,200‑₹3,000): Often 12‑24 sticks, mixing hard and soft grades. Brands like Derwent or Faber‑Castell fall here.
- Premium Collections (₹3,000‑₹6,000+): Full sets (24‑30 sticks) with a wide gamut, light‑fast pigments, and higher quality cores. Caran d’Ache and high‑grade Derwent sets land in this bracket.
When you’re budgeting, remember that a slightly higher upfront cost can pay off if the pencils last longer and the pigment stays vibrant on display. Think of it as an investment in your portfolio, not just a purchase.
4. Practical Tips for Your Purchase
• Buy in bulk?: If you plan to do portraits regularly, buying a full set pays off. Sets often come with a price break compared to individual sticks.
• Look for bundled deals: Some suppliers pair pastel pencils with a matching set of sharpener blades or a kneaded eraser, giving you a starter kit feel without extra cost.
• Ask about light‑fastness: Especially for pieces you’ll display, check the brand’s light‑fastness rating. Caran d’Ache leads the pack, while Stabilo is solid for practice pieces.
• Test on paper first: If you’re buying online, see if the retailer allows a small sample order or returns. A test can save you a lot of frustration.
In short, the best pastel pencils for portraits are all about matching your style, paper, and budget. Start with a reliable retailer—whether that’s a local boutique or a reputable online shop like Utrecht Art—pick a set that balances hardness and softness, and keep an eye on price tiers that match the longevity you need. Happy hunting, and may your next portrait feel as real as a smile caught in a moment.
Conclusion
We’ve taken a deep dive into the world of pastel pencils, from the softest 6B to the toughest 2B, and matched each tone to a portrait need. If you’re still wondering which set will bring your subjects to life, you’re not alone. Let’s wrap it up with the big take‑aways.
First, remember softness matters for blending, but a bit of hardness helps you carve precise lines around eyes and mouth. Think of the 2B‑3B range as your sketching partner and the 4B‑6B as the paintbrush that adds depth.
Second, paper is your best friend. A 250 g/m² textured stock keeps pigment from bleeding, letting your layers sit where you want them. Test a few swatches before committing.
Lastly, light‑fastness is the long‑term guard. Caran d’Ache tops the charts, but Stabilo is solid for practice work. If you plan to display, pick a set that won’t fade in a few years.
The real magic happens when you combine the right pencil, paper, and lighting. Try layering from light to dark, pause to lift, and let the skin feel natural. Your next portrait will breathe better than the first time.
So, what should you do next? Grab a 4B‑6B set, test it on your chosen paper, and let your hand guide the flow. Keep practicing, and you’ll notice that each stroke starts to feel like an extension of your own heartbeat.
Remember, the best pastel pencils for portraits are not just about pigments; they’re about the moments you capture. Keep exploring, keep tweaking, and above all, keep enjoying the process. Happy drawing, friend!
Frequently Asked Questions
What makes a pastel pencil good for portrait work?
A good portrait pencil has a balanced soft core—usually 4B to 6B—so the pigment lays smoothly without bleeding. It should also be light‑fast enough to survive display, meaning the color stays vibrant over time. Think of a pencil that feels like a gentle hand on paper: it lets you layer, blend, and lift without the pigment flaking off.
Do I need a special paper for pastel portraits?
You do. A heavyweight textured paper, around 250 g/m², grips pigment without soaking it. Linen‑textured stock keeps colors rich and prevents them from sliding off when you lift with a kneaded eraser. If you’re on a budget, a heavyweight watercolor paper works, but just remember it’s a bit more forgiving to pigment than a dedicated pastel stock.
Which brand is best for beginners without breaking the bank?
Stabilo CarbOthello is a favorite for new artists. Its 4B‑6B set offers buttery softness and easy sharpening, so you can focus on learning shading instead of fiddling with tools. The price point keeps it affordable, and the pigment stays on paper without too much bleed, letting you experiment freely.
How do I keep my pastel pencils from drying out?
Store them in a drawer with a lightly dampened paper towel to maintain humidity. Wrap each stick in a clean cloth or use a pencil sleeve to block dust. If you’re using them often, keep a small bucket of water nearby to re‑humidify the paper before each session, especially in dry climates.
Can I use a mechanical pencil for pastels?
Not really. Pastel pencils rely on a core that’s soft and pliable, which a mechanical lead can’t provide. Mechanical pencils are rigid and designed for graphite, not the soft pigment cores that pastels need. Stick with true pastel sticks for the best feel and pigment control.
What’s the best way to sharpen a pastel pencil?
A fine‑burr hand crank or a gentle sharpening block keeps the tip clean without over‑sharpening. Over‑sharp points split the core, creating unwanted white lines. Aim for a point that feels just sharp enough to carve fine details but still allows pigment to deposit evenly.
How do I prevent my portrait from looking too shiny?
Layer lightly and pause between layers to let the pigment set. If you notice a glossy sheen, gently lift a bit with a kneaded eraser or a soft cloth before adding the next layer. This trick keeps the texture natural and avoids that waxy, overworked look.
