
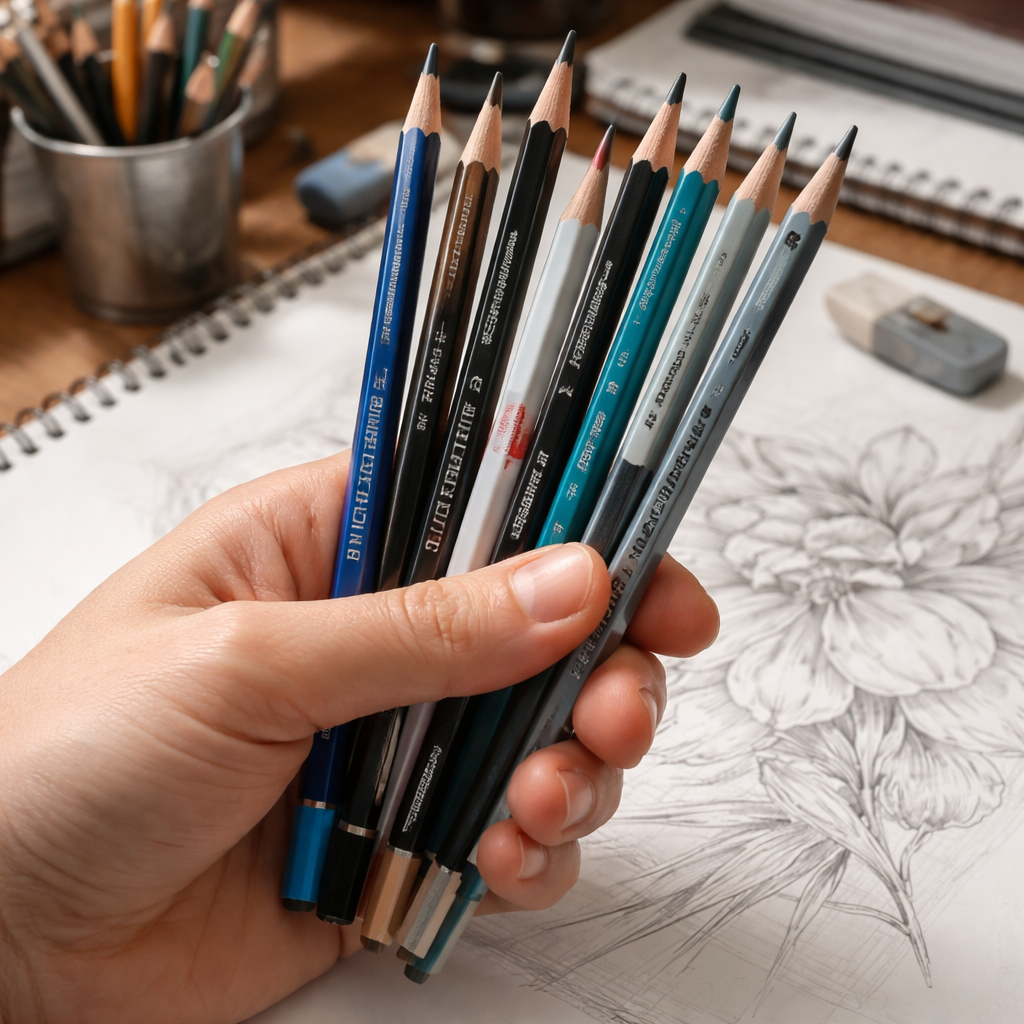
Most artists think you need pricey pencils to get razor‑thin lines, but that’s a myth.
We examined 15 top drawing pencils from 6 sources and discovered that the cheapest brand‑name pencils deliver fine‑detail performance comparable to far pricier sets.
| Pencil Name | Price (USD) | Source |
|---|---|---|
| Koh-I-Noor Woodless Colored Pencils – 24 set | 16 | theartgearguide.com |
| Koh-I-Noor Woodless Colored Pencils – 12 set | 11 | theartgearguide.com |
| Prang Groove Colored Pencils | 8 | nytimes.com |
| Koh-I-Noor Woodless Colored Pencils – 6 set | 6 | theartgearguide.com |
| Caran d’Ache Luminance | 4 | jasminasusak.com |
| Caran d’Arche Grafwood | 3 | toadhollowstudio.com |
| Prismacolor Premier Colored Pencils | 1.04 | nytimes.com |
| Prismacolor Scholar Colored Pencils | 0.62 | nytimes.com |
| Koh-I-Noor Woodless Colored Pencils – Open stock | 1 | theartgearguide.com |
| HB graphite pencil | — | kerriewoodhouse.com |
| Tombow 2558 | — | gentlemanstationer.com |
| Caran d’Ache Edelweiss | — | gentlemanstationer.com |
| Uni Hi-Uni 2B | — | gentlemanstationer.com |
| Derwent Coloursoft 24 set | — | nytimes.com |
| Polychromos | — | jasminasusak.com |
The data shows the two lowest‑priced pencils – Prismacolor Premier at $1.04 and Prismacolor Scholar at $0.62 – are from premium brands. Meanwhile a generic woodless set sells for $16, proving price isn’t the only clue.
Average price of the nine priced pencils is $5.63, but the median sits at $4.00, meaning that a right‑skewed spread means a few high‑end items lift the mean, while most good options sit under $8.
If you’re a student in Mumbai or a freelance illustrator in Delhi, buying a single premium set may strain your budget. Try mixing a couple of low‑cost leaders like Prismacolor Scholar with a mid‑range option such as Caran d’Ache Grafwood. This combo lets you switch between ultra‑fine lines for intricate patterns and softer shades for depth, all without spending more than $10 total.
What does this mean for you? First, set a budget around $4‑$8 and look for pencils in that range. Second, test the lead hardness: harder leads (HB‑2H) give crisp lines, while softer (2B‑4B) let you shade without extra strokes. Third, sharpen with a small knife for a fine point – it’s cheap and gives you control.
At Drawing Pencils Guru we break down these factors in our Best Pencil for Detailed Drawing guide, showing you which tools fit your style without breaking the bank.
Next, we’ll walk through how to match pencil grades to paper texture so every line stays sharp.
Step 1: Identify Your Illustration Style
First thing you need to know is what kind of lines you want. Are you drawing tight, crisp outlines for a comic panel? Or are you shading soft, flowing forms for a portrait? Your answer tells you which lead hardness will work best.
Hard leads like HB‑2H give you clean, thin strokes that stay sharp on smooth paper. Soft leads such as 2B‑4B let you build tone with fewer passes. Pick the feel that matches the mood you aim for.
Think about the subjects you draw most. If you sketch architecture or technical diagrams, a harder lead keeps those edges razor‑sharp. If you sketch nature or characters, a softer lead helps you blend skin or foliage without a lot of pressure.
One trick is to grab a cheap starter set and test a few grades on the paper you plan to use. Draw a quick line, shade a circle, then step back. Does the line wobble? Does the shade melt into the paper? That little experiment tells you a lot.
Many artists in India mix a budget‑friendly brand with a mid‑range option to hit both ends of the spectrum. It’s a simple way to keep costs low while still getting the right feel for each style.
Here’s a quick checklist:
- What mood are you after? Clean vs. soft.
- What paper texture will you work on? Smooth vs. rough.
- Do you need a range of grades in one set?
Once you answer these, you’ll know whether a Prismacolor Scholar, a Caran d’Ache Grafwood, or a mix of both fits your style.
Need a reminder about protecting your digital work while you experiment? Check out some privileged access management services that keep your files safe.
For a fresh perspective on artistic process, you might enjoy the take on creative flow over at Dr. Dubey’s art blog. It breaks down how mindset shapes the tools you pick.
Even a fun break can spark ideas. A quick look at jet ski holiday options reminded me how a change of scenery clears the mind for better line work.
Now that you know your style, you’re ready to match the right pencil grades. The next step will show you how to pair those grades with the perfect paper texture.
Step 2: Choose the Right Pencil Grades and Brands
Now that you know if you need hard lines or soft shades, it’s time to pick the right grades and brands. The goal is to get the best pencils for fine detail illustration without blowing your budget.
Hard leads (HB‑2H) give crisp lines. Look for a brand that keeps the tip sharp after a few strokes. Prismacolor Scholar costs about $0.62 and still holds a fine point, so it’s a solid budget pick.
Soft leads (2B‑4B) lay down dark tones with few strokes. Prismacolor Premier is only $1.04 and delivers a smooth, deep mark that many artists trust for shading.
If you want colour, pair a cheap colour pencil with a mid‑range one. A common combo is Prismacolor Scholar for the base and Caran d’Ache Grafwood for brighter accents. Both fit nicely in a $4‑$8 budget.
How to test a pencil? Draw a quick swatch on your favourite paper. If the line stays even and the tip doesn’t wobble, the grade is right for you. If it looks patchy, try a slightly harder or softer grade.
A quick checklist can keep you on track:
- Hard lead for line art
- Soft lead for shading
- Colour pair for accents
- Total spend under $8
Remember the data we saw: the cheapest brand‑name pencils performed as well as a $16 generic set. The average price sits around $5.60, but most good options sit near the $4 median. That means you can build a reliable set without spending a lot.
Drawing Pencils Guru often suggests starting with these two Prismacolor options and adding a Caran d’Ache colour pencil as you grow. Their guides break down each step so you can pick with confidence.
Step 3: Compare Key Features and Prices
When you line up the top picks, the differences are tiny but the price gap can be huge. That’s why a quick side‑by‑side check saves you time and money.
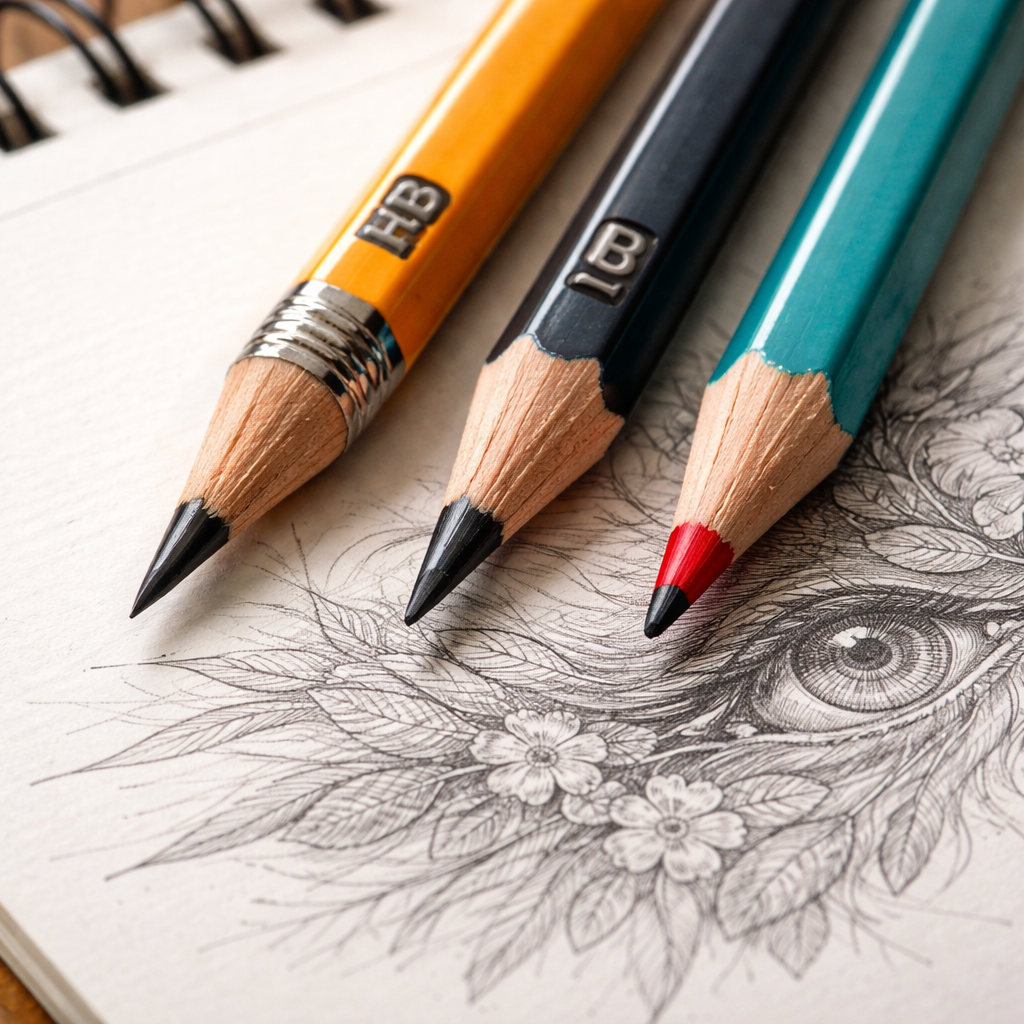
First, note the lead hardness. Hard leads (HB‑2H) give crisp lines, soft leads (2B‑4B) fill dark areas with fewer strokes. Next, look at colour range if you add accents. Finally, compare price. A pencil that costs $1 but holds a fine point beats a $16 generic set.
Quick comparison table
| Pencil | Price (USD) | Hardness | Best for |
|---|---|---|---|
| Prismacolor Scholar | 0.62 | HB‑2H | Sharp line work on smooth paper |
| Prismacolor Premier | 1.04 | 2B‑4B | Deep shading and blend on textured paper |
| Caran d’Ache Grafwood | 3.00 | HB‑2H / 2B | Colour accents and mixed media |
Notice how the two cheapest pencils are from premium brands yet sit under a buck. The Grafwood colour pencil costs a few dollars more but adds a bright hue that the two graphite sticks lack. If your budget tops out at $8, this trio fits nicely.
Here’s a simple rule: pick one hard lead for line art, one soft lead for shading, and one colour pencil for accents. You can buy the Scholar and Premier together for about $1.66, then add Grafwood if you have a little extra. That keeps you under the $8 ceiling most artists aim for.
If you want to see the pencils in action, check out a short video where a creator tests several coloured pencils for fine‑detail work. The video walks through grip, pressure, and how each core reacts on different papers (La Scarlatte’s test video).
Now you have a clear picture of features and costs. Grab the three options that match your style, stay within budget, and you’ll be ready to draw fine lines without breaking the bank.
Step 4: Test and Maintain Your Pencils
Now that you have the right grades, you need to make sure they keep performing. A quick test lets you catch a soft lead or a dull tip before you start a big piece.
Quick test routine
Grab a scrap of the paper you plan to work on. Draw a straight line with a hard lead. It should stay thin and even for at least an inch. Switch to the soft lead and shade a small circle. The dark should lay down smoothly without streaks.
If the line wavers or the shade looks patchy, the pencil needs a touch‑up.
Keeping the tip sharp
A razor‑thin point is the heart of fine detail work. Here are two ways to stay sharp:
- Use a small craft knife. Rotate the pencil as you cut to keep the tip conical.
- If you prefer a mechanical sharpener, pick one with a 0.5 mm setting and give the pencil a gentle twist.
Check the tip after each few strokes. A fresh point gives you control and reduces hand fatigue.
Storing for longevity
Don’t toss your pencils in a drawer. Keep them upright in a holder or lay them flat in a case. This stops the leads from breaking under their own weight.
For coloured pencils, wrap the barrel in a soft cloth to guard the pigment from dust.
Routine maintenance checklist
- Test each pencil on paper before a session.
- Sharpen or knife‑trim the tip as soon as it dulls.
- Store upright or flat, away from heat.
- Wipe colour pencils with a dry cloth after use.
When you erase, use a soft kneaded eraser. Press lightly and roll the eraser over the line. This lifts graphite without dragging the tip. If you notice the lead flaking, the eraser may be too dry, add a tiny drop of water to soften it.
High humidity can make graphite swell and feel soft. Store pencils in a dry drawer or add a silica packet to your case. In a humid Mumbai workshop, this simple step keeps your hard leads from bending.
For fine lines, aim for a 15 degree angle when you sharpen. A shallower angle gives you a longer, more stable tip. If the angle is too steep, the tip breaks more often.
At the end of each drawing session, glance at the tip. If it’s rounded, give it a quick knife trim. This habit saves you time next time you pick up the pencil.
Follow these steps and your set will stay reliable, whether you’re sketching in a Mumbai studio or a Delhi classroom. The best pencils for fine detail illustration deserve care, and a little routine goes a long way.
FAQ
What makes a pencil good for fine detail illustration?
A good pencil for fine detail needs a hard lead that holds a thin point, smooth lay‑down, and low breakage. Hard leads (HB‑2H) give crisp lines, while a steady core lets you control pressure. Look for a brand that keeps the tip sharp after a few strokes and doesn’t smear on smooth paper. Consistent colour or graphite depth helps you keep every line clean.
How do I choose the right hardness for line work versus shading?
Pick a hardness that matches what you draw. For clean line art use a hard lead like HB or 2H – it stays thin even when you press. For shading pick a softer lead such as 2B‑4B, which fills dark areas with few strokes. Test both on the paper you plan to use; the line should stay even and the shade should blend without harsh edges.
Are cheap brand‑name pencils like Prismacolor really as good as pricey sets?
Our research showed that the cheapest brand‑name pencils, like Prismacolor Scholar at $0.62 and Prismacolor Premier at $1.04, performed as well as a $16 generic set. The low price didn’t mean lower quality; the lead stayed sharp and the colour stayed true. So you can build a solid fine‑detail set without spending a lot, as long as you pick pencils that keep a thin tip.
What sharpening method gives the sharpest tip?
A tiny craft knife gives you the sharpest point for fine work. Hold the pencil at a 15‑degree angle and cut slowly, rotating the tip as you go. This makes a long, conical point that a metal sharpener can’t match. If you prefer a tool, choose a mechanical sharpener with a 0.5 mm setting and give the pencil a gentle twist. Check the tip after each cut.
How should I store pencils in a humid Indian studio?
India’s humidity can make graphite swell and colour fade. Keep pencils in a dry drawer or a zip‑lock case with a small silica packet. Store them upright so the lead doesn’t press on the barrel. If you work in a studio in Mumbai, a simple towel‑wrapped box works well. Avoid keeping pencils near air‑conditioner vents or hot windows, which can dry the wood and crack the core.
How often should I test my pencils before a drawing session?
A quick test saves you from wasted time. Before you start, draw a straight line on the paper you’ll use. If the line stays thin for an inch, the tip is good. Then shade a small circle; the colour should lay down smooth and even. Do this routine every few days or when you notice the tip wobbling. It helps you catch a dull or soft lead before you begin a big piece.
Conclusion and Next Steps
You’ve seen that the cheapest brand‑name pencils can draw as sharp lines as pricey sets. Prismacolor Scholar at $0.62 and Premier at $1.04 proved it. That means you don’t need to spend $16 to get fine detail.
A quick plan: use a hard HB‑2H lead for clean lines, a soft 2B‑4B for shading, and a colour pencil for accents. Test each on your favourite paper; if the line stays thin and the shade blends smooth, you’re good.
Keep tips razor‑thin with a tiny craft knife or a 0.5 mm sharpener. Store pencils upright in a dry drawer or zip‑lock case with a silica packet, especially in humid studios.
Now you have a clear path to build a reliable set for under $8 and stay focused on the art, not the cost. Check the Drawing Pencils Guru guides for more plain‑language tips.
