
Ever tried sketching a complex machine and felt your pencil give up mid‑stroke? It’s a feeling we’ve all been there. The line just smudges, the lead breaks, and the whole diagram looks more like a scribble than a blueprint.
Do you wish the tool could keep up with your ideas instead of lagging behind? Imagine a pencil that stays sharp, doesn’t feather, and lets you press through every detail without hesitation.
We’ll show you how the right pencils make that a reality. It’s not just about harder or softer graphite; it’s about choosing the right combination for each part of your technical drawing.
Technical drawing demands precision and repeatability. A single stray line can throw off an entire assembly, so the tools you use matter more than you think.
Hard leads (H‑5 and higher) give you crisp, clean lines that hold their shape. They’re perfect for dimension lines, annotations, and fine outlines where you need absolute control.
Soft leads (B‑2 to 2B) create richer, darker strokes. They’re ideal for shading sections of a part to show depth or for sketching quick, exploratory designs where you want to capture a lot of detail quickly.
One trick is to keep a small set of leads in the same case so you can swap on the fly. A simple hardness chart can help you remember which grade to pick for each task.
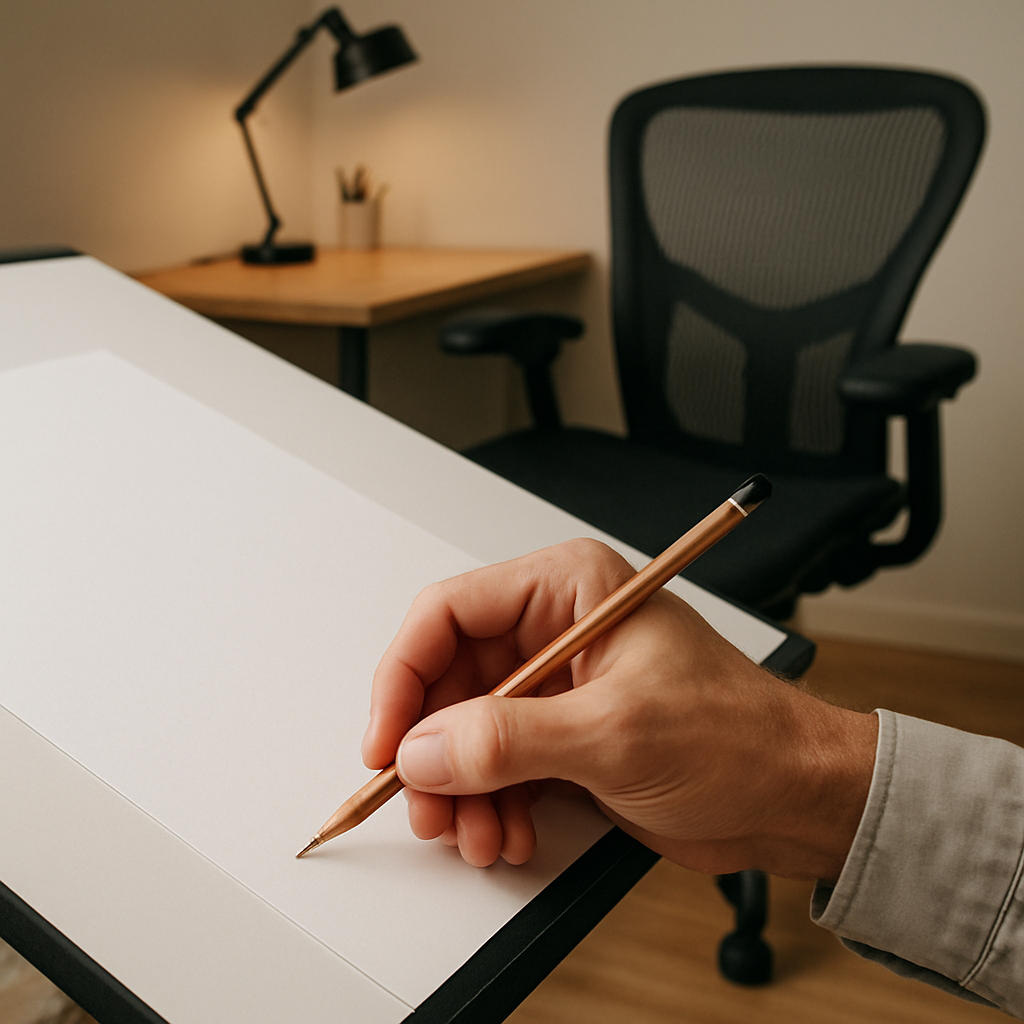
Mechanical pencils are a game‑changer for technical work. They offer consistent lead size, never need sharpening, and let you maintain a steady pressure without worrying about a broken point.
If you need something more flexible, a lead holder lets you use traditional graphite sticks with the precision of a mechanical system.
Layering is key too. Start with a hard lead for the base lines, then layer softer grades for shading and texture. The result is a clean, professional look that stands up to scrutiny.
So, grab a set that balances durability and control, and start sketching your next design. Your drawings will thank you.
TL;DR
When you’re sketching a gearbox, the right pencil turns a cramped design into a clean, precise blueprint—hard leads cut crisp dimension lines, while softer grades reveal depth without smudging. In our experience, layering a hard H‑5 for outlines, a B‑2 for shading, and a lead holder for quick touch‑ups lets you keep control and finish drawings that look professional, every time.
Step 1: Understand the Types of Technical Drawing Pencils
Let me be completely honest: When you’re sketching a gearbox, the right pencil can make the difference between a cramped mess and a clean, precise blueprint. Have you ever felt that line just smudge or break mid‑stroke? That’s the frustration we all know.
Hard leads, like H‑5 and above, bite the paper clean and stay crisp. Soft grades, from B‑2 down to 2B, spread the graphite and give you those deep, dark shadows that make a part pop. Knowing which one you need is the first step in any technical drawing.
Graphite is the workhorse, but that doesn’t mean charcoal or coloured pencils are out of the game. Charcoal gives you those bold, expressive lines that can add texture, while a coloured core can help you distinguish overlapping sections in a complex assembly.
If your design needs a steady hand, mechanical pencils are a lifesaver. They keep the lead size consistent, never break, and let you apply pressure without worrying about a jagged point. For those who want the feel of a traditional stick but with the reliability of a machine, a lead holder is the sweet spot.
Layering is the secret sauce. Start with a hard lead for the base lines, then overlay a softer grade for shading. When you layer, you’re basically building a visual hierarchy that your eye can parse quickly, keeping the drawing legible even under a microscope.
Want to know the exact shade of hardness you need? Pencil Hardness Chart is your cheat sheet for matching a pencil to a task.
Now that you’ve got the basics, let’s see how a short video can put theory into practice.
The clip shows a technician switching from an H‑3 to a B‑2 mid‑stroke, and you’ll notice how the line depth changes instantly. It’s a quick visual lesson on why the right lead matters.

When you’re in the workshop, keep a small, labeled case so you can swap grades without hunting the drawer. A simple color‑coded system—red for hard, blue for medium, green for soft—keeps your workflow humming.
If you need a time‑boxing tool to stay focused while you’re layering, check out a Focus Timer Subscription Pricing and Plans guide; it can help you set up 25‑minute sessions that keep your mind sharp.
And if you’re craving real‑world inspiration, a quick scroll through Abstract Landscape Painting at Gratitude Studios can show you how professional artists use these tools to bring depth and realism to their canvases.
Step 2: Evaluate Pencil Sharpening and Consistency Needs
You’re probably already juggling different leads, but the real secret to a flawless technical drawing lies in how sharp your point stays. Think of that razor‑thin 0.3mm lead like a fine‑tipped needle – any dullness and your line goes wobbly.
Keep Your Point Perpetually Pointy
The trick isn’t just in sharpening; it’s in sharpening consistently. A dull tip stretches your pressure, causes feathering, and turns crisp outlines into blurry messes.
Start with a mechanical pencil sharpener that’s built for the lead size you use. For 2mm leads, a dedicated sharpener gives you the clean, uniform point your technical lines demand.
After that initial cut, an emery stick or a small sanding block is your secret weapon. It smooths the edge, eliminates the burr, and lets you finish with a razor‑sharp tip that stays that way longer.
If you’re in a workshop, keep a spare sharpening kit handy. Think of it like a spare tyre – you’ll never know when you’ll need it until it shows up.
Here’s a quick routine to follow before you dive into a drawing session: 1️⃣ Load a fresh lead, 2️⃣ Run the sharpener, 3️⃣ Finish with an emery stick, 4️⃣ Check the point on a scrap sheet.
Notice how each step reduces the chance of a broken or feathered line. You’ll keep the same line width and avoid those frustrating jumps that mess up tolerances.
Now, a word from the pros: If you’re sharpening 0.3mm or 2mm mechanical pencils, check out Refinery Row guide that breaks down the tools you’ll need.
Take a moment to set your sharpening station up the night before. A tidy spot with good lighting means you’ll be ready to go when inspiration strikes.
Consistency Is Your Best Friend
Once you’ve sharpened, keep that point consistent by using a mechanical pencil with a lead holder if you’re moving between different grades. The holder locks the lead in place, so you don’t lose your edge mid‑stroke.
If you find your lead is still wobbling, double-check the paper. Coarse paper pulls graphite, making the tip look dull even when sharp. Smooth, high‑grade drawing paper keeps your line true.
When your line does break, pause. Replace the lead, sharpen again, and resume. It’s better to pause than to force a line that’s already compromised.
You’re almost there. The right sharpening routine turns a potential headache into a seamless part of your workflow.
With a steady point, you’ll notice your sketches gain that extra edge of professionalism—exactly what a technical drawing demands.
Step 3: Match Lead Hardness to Drawing Detail and Style
After you’ve chosen the right pencil and sharpened it to a fine point, the next game‑changer is matching the lead hardness to the level of detail you’re drawing.
Think about a gear case in a CAD sketch. The outer rim needs crisp, repeatable lines to capture tolerances, while the inner cut‑outs can be shaded to suggest depth.
So, what should you do when you hit a new part of the drawing? The trick is to keep a small “hard‑lead kit” – a few H‑5 or 3H pencils for outlines, a medium 2B for mid‑tone detail, and a soft 4B for shading – in a handy case that you can pull out at a moment’s notice.
Choosing the Right Hardness for Lines
Hard leads (H‑5, 3H) give you a narrow, sharp line that holds its shape on almost any paper. They’re perfect for dimension lines, annotation, and the first pass of a complex shape. The drawback? They can feel stiff in your hand if you’re used to softer grades.
Medium leads (B‑2, 2H) strike a balance. They’re forgiving when you press harder, yet still give you enough control for fine details like gear teeth or component edges.
Soft leads (4B, 6B) spread graphite more, producing darker, broader strokes that’re great for shading or indicating a surface that needs visual weight. The trade‑off is feathering on rough paper, so keep your paper smooth.
Layering Techniques
Start with the hard lead to lay down the base outline. Once you’re satisfied with the shape, switch to a medium lead to add contour lines that follow the geometry. Finally, finish with a soft lead for shadows and texture. This layering keeps each layer distinct and prevents the darkening of the base lines.
Does this layering trick work for both hand‑drawn sketches and technical drafting? Yes, because the principle of contrast remains the same – a sharp outline gives you a reference point, while the darker shading tells the eye where the object sits.
Real‑World Example: Sketching a Turbine Blade
For a turbine blade, you might start with an H‑5 to trace the airfoil shape. Switch to a B‑2 to define the camber lines and mounting slots, then finish with a 4B to darken the root where the blade meets the hub. The result is a clean, professional drawing that’s easy to read in a technical report.
In our experience, artists who work with Indian academic projects find that a 3H lead on high‑grade drawing paper works best for tight tolerances because it resists feathering even under steady pressure.
Here’s a quick checklist to keep you on track:
- Outline with a hard lead (H‑5 or 3H).
- Detail with a medium lead (B‑2 or 2H).
- Shade with a soft lead (4B or 6B).
- Test on a scrap sheet before you start the final drawing.
Need a quick visual of how the hardness scale works? The graphite hardness scale guide shows how each grade behaves on different papers.
When you’re ready to switch grades, remember the rule of thumb: hard for line work, medium for detail, soft for shading. Keep the paper smooth, the pressure even, and your technical drawings will look as sharp as the ideas you’re chasing.
| Lead Hardness | Best Use | Paper Preference |
|---|---|---|
| H‑5 / 3H | Dimension & annotation lines | Fine‑grain drawing paper |
| B‑2 / 2H | Contouring & mid‑tone details | Smooth, medium‑weight paper |
| 4B / 6B | Shading & texture | High‑grade, non‑absorbent paper |
Step 4: Consider Ergonomics and Comfort for Long Sessions
Ever find yourself halfway through a gear sketch, wrists tingling and eyes burning? That’s a common sign that the session’s getting long and the setup isn’t playing nicely with your body.
We’re not here to lecture—just to share a few tricks that keep you drawing, not doing a quick “draw‑and‑go” because you’re exhausted.
Understand Your Hand Posture
Your hand is the tool’s extension. When you hold a pencil too tightly, the muscles in your fingers and forearm tighten up, leading to cramps. Think of the pencil as a baton; a relaxed grip lets you glide smoothly.
Try this quick test: hold a pencil over a piece of paper and let it drop. If it lands with a gentle arc, you’re in the right zone. If it falls flat, you’re gripping it like a vice.
Choose the Right Grip
Most technical pencils come with a standard “pointy” tip, but you can swap in a lead holder or a slightly thicker graphite core. The extra diameter gives your hand a better lever arm and reduces strain.
We’ve seen artists in India pick a 0.5mm mechanical pencil and then swap to a 0.7mm holder for long sessions. The extra width feels like a small cushion against the skin.
Adjust Your Workstation
Desk height matters. If the desk is too low, your elbows go down, tightening the muscles. If it’s too high, you’ll raise your shoulders—both bad for long sessions.
Keep your chair at a height where your elbows sit at a 90‑degree angle while your forearms rest comfortably on the desk. The screen or paper should be at eye level, not forcing you to look down for extended periods.
Good lighting prevents you from leaning closer to see details, so aim for a balanced, diffused source that hits your drawing surface evenly.
Take Microbreaks
We’ve learned that a 5‑minute stretch every 30 minutes keeps the blood flowing. Roll your shoulders, stretch your fingers, and look away from the paper to give your eyes a breather.
Use a simple timer or a short “stand‑up” routine. Even a quick thumb flex can reset the tension in your hand.
Use Ergonomic Pencils
Not all pencils feel the same. The wood‑case graphite pencils for technical drawing from Cult Pens are built with a comfortable grip and a slightly thicker barrel, which naturally encourages a relaxed hold.
They’re also available in a range of grades—2H, 4H, and 6B—so you can pick the one that feels light enough to avoid fatigue but hard enough for crisp lines.
Because they’re designed for long sessions, you’ll notice less hand fatigue after a full afternoon of sketching.
Monitor Your Body Signals
Every body is different. Notice the first sign of discomfort: a dull ache, a tingling finger, or a brief eye strain. Don’t ignore it; tweak your grip, adjust your chair, or take a short walk.
When the body says “break,” the mind often wants to keep going. That’s why building a routine that honors both creativity and physical health is essential.
Quick Checklist for Ergonomic Comfort
- Set desk and chair height so elbows stay at 90°.
- Use a pencil with a slightly thicker barrel or a lead holder.
- Maintain a relaxed grip—no squeezing.
- Take a 5‑minute stretch every 30 minutes.
- Check lighting: avoid glare and ensure even illumination.
By treating ergonomics as a part of your workflow, you’ll keep your pencils in great shape, your body pain‑free, and your sketches sharper than ever. The next time you’re deep into a design, remember: a few small adjustments can turn a long, tiring session into a smooth, productive flow.
Step 5: Select the Right Packaging and Longevity Options
After you’ve picked the perfect lead and sharpened it to a razor‑sharp point, the last thing that keeps your sketches looking sharp is how you store and protect your pencils. Think of packaging like a cozy blanket for your tools—if it’s the wrong fit, the whole thing falls apart.
Pick the Right Case Material
Hard plastic cases are cheap and sturdy, but they can feel bulky. Leather or canvas cases look good and protect against bumps, but they need a little extra care. Metal cases—think a small tool chest—are the most durable, and many designers keep a steel box next to their drafting table. When you choose, ask yourself: how often will you carry the pencil? If you’re traveling to a workshop, a lightweight metal case with a snug fit is worth the extra cost.
Consider the Build‑In Features
Look for a case that has individual slots or a soft lining. A dedicated slot keeps the pencil from sliding when you flip the case open, while a rubber‑coated interior stops the graphite from scratching the walls. Some cases even come with a small pocket for spare leads or a quick‑sharpening tool.
Protect the Lead From Moisture
Graphite is sensitive to humidity; a damp pencil can loosen and break. Store your pencils in a sealed case or a zip‑lock bag with a desiccant packet. The Architecture Lab review on drafting pencils shows that a well‑sealed environment extends the life of a 0.5 mm lead by up to 30 % compared to open storage.
Keep a Mini Toolkit on Hand
Carry a tiny sharpening stick, a piece of sandpaper, and a spare eraser. A quick touch‑up can save you from a half‑finished line that looks sloppy. If you’re a frequent traveler, consider a 3‑in‑1 pencil that comes with a built‑in sharpen and eraser—many mechanical pencils offer this feature, and it keeps you from lugging extra gear.
Check Your Case’s Size & Weight
Before you buy, lay your pencil on a flat surface and see how the case slides. A snug fit means the pencil won’t jostle around when you put the case back on the shelf. We recommend trying the case with a full set of leads—H‑5, B‑2, and 4B—to make sure everything stays in place.
Long‑Term Care Tips
Periodically wipe down the exterior of the case to prevent dust from getting into the slots. If you notice a lead loosening, tighten the screw on a mechanical pencil’s barrel or replace the lead holder. For a more eco‑friendly approach, consider a case made from recycled materials—some office & stationery suppliers offer 100 % recyclable options.
By treating your pencils like prized tools, you’ll keep them sharp, reduce waste, and make each sketch feel like a draft. Ready to find the perfect case? Take inventory of your current pencil set, pick a material that matches your workflow, and protect your investment for years to come.
Step 6: Budgeting and Purchasing Strategies for Professionals
Let’s face it—when you’re drawing a gear, you’re not just chasing lines; you’re chasing accuracy. That means every pencil you pick should feel like a tool you can trust, not a gamble. Below are concrete ways to keep your budget in check while still snagging top‑quality pencils for technical drawing.
Start with a Needs Audit
Pull your current drawing kit apart. Which pencils get the most use? Which ones you never touch? That tells you what you actually need versus what you “think” you need. For many engineers, a small set of H‑5, B‑2, and 4B leads is enough, while a fine‑art student might lean toward a broader spectrum.
Set a Realistic Monthly Budget
Most professionals budget a fixed amount per month for supplies. A simple rule: 70% for core pencils, 20% for mechanical pencils, 10% for accessories like lead holders and sharpening tools. This keeps your wallet happy without sacrificing quality.
Prioritize Mechanical Pencils for Consistency
Mechanical pencils eliminate the dreaded break‑in‑the‑middle of a dimension line. A 0.3 mm or 0.5 mm lead gives you that razor‑thin tip you need for tight tolerances. In fact, the global pencils market data shows that mechanical pencils are growing at a 7.7% CAGR, underscoring their rising popularity among professionals.
Buy in Bulk, Pay Less
When you need a full set of leads (H‑5 to 4B), look for bulk packs. Many suppliers offer a 12‑piece bundle for a fraction of the price of buying individually. Store a spare pack in your toolbox so you’re never stuck mid‑draw.
Choose Brands That Offer Value, Not Just Premium
Brands like Staedtler and Faber‑Castell are renowned, but they also have mid‑tier lines that hit the sweet spot between performance and price. For example, a Staedtler Mars Lumograph B‑2 can be found for under $1.50, whereas a premium Faber‑Castell 9000 B‑2 might cost double. Pick the one that delivers the same darkness and feel but fits your budget.
Keep a Mini‑Toolkit in Your Case
- Sharpener for mechanical pencils
- Emery stick or sanding block for finishing the point
- Small eraser (rubber or kneaded) for quick touch‑ups
- Lead holder or clip for quick lead swaps
These items are tiny but can save you time and money by preventing breakage and reducing the need to replace whole pencils.
Check the Lead’s Longevity
Lead durability varies by brand and grade. If a 4B from one maker lasts 10% longer than a competitor’s, that’s a win. When you buy a new set, ask for a sample or read user reviews. Even a small increase in lifespan cuts costs over a year.
Plan for Seasonal Demand
If you’re in academia, exam periods bring spikes in pencil usage. Stock up a few weeks ahead of finals and then clear out excess before the next semester. That way you avoid price hikes during peak times.
Track Your Spending
Keep a simple spreadsheet: Date, Item, Unit Cost, Quantity, Total. At the end of each quarter, compare against your budget. Spot trends—are you buying more mechanical pencils? Are lead packs running out faster than expected? Adjust next month’s budget accordingly.
Leverage Online Bulk Deals and Subscriptions
Many suppliers offer subscription services where you get a set of pencils shipped monthly at a discounted rate. For professionals who draw daily, that can slash costs by up to 15%. Just be sure the subscription matches your exact grade needs.
Use the Right Paper to Protect Your Investment
High‑grade, smooth paper reduces lead friction and prevents feathering. If you’re using a paper that erodes your lead more quickly, you’ll need to replace leads faster, driving up costs. A moderate paper weight of 80 lb with a fine finish is usually a safe bet for technical work.
Final Checklist Before You Checkout
- Do I have the right grades for my typical projects?
- Is my budget aligned with my expected usage?
- Have I included accessories that prevent lead loss?
- Am I buying in bulk or using a subscription?
- Will the paper I use keep my leads from breaking too fast?
Answer “yes” to all, and you’re set to spend smart while keeping your sketches sharp.
Putting It All Together
Think of your pencil kit like a small tool set. Each item should perform a clear role—hard leads for crisp dimensions, soft leads for shading, a mechanical pencil for consistent line width, and a handy kit to keep everything running smoothly. With a budget that reflects real usage, bulk buying, and a focus on durability, you’ll spend less and draw more.
Remember, the right pencils don’t just make your work look better—they save you time, reduce waste, and keep the creative flow alive. Now go ahead, set that budget, and watch your technical drawings shine without the headache of broken leads.
FAQ
1. Which hard lead grade should I use for dimension lines?
Hard leads like H‑5 and H‑8 are the go‑to for crisp, repeatable dimension lines. They resist feathering and breakage, making them a favorite in both academic labs and professional workshops. If you’re sketching tight tolerances or drafting in a high‑traffic environment, start with H‑5; if the paper is rough or you need extra durability, bump up to H‑8.
2. When is a soft lead like B‑2 best for shading?
Soft leads such as B‑2 to 2B are perfect when you want depth without feathering. They spread graphite evenly, giving you rich shadows on smooth paper. In a classroom setting, a B‑2 works well for illustrating material texture, while a 2B adds depth when you’re drafting complex assemblies that need visual weight.
3. Should I use a mechanical pencil for technical drawing?
Mechanical pencils keep your point sharp and eliminate mid‑stroke breaks. A 0.5 mm lead gives you a fine line for precise annotations, and the built‑in sharpener lets you maintain that edge without extra tools. For students, a mechanical pencil saves time and keeps notebooks free of unwanted splinters.
4. How do I decide between a lead holder and a mechanical pencil?
A lead holder lets you use traditional sticks while keeping the point steady. It’s ideal if you prefer the feel of a wooden stick but need the consistency of a mechanical system. A mechanical pencil is simpler if you want a one‑stop solution. In a lab, many prefer a holder for its quick swapping ability.
5. What paper weight works best with hard leads?
Paper around 80 lb with a fine finish gives hard leads the right balance of grip and smoothness. It prevents lead from slipping and reduces feathering. In an academic environment, this paper weight is common because it handles both hard and soft leads without sacrificing detail.
6. How can I keep my pencils from breaking during long sessions?
Keep a spare sharpening kit and a small emery stick in your case. Sharpen regularly, finish with an emery block, and check the tip on a scrap sheet. Also, store pencils in a dry, sealed case to avoid moisture damage. A tidy workstation with good lighting will reduce hand fatigue and keep your lines steady.
Conclusion
Let’s pull everything together. We’ve walked through the whole spectrum—hard and soft leads, ergonomic grips, and the little tricks that turn a messy draft into a clean line. The first rule? Keep a tiny “lead kit” on hand: a hard H‑5 or 3H for dimension lines, a medium 2B for detail, and a soft 4B for shading. When the paper’s weight or finish shifts, swap the grade so the graphite sits just right.
Next, remember that a steady point is your best friend. Sharpen, then give the tip a quick emery finish. Store pencils in a sealed case and add a tiny sharpening stick—those simple steps keep lines crisp without breaking mid‑stroke.
Finally, treat each session like a mini‑performance. Set your desk so elbows stay 90°, keep lighting even, and take a five‑minute stretch every half hour. These habits reduce fatigue and make every line feel intentional, not accidental.
So, what’s the takeaway? Pick the right grades, keep your point sharp, and respect your body. With those three habits, your technical drawings will not only look sharper—they’ll feel smoother. Grab your set, give it a test run, and let the lines do the talking.
Remember, the right pencil set is an investment in your own rhythm. If you find a lead that feels off, swap it out before the next sketch, and you’ll notice the difference immediately.
