
Ever found yourself in a cramped studio, the only tool on hand a kitchen knife, and wondered if you could still get a crisp point on your graphite? You’re not alone. Many artists in bustling Indian classrooms or tiny home studios face that exact dilemma, and the good news is you can turn a simple knife into a reliable sharpening ally.
A sharp knife gives you control you won’t get from a bulky electric sharpener. Because the blade slices the wood rather than grinding it, you can preserve the lead’s integrity—especially important for soft 2B or 4B pencils that love to break. In our experience, a chef’s knife or even a sturdy craft utility knife lets you expose just enough wood to reveal a fresh tip without crushing the core. If you’re curious about how delicate the process can be, check out our How to Sharpen Colored Pencils: A Step‑By‑Step Guide for Artists for a visual walk‑through that works for graphite too.
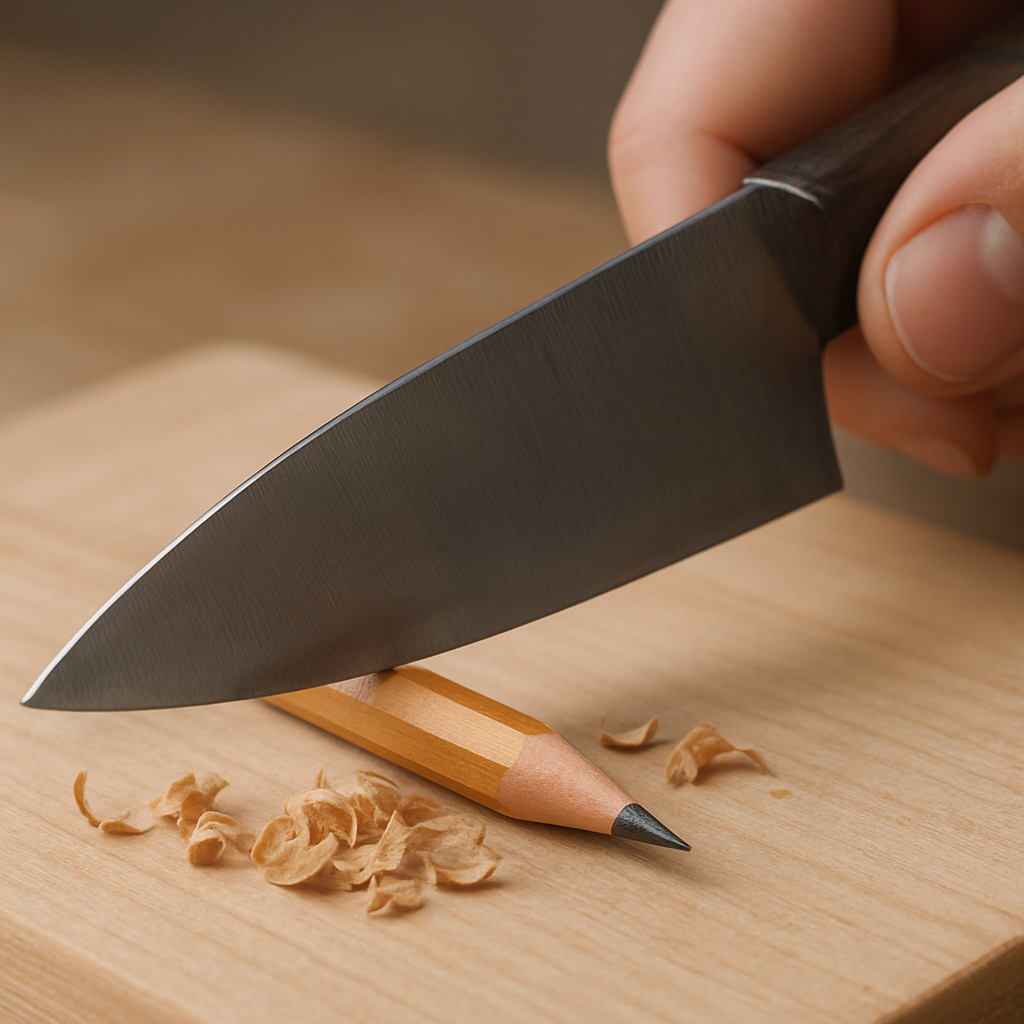
Here’s a quick, actionable routine you can try right now: 1️⃣ Grip the pencil firmly just above the wood, leaving the lead exposed. 2️⃣ Angle the knife blade about 30‑45 degrees—steeper angles give a finer point, shallower angles produce a sturdier tip. 3️⃣ With a gentle sawing motion, shave off thin shavings of wood, pausing every few strokes to check the length. 4️⃣ When the lead peeks through, give it a light tap on the desk to set the point, then test the line on a scrap sheet. If the line wavers, trim a hair more off the side until it’s smooth.
I’ve seen a first‑year art student in Delhi rescue a half‑used box of charcoal pencils by simply swapping the blade for a pocket knife—no budget needed, and the results were razor‑sharp for their charcoal sketch. A freelance illustrator in Mumbai once shared that during a client deadline, the only thing she had on her desk was a utility knife; after a few minutes she had a perfect point and finished the commission on time. Those stories show the method works across mediums and skill levels.
A couple of safety tips: always work on a stable surface like a cutting board, and keep your fingers away from the cutting edge. Dull blades demand more force, which raises the risk of slipping. If you notice the wood splintering, sharpen the blade first—sharper steel means cleaner cuts. And remember, this isn’t a replacement for a proper sharpener when you need ultra‑fine precision; it’s a handy backup when you’re in a pinch.
TL;DR
Grab a kitchen or utility knife, set a 30‑45° angle, shave thin wood strips, and tap the tip to reveal a sharp point.
The trick works for graphite, charcoal, or colour pencils in Indian studios, keeping you safe on a stable surface and freeing you from buying a pricey sharpener.
Step 1: Choose the Right Knife and Pencil
Before you even think about the angle, make sure you’ve got the right tool in your hand. A kitchen chef’s knife or a sturdy utility blade works best because the steel is sharp enough to slice wood without crushing the lead, and it’s usually already in most Indian studios or home workspaces.
If a chef’s knife feels too big, a pocket knife with a fixed blade is a solid backup – just check that the edge isn’t nicked. A dull blade forces you to press harder, which raises the risk of slipping and breaking the pencil core.
Pick the right pencil
Most graphite pencils you’ll encounter in college art rooms are wood‑cased, so the knife only needs to shave away the outer wood. Soft 2B or 4B leads benefit from a gentler touch, while harder H‑grades can tolerate a slightly steeper angle without splintering.
Charcoal and coloured pencils behave similarly; the key is to keep the core intact. If you’re working with a coloured pencil that has a waxy binder, a clean cut will prevent smudging later on.
Set up a safe workspace
Place a cutting board or a thick piece of cardboard on your desk – this gives the blade something solid to rest on and protects both the surface and your fingers. Keep the pencil’s tip pointing away from you, and grip the pencil just above the wood so your hand stays clear of the blade.
Now, angle the blade about 30‑45 degrees. A shallower angle gives a sturdier point, while a steeper angle produces a razor‑thin tip. Use a gentle sawing motion; you’ll see thin shavings fall away like a cascade of sawdust.
Take a moment after a few strokes to test the lead on a scrap sheet. If the line wavers, shave a bit more off the side until the point feels solid and draws a clean line.
When you’re in a cramped studio, a calm environment helps you stay steady. That’s why many artists set up a short Pomodoro timer to keep focus; you can read a quick tip on building that habit here and then return to your sharpening with fresh energy.
Choosing the right knife also means thinking about where you practice. A bright, well‑lit space like a studio at Gratitude Studios makes the wood shavings easier to see and reduces eye strain.
And don’t forget why you’re sharpening in the first place – a fresh point can bring out the subtle textures in a wildlife illustration. For inspiration, check out this guide on selecting stunning nature art prints contemporary wildlife art prints to see how a crisp line can make fur or feather details pop.
Step 2: Prepare Your Workspace Safely
Before you even think about the blade, make sure the place you’re working at is set up for safety. It’s easy to forget that a simple kitchen knife can become a slip hazard if the surface is wobbly or cluttered.
Pick a stable base
We recommend a wooden cutting board or a thick piece of cardboard. Both give the knife a firm grip and protect your desk from scratches. If you’re in a cramped art classroom in Delhi, a cheap kitchen‑sheet can double as a workspace – just lay it flat on the table and make sure it doesn’t slide.
Tip: a damp towel underneath the board adds friction without damaging the surface.
Clear the area
Remove any loose paper, erasers, or other tools that could get in the way. A stray sketchbook page can turn a clean shave into an unexpected cut.
And if you share the bench with a fellow student, ask them to keep their supplies on the opposite side. A little courtesy goes a long way when you’re both handling sharp steel.
Guard your hands
Position your fingers behind the pencil, never in front of the blade. Some artists tape a small piece of painter’s tape to the knife edge; it acts as a visual reminder that the cutting side is facing away.
We’ve seen students in Mumbai slip because they tried to steady the knife with their thumb. Using a fingertip guard or even a rubber glove on the hand that holds the board can prevent that.
Lighting and visibility
Good light is underrated. A bright desk lamp lets you see the wood grain and judge how much you’re shaving off. In a dim hostel room, a phone flashlight angled at the board works surprisingly well.
Does the wood look dry or cracked? If it does, switch to a fresh pencil – dry wood can splinter and bite the blade, increasing the chance of a slip.
Test the blade first
Run the knife lightly across the board’s edge. If it feels dull, give it a quick hone on a ceramic rod or a fine sandpaper block. A sharp edge needs less pressure, which means your hand stays relaxed and safer.
For a quick visual guide on checking blade sharpness, check out this short video that walks through the process how to sharpen pencils with a knife safely.
Final checklist before you start
- Stable cutting board or cardboard placed on a non‑slip mat.
- Workspace cleared of loose papers and tools.
- Fingers tucked behind the pencil; optional tape guard on blade.
- Bright lighting focused on the work area.
- Blade honed and confirmed sharp.
Once all of these boxes are ticked, you’re ready to move on to the actual shaving step. You’ll notice the difference instantly – the blade glides, the wood falls away cleanly, and you stay injury‑free. Remember, a safe setup is the foundation of every great pencil point, especially when you’re improvising with a kitchen knife in a busy Indian studio.
Step 3: The Sharpening Technique – Angle and Motion
Now that your blade is honed and your workspace is safe, it’s time to talk about the heart of the process – the angle and the motion that turn a plain wooden pencil into a crisp‑pointed drawing tool.
First, set the blade at about 30‑45 degrees relative to the pencil shaft. If you picture the knife leaning just a little more than a right angle, that’s the sweet spot. A steeper tilt (closer to 45°) yields a finer tip, perfect for detailed line work, while a shallower angle (around 30°) gives you a sturdier point that won’t snap on heavy shading.
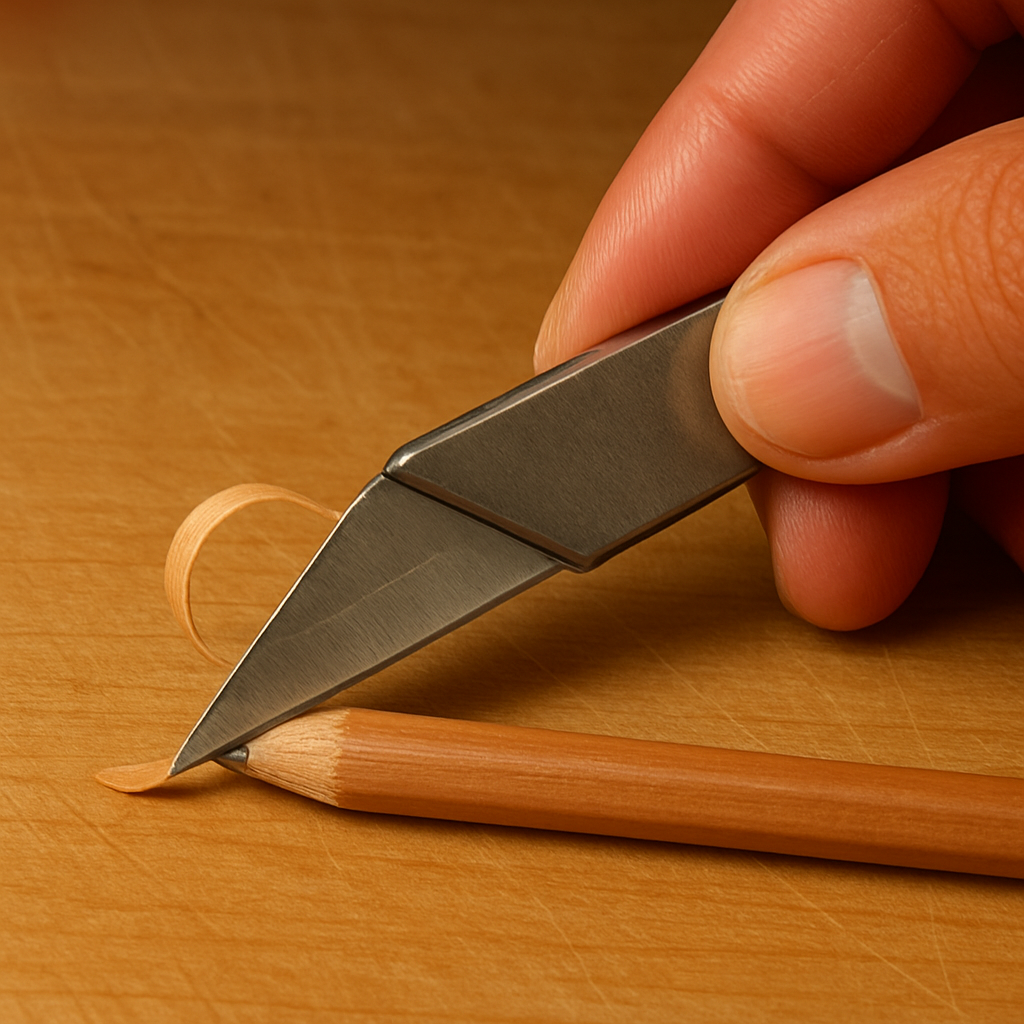
Grab the pencil just above the wood, fingers tucked behind the barrel. Rest the tip of the blade against the wood near the lead, but never let the edge cross the graphite itself. This little distance is what keeps the lead safe.
Now the motion: think of a gentle sawing action, like you’re trimming a thin slice of bread. Push the knife forward a few millimetres, then pull it back slightly, keeping the angle constant. The key is short, controlled strokes – about the length of a fingernail – rather than a long, forceful scrape.
Why short strokes? They let the blade bite the wood evenly, producing thin shavings that peel away without catching. If you try to shave a big chunk in one go, the wood can splinter and the lead may snap, especially with soft 2B or coloured cores.
Pause after every two or three strokes. Look at the exposed wood, feel the resistance. If the shavings start to feel thick, you’ve gone too deep; lift the blade a tad, reset the angle, and continue. This micro‑checking habit is what we at Drawing Pencils Guru call the ‘feel‑check.’
A quick tip for Indian studio settings: the humidity can make wood swell a bit, so you might need to tilt the blade a degree lower than you would in a dry climate. In Delhi’s monsoon season, we’ve seen artists add a tiny 5° adjustment and the wood slides off cleanly.
If you’re unsure whether you’re keeping the angle steady, watch a short demo that walks through the motion step‑by‑step. This video shows the exact push‑pull rhythm and angle consistency you need to master how to sharpen pencils with a knife.
Remember, the motion is more important than raw speed. Let the blade do the work; your hand should stay relaxed, guiding the pencil rather than forcing it. A relaxed grip reduces fatigue and lets you maintain that perfect angle for longer.
When the lead finally peeks through, give the tip a light tap on the board to set it. Test the line on a scrap sheet – if it draws a clean, uninterrupted stroke, you’ve nailed the angle and motion. If it wavers, a few more light passes will smooth it out.
So, to sum up: set 30‑45° angle, use short sawing strokes, pause and check, adjust for humidity, and keep your hand relaxed. Mastering this rhythm turns any kitchen knife into a reliable sharpening ally, whether you’re in a bustling Mumbai classroom or a quiet home studio.
Step 4: Finishing Touches and Testing the Point
Now that you’ve got the blade dancing at the right angle, it’s time to put the finishing touches on that fresh point. This is where the magic turns from “just shaved wood” into a line that glides across paper without hiccups.
First, give the tip a gentle tap on your cutting board. That tiny tap settles the lead, removes any loose wood fibers, and tells you whether the point is truly set. If the tip feels wobbly, you’ve probably left a micro‑splinter – a quick, extra pass with the knife will clean it up.
Next, grab a scrap sheet of drawing paper and draw a slow, straight line. Does the stroke come out even, or does it jitter? A clean, uninterrupted line means you’ve nailed the angle and pressure. If the line flickers, you’re still a shade too shallow or a hair too deep. Trim a little more wood on the side that’s lagging, then test again.
Wondering how many passes are too many? Think of it like sanding a piece of wood – a few light strokes are enough; over‑shaving will expose the lead and make it fragile. In our experience, three to five light passes after the initial point usually give you that sweet spot where the wood is thin enough to reveal the lead but still supports it.
Sometimes a tiny burr remains on the side of the tip. A quick swipe with the back of the knife blade (the dull side) or a piece of fine sandpaper can smooth it out without dulling the cutting edge. This extra step is especially handy for soft 2B or coloured pencils that love to snag on rough edges.
Do you ever worry about the point dulling mid‑sketch? A simple trick is to keep a spare knife blade handy and give the tip a micro‑trim after every 10–15 minutes of heavy line work. It’s like a quick tune‑up for your pencil, and you’ll notice the difference the moment you lift the pen.
Finally, think about storage. Slip the freshly sharpened pencil into a holder that keeps the tip upright – a simple wooden block with a slot works wonders. Avoid tossing it into a crowded sketchbox where the tip can knock against other tools; that’s a fast track to a broken lead.
So, what’s the takeaway? Tap, test, trim, smooth, and protect. Follow these tiny rituals and the simple act of learning how to sharpen pencils with a knife becomes a reliable part of your studio routine, whether you’re sketching in a bustling Mumbai classroom or a quiet home studio.
Step 5: Compare Knife Types and Choose Your Preferred Tool
Now that you’ve got the angle down, the next big decision is which blade will actually do the work. It sounds simple, but the right knife can be the difference between a clean point and a snapped lead.
If you’ve ever wondered whether a serrated edge or a straight‑edge blade is better for shaving wood, you’re not alone. In a quick rundown, straight‑edge knives give you that smooth, push‑cut feel, while serrated knives act like a tiny saw that can bite through tougher wood grain. Knives Academy breaks down the pros and cons, and the same logic applies when you’re sharpening pencils with a knife.
Straight‑edge utility knives are the workhorse most artists reach for. Because the blade slides cleanly, you can keep the 30‑45° angle steady without the blade wobbling. The result is a uniform shave that leaves the wood thin but intact, which is especially important for soft 2B or coloured pencils that love to splinter.
Serrated utility knives, on the other hand, excel when the wood is a bit dry or fibrous – the tiny teeth help you start the cut without grinding the whole edge. Think of a rainy monsoon morning in Delhi when the wood can feel a touch harder; the saw‑like motion lets you break that outer layer with less pressure, protecting the lead from accidental snaps.
Pocket knives are the on‑the‑go option. If the blade locks solidly and you can extend it fully, they work just as well as a kitchen utility. Just remember to keep the tip pointing away from your fingers and maybe tape a small strip of painter’s tape on the edge for extra visual safety.
So, how do you pick? The best approach is a quick “test‑shave” on a scrap piece of wood. Give each knife a couple of short strokes and watch how the wood falls away. If the shavings look clean and the pencil stays steady, that’s your go‑to. If the wood chips or the lead wobbles, switch to the other style.
- Straight‑edge utility: smooth cuts, ideal for soft leads.
- Serrated utility: great for dry or dense wood, less pressure.
- Pocket/lock‑blade: portable, works everywhere if it stays sharp.
Here’s a quick side‑by‑side comparison to help you decide which blade fits your workflow.
| Knife Type | Best For | Notes |
|---|---|---|
| Straight‑edge utility | Soft leads (2B, coloured) | Provides consistent push cuts; keep blade sharp for minimal force. |
| Serrated utility | Dry or dense wood, on‑the‑fly work | Saw‑like action reduces drag; watch for extra wood dust. |
| Pocket/lock‑blade | Portable setups, classrooms | Needs a solid lock; tape edge for safety; may need occasional honing. |
In the end, the “right” knife is the one that feels comfortable in your hand and lets you keep that 30‑45° angle without fighting the wood. Pick one, practice a few test cuts, and you’ll have a reliable sharpening partner whether you’re in a bustling Mumbai classroom or a quiet home studio.
Conclusion
So there you have it – sharpening pencils with a knife isn’t a hack, it’s a handy skill that fits right into a bustling Indian studio or a cramped dorm desk.
When you choose the right blade, set a steady 30‑45° angle, and use short, controlled strokes, the wood falls away cleanly and the lead stays intact. That little “tap‑and‑test” routine at the end makes the difference between a wobbling line and a confident stroke.
Think about the last time you ran out of a proper sharpener during a class in Delhi. With a kitchen or utility knife in hand, you can keep sketching without missing a beat – no extra cost, no extra clutter.
Remember these quick takeaways: pick a sharp straight‑edge blade, work on a stable board, guard your fingers, and pause after every few cuts to check the wood. A tiny adjustment for humidity, a brief tap to set the tip, and you’re ready to draw.
Got a favorite knife or a clever tip you’ve discovered? Share it in the comments or swing by Drawing Pencils Guru for more “on‑the‑fly” sharpening tricks. Keep the blade sharp and the ideas sharper.
Happy sharpening, and let your sketches shine today!
FAQ
Can I use any kitchen knife to sharpen my pencils?
In practice, a straight‑edge knife with a sharp, thin blade works best. A heavy, serrated slicer tends to crush the wood and can snap the lead, especially with soft 2B or coloured cores. Look for a chef’s knife, a utility knife, or a pocket knife that locks solidly. The key is a clean edge that lets you glide the blade at a steady 30‑45° angle without forcing the pencil.
What angle should I hold the knife for the cleanest point?
We recommend a 30‑45° tilt relative to the pencil’s shaft. Aim for the middle of that range if you want a balanced tip—fine enough for detail work but sturdy enough to survive a few heavy strokes. A steeper angle (closer to 45°) produces a razor‑thin point, great for fine lines, while a shallower angle (around 30°) gives a broader tip that resists breakage. A quick “feel‑check” after every two strokes helps you stay on target.
How do I keep my fingers safe while sharpening?
Safety starts with positioning your hand behind the pencil, never in front of the blade. Some artists tape a small strip of painter’s tape to the edge of the knife as a visual reminder that the cutting side is facing away. Using a cutting board or a thick piece of cardboard as a work surface also gives you a stable base and keeps the blade from slipping onto the desk.
Will sharpening with a knife damage the lead?
If you use short, controlled strokes and pause to check the wood, the lead stays intact. The blade removes only the wood sheath; it never contacts the graphite directly. Problems arise when the blade is dull or you apply too much pressure, which can push the wood into the lead and cause a break. Honing the blade on a ceramic rod before you start makes the process smoother and protects the core.
How often should I re‑sharpen during a long drawing session?
Every 10–15 minutes of heavy line work is a good rule of thumb. A quick micro‑trim restores the tip’s crispness and prevents the wood from fraying, which can catch on paper. Keep a spare knife blade handy so you can make a light pass without stopping your flow. Many artists find that a brief “tap‑and‑test” after each mini‑sharpen keeps the line steady and the sketch progressing.
Is this method suitable for charcoal and pastel pencils?
Yes, but treat the wood a bit more gently. Charcoal and pastel cores are usually softer, so a slightly shallower angle (around 30°) and a lighter sawing motion work best. The same short‑stroke rhythm applies; just watch for any splintering of the outer wood, which can happen when the humidity is high. A quick wipe of the tip on a scrap sheet will show you if the point is ready for bold strokes.
What should I do if the wood starts to split or splinter?
If you notice the wood flaking, stop and check the blade’s sharpness—dull steel tends to crush rather than slice. Sharpen the knife or switch to a fresher blade, then resume with the same angle. You can also switch to a serrated utility knife for a brief “starter” cut, which grabs the outer fibers without forcing them. Once the wood is smooth again, go back to your straight‑edge blade for the final point.
