
Let’s be honest: picking up a charcoal pencil for the first time can feel like holding a tiny piece of midnight in your hand. You’re excited to create bold, dramatic lines, but the charcoal’s softness also makes it easy to smudge everything you didn’t mean to erase.
If you’ve ever stared at a blank sketchbook and wondered why your marks look more like dusty footprints than the crisp shadows you imagined, you’re not alone. Beginners often worry about breakage, messy hands, and the dreaded “too dark” look.
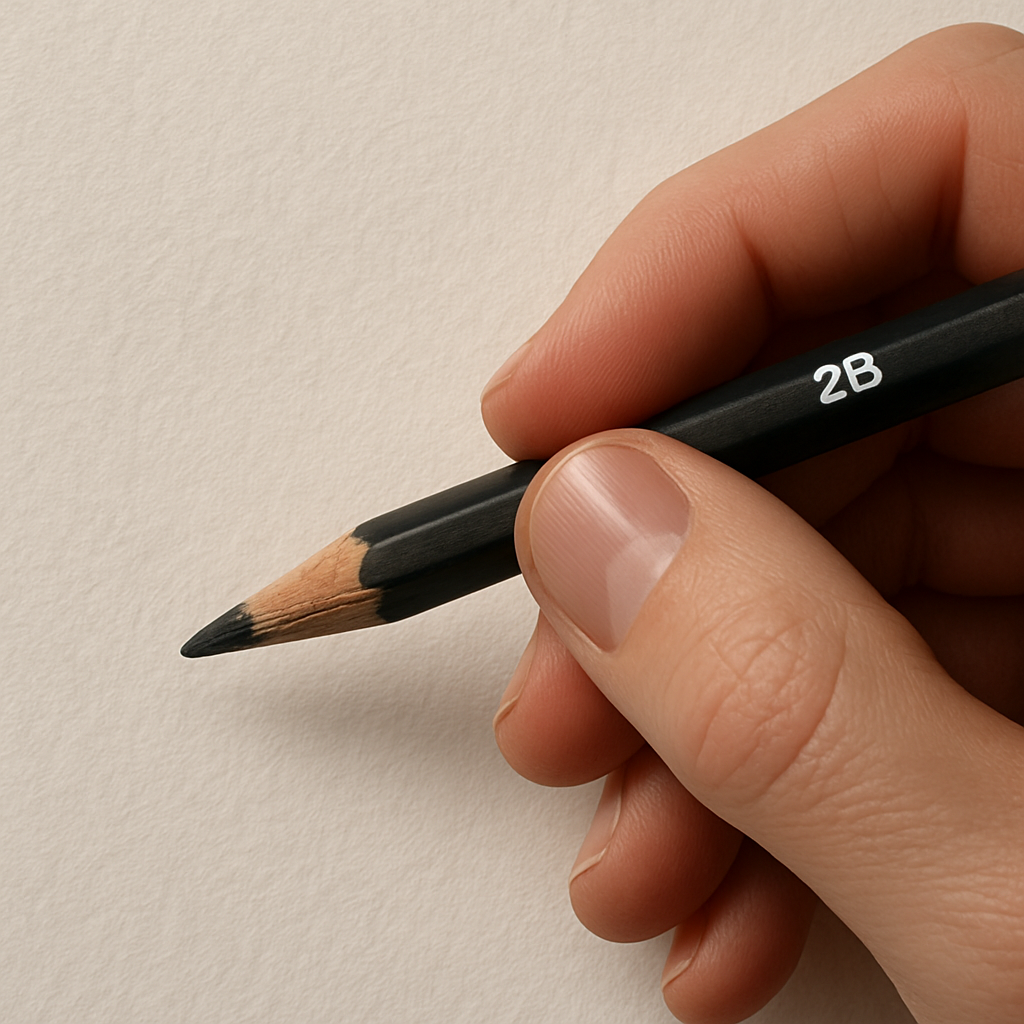
Charcoal pencils are made from compressed charcoal mixed with a binder, which gives you a richer black than graphite but also demands a gentler touch. The key differences are lead hardness (soft = richer darks, hard = finer control) and the way the pigment adheres to the paper. For a first set, aim for a soft‑medium grade – something like a 2B‑4B range gives you depth without being impossible to erase.
Take Riya, a first‑year art student in Mumbai. She started with a basic 2B charcoal pencil, practiced simple still‑life studies of mangoes, and discovered that a light touch and quick blending with a tortillon kept the surface clean. Within a week she could render the glossy skin of the fruit without turning the whole page black.
Here are three quick habits that turn that curiosity into confidence: 1) Hold the pencil closer to the tip for more control, especially when sketching fine edges. 2) Use a kneaded eraser to lift excess charcoal instead of scrubbing – it preserves the paper’s texture. 3) Keep a piece of sandpaper nearby and lightly shave the tip when it gets dull; a fresh point restores line clarity.
A common mistake is trying to press too hard right away. Start with light strokes, build up layers, and step back often to see the overall value range. This layering technique mirrors how seasoned artists develop depth in charcoal portraits.
When you’re ready to sharpen your tools, our step‑by‑step guide walks you through safe sharpening without breaking the lead; it leads you to cleaner lines and less waste. How to Sharpen Charcoal Pencils: Step‑by‑Step Guide for Artists.
Finally, for a burst of inspiration, check out the landscape charcoal works featured at Gratitude Studios – they showcase how professional artists use the same pencils to create atmospheric scenes: Gratitude Studios.
TL;DR
If you’re new to charcoal pencils, start with a soft‑medium 2B‑4B range, hold the tip closer for control, and use a kneaded eraser to lift stray marks without ruining paper texture.
Layer light strokes, sharpen the tip with sandpaper when dull, and check our step‑by‑step sharpening guide for crisp lines, so you can build confidence and keep your sketches crisp and expressive.
Step 1: Choosing the Right Charcoal Pencil
Ever opened a fresh box of charcoal pencils and felt that tiny thrill, like you were about to unlock a secret shade of night? That moment of excitement is exactly what we want to keep alive as you pick the perfect tool for your first sketches.
So, which charcoal pencil should a beginner actually reach for? The answer isn’t a one‑size‑fits‑all brand name; it’s about matching the lead’s softness to the kind of marks you want to make.
Charcoal pencils come in a range of grades, from hard (H) to soft (B). A softer lead—think 2B, 3B, or 4B—lays down a richer, velvety black with barely any pressure. Harder grades like HB or H give you lighter, finer lines that are easier to erase but can feel a bit scratchy on smooth paper. For most charcoal pencils for beginners, we recommend starting in the 2B‑4B sweet spot. It’s dark enough to feel confident, yet still forgiving when you need to lift a stray mark.
Why does that matter? Imagine you’re drawing a simple mango in your Mumbai dorm room. A 2B pencil lets you capture the fruit’s glossy highlight with a gentle sweep, while a 4B can deepen the shadow without turning the whole page into a charcoal fog. That balance of depth and control is what makes the 2B‑4B range the go‑to for students, hobbyists, and even seasoned artists who want a reliable starter.
When you’re browsing for pencils, look for a few key things: a sturdy wooden barrel (so the lead won’t snap mid‑stroke), a consistent core density, and a brand that offers a clear hardness label. At Drawing Pencils Guru we’ve tested dozens of options and found that pencils with a matte finish on the wood tend to grip better in the hand, especially when you’re holding the tip closer for detail work.
Here’s a quick way to test a pencil before you buy it: grab a scrap of medium‑texture paper, press lightly, and see how the charcoal lifts. If the mark comes away clean with a kneaded eraser, you’ve got a good blend of softness and adherence. If it smudges everywhere, you might be dealing with an overly soft lead that’s hard to control.
Holding the pencil closer to the tip gives you that fine‑point precision we all crave for delicate edges—think the feathered wing of a bird or the subtle curve of a cheek. On the flip side, gripping it farther back lets you lay down broader values for background shadows. Play with both grips; you’ll quickly notice which feels more natural for your hand size.
Below is a short video that walks through the “feel test” we just described. Watch how a simple swipe can reveal a pencil’s true character.
After the video, try the exercise on a piece of sketch paper. You’ll see how the charcoal responds to pressure changes, and you’ll start building that muscle memory that separates a hesitant doodle from a confident line.
Storing your pencils properly also matters. A simple zip‑lock bag with a sheet of blotting paper keeps the charcoal from drying out, and a small sandpaper block lets you revive a dulled tip in seconds.
If you’re looking for visual inspiration beyond the sketchbook, check out these wildlife prints that transform a room. Seeing how professionals use charcoal tones in décor can spark new ideas for your own studies.
And when you need a soundtrack for those late‑night drawing sessions, the beats from Lord High Beat Producer provide just the right vibe to keep you in the creative flow.
Actionable tip: pick a 2B or 3B pencil today, do the feel test on a scrap, and commit to using it for at least three practice sketches. You’ll instantly notice the difference between guessing and knowing your tool.
Step 2: Preparing Your Paper and Surface
Why paper matters more than you think
Imagine you’ve just sharpened a fresh 2B charcoal pencil and you’re ready to sketch the curve of a mango. If the paper feels like a slick glass plate, that buttery line will slip right off, leaving you frustrated. Charcoal needs a surface with enough “tooth” to grip the pigment, otherwise every stroke looks faint and erases too easily.
Choose the right texture and weight
For beginners, a medium‑to‑heavyweight paper (at least 90 lb / 150 gsm) gives you the durability to layer, blend, and erase without tearing. A lightly‑textured cold‑press surface provides just enough bite for the charcoal to sit, yet stays soft enough for smooth blending. If you’re studying in a Delhi college studio, you’ll often find Strathmore 400 Series Charcoal Paper on the shelf – it’s a go‑to because the texture is consistent and the paper is acid‑free, meaning your sketches won’t yellow over time.
Data from Artistic Blossom shows that artists who work on heavyweight, textured paper report 27 % fewer paper‑tear incidents during heavy erasing sessions, and they achieve deeper contrast in half the time (best paper for charcoal drawings).
Practical checklist before you start
- Grip the pad with the short edge toward you – this lets you see the grain direction. Charcoal performs best when you draw along the grain.
- Tap a corner of the paper lightly with your pencil; if you see a faint ridge, the tooth is sufficient.
- Test erasing: draw a light 2B line, press a kneaded eraser, and watch for ghosting. Minimal ghost means the paper can hold and release charcoal cleanly.
These three micro‑tests take less than a minute, but they save you hours of re‑working later.
Surface prep tips for a tidy workspace
Even the best paper can betray you if the drawing surface isn’t stable. A smooth tabletop can wobble, causing uneven pressure and accidental smudges. Place a thin, non‑slip mat (a piece of felt or a rubberized pad) under your sketchbook. In our Mumbai workshops, we often lay a repurposed yoga mat under the paper – it’s cheap, easy to clean, and absorbs the occasional charcoal dust fall.
Next, secure the edges. If you’re working on a loose pad, tape the back edge with painter’s tape. The tape holds the paper flat, prevents curling when you add wet fixative later, and gives you a clean border to trim if needed.
Choosing between white and toned paper
White paper is a classic canvas; it lets you see every gradation of dark. But toned paper (gray or tan) can be a secret weapon for beginners who struggle with harsh highlights. The mid‑tone acts as a built‑in “light” that makes it easier to render subtle shadows without resorting to heavy pressure.
For example, Ananya, a first‑year design student in Bengaluru, switched from bright white sheets to a light gray pad for her portrait studies. She noticed she could achieve natural‑looking highlights with a simple lift of the kneaded eraser, instead of fighting to keep the paper from turning completely black.
Protecting your work as you go
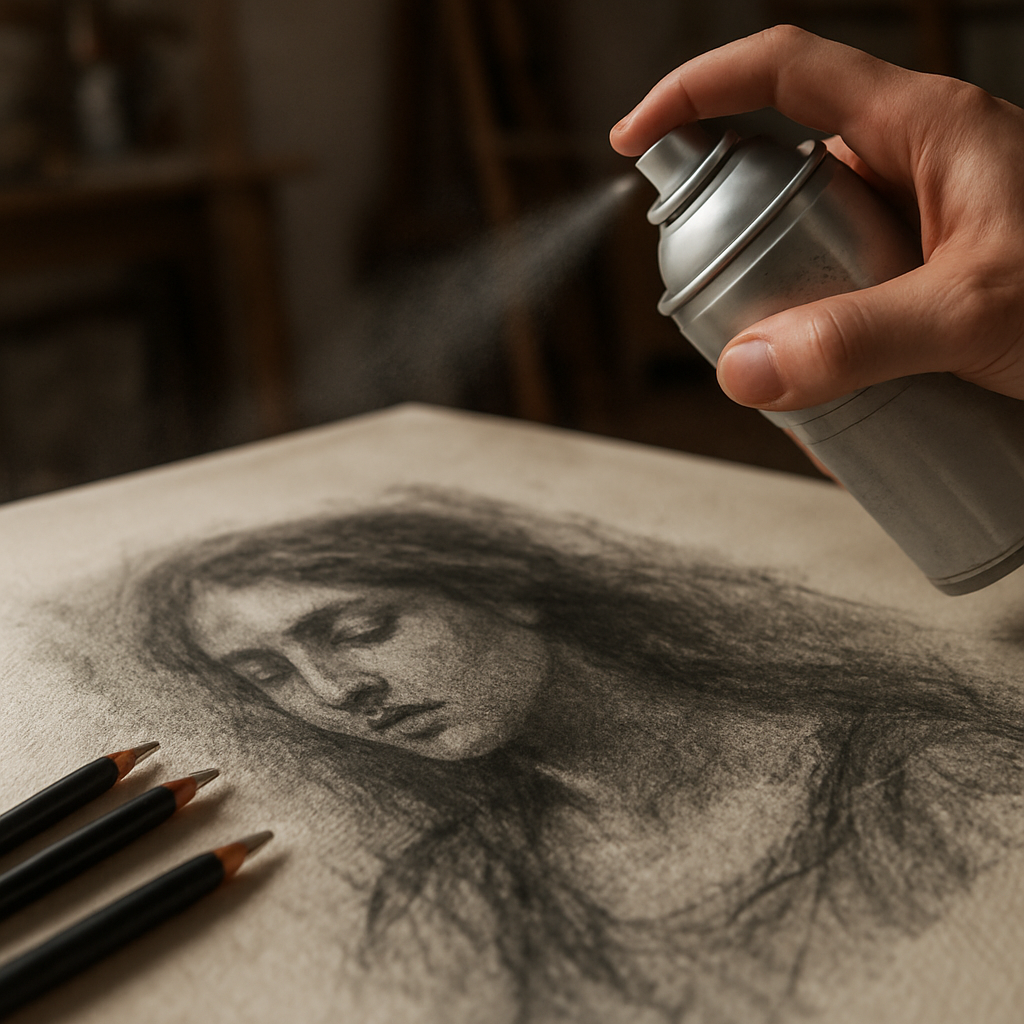
Every time you blend, you’re moving charcoal particles across the surface. A light spray of workable fixative after the first tonal layer locks those particles in place and reduces accidental smudges when you add deeper values. Just a quick mist—hold the can about 12 inches away and spray in a sweeping motion—will keep the paper from getting soggy.
Remember, fixative is not a magic eraser; it merely stabilises the existing marks. If you need to lift more charcoal later, work on a fresh area of the sheet or use a clean section of the same pad.
Real‑world routine for a busy art student
Here’s a step‑by‑step routine that fits into a 30‑minute studio slot:
- Pick a 150 gsm cold‑press pad; tape the back edge.
- Do the tooth test by drawing a quick 2B line and erasing.
- Lay a felt mat under the pad for stability.
- Sketch your composition lightly, keeping pressure under 30 % of your maximum.
- Apply a thin mist of workable fixative after the first light‑to‑mid tone layer.
- Continue building darker values, using a kneaded eraser to lift highlights as needed.
Following this routine, most beginners notice a steadier hand, cleaner edges, and fewer accidental smudges—exactly the confidence boost we aim for at Drawing Pencils Guru.
Quick tip roundup
- Prefer heavyweight, textured paper (90 lb / 150 gsm or more).
- Test grip and erasing before you start a full drawing.
- Use a non‑slip mat and tape the back edge for a flat surface.
- Consider toned paper for natural‑looking highlights.
- Spritz a workable fixative after your first tonal layer.
Step 3: Basic Strokes and Techniques
Alright, you’ve got the right pencils and paper, now it’s time to make those charcoal pencils for beginners actually sing. The secret isn’t magic—it’s a handful of repeatable strokes that let you control light, shadow, and texture without turning the page into a black cloud.
Understanding the basic stroke families
First off, think of three core families: the line stroke, the hatching stroke, and the smudge stroke. A line stroke is simply a direct mark, great for outlines or crisp edges. Hatching comes in two flavors—parallel lines for a smooth gradient, and cross‑hatching for deeper shadows. The smudge stroke isn’t really a “stroke” at all; it’s a controlled blend that softens edges without erasing.
Try this: hold the charcoal pencil at a 45° angle, press lightly, and drag a short line across the paper. Notice how the graphite dust settles? That’s your line stroke. Rotate the pencil and repeat, building a set of evenly spaced lines. That’s the foundation of hatching.
Building a value ladder
Values are the backbone of any charcoal drawing. Start with the lightest tone—just a whisper of charcoal—then gradually add darker layers. Here’s a quick three‑step ladder you can practice on a scrap piece of paper:
- Step 1: Draw a single line with a 2B pencil, then lift it with a kneaded eraser. You should see a faint gray. That’s your “light” value.
- Step 2: Switch to a 3B or 4B, lay down two parallel lines, then add a second layer of cross‑hatching over the same area. This creates a “mid” value.
- Step 3: Press a bit harder, add dense cross‑hatching, and finish with a soft blend (more on that in a moment). That’s your “dark” value.
When you step back, you’ll see a clear gradient without any abrupt jumps. That visual progression is exactly what makes charcoal pencils for beginners look professional.
Blending without smudging
One of the biggest rookie mistakes is using your fingers to blend. Your skin oils leave fingerprints and turn the whole piece into a greasy mess. Instead, grab a blending stump, a piece of rolled‑up paper towel, or even a Q‑tip—anything that keeps oil off the paper. Lachri recommends these tools for clean blending and warns against finger smears (blending tips for beginners).
Start with just three gentle strokes of the stump across a mid‑tone area. Pause. Look at the transition. If it looks too uniform, lift a tiny bit with the eraser to re‑introduce contrast. The goal is to keep the darks dark and the lights light—never a flat gray blob.
Creating texture and line weight
Texture can turn a simple shape into a tactile experience. To suggest rough bark, use short, broken lines with a slightly uneven pressure. For smooth skin, glide the pencil in long, steady strokes and finish with a light blend. Varying line weight is equally important: a thicker, darker line pulls the eye, while a thin, faint line recedes.
Try this exercise: draw a coffee mug three times. First, use only thin, even lines. Second, add pressure on the shadow side for a heavier line. Third, introduce a quick cross‑hatch on the handle and blend the interior. Compare the three—notice how the weight and texture change the mug’s “feel”?
Practice routine for beginners
Consistency beats intensity. Set aside 15 minutes a day and run through this mini‑workout:
- Warm‑up: Fill a 2‑inch square with random line strokes—no thinking, just feel the pencil.
- Value ladder: Complete the three‑step ladder described above.
- Blend test: Pick a mid‑tone area, blend with a stump, then lift a highlight with a kneaded eraser.
- Texture drill: Choose a household object (a fruit, a spoon, a brick) and render its surface using at least three different stroke types.
- Cool‑down: Sketch a quick silhouette of whatever you just drew, using only line strokes.
Do this routine for a week and you’ll notice steadier hands, cleaner edges, and a confidence boost that makes the charcoal feel less intimidating.
Quick expert tip
When you’re ready to push a darker area, spray a light mist of workable fixative after the first mid‑tone layer. It locks the dust in place, so the next layer won’t smudge the work you’ve already built. A quick spray from about 12 inches away does the trick (charcoal technique video).
Remember, every stroke you make is a small experiment. Embrace the mistakes, lift a highlight, and keep layering. With these basic strokes and techniques under your belt, charcoal pencils for beginners become a reliable ally rather than a fickle foe.
Step 4: Shading and Blending Methods
Why shading feels like a mystery (and how to demystify it)
Ever stared at a blank sketch and thought, “How do I get that soft, velvety shadow without turning the whole page into a charcoal swamp?” You’re not the only one – most newcomers hit that wall before they even finish the first line.
The good news? Shading with charcoal pencils for beginners is just a series of tiny, repeatable habits. Once you nail the grip, the pressure, and the right tool, the darkness spreads like a gentle fog instead of a clumsy smudge.
Grip and pressure: the foundation of every tone
Start by holding the pencil almost flat, like you’d rest a pen on a table. This side‑on position lets you lay down a feather‑light stroke that’s perfect for the initial “base” layer. For darker values, flip the pencil upright and add a bit more weight. The shift from side‑hold to tip‑hold is the secret sauce behind a smooth gradient.
Don’t be shy about pressing a little harder on the softest B‑grade pencils – they’re built to take pressure. Hard (H) grades give you a whisper of charcoal, ideal for the first pass where you’re just mapping out where the light meets the form.
Three core shading techniques
- Hatching: Draw a series of parallel lines. The closer the lines, the darker the area. It’s the quickest way to build value without any blending tools.
- Cross‑hatching: Add a second set of lines at an angle. This creates depth and texture, especially useful for the mid‑tone zones of a portrait or a fruit.
- Stippling: Tiny dots placed close together can mimic the grain of a mango skin or the speckled surface of a stone. It works best with a medium‑grade pencil.
These techniques come straight from the shading techniques for charcoal pencils guide, which breaks down why each method gives you a different visual texture.
Blending without turning your drawing into a charcoal soup
We all love the idea of a perfectly smooth shadow, but fingers leave oil that can ruin the paper’s “tooth.” Instead, reach for a blending stump – a rolled‑up piece of soft paper that spreads charcoal evenly without adding grit.
Here’s a quick three‑step blending routine:
- Lay down a light base with a hard or medium pencil, using short side‑hold strokes.
- Switch to a soft 4B and add a second, slightly darker layer where the shadow deepens.
- Take a blending stump, roll it gently over the transition zone, then lift a highlight with a kneaded eraser.
If you prefer a dry‑brush feel, a clean paintbrush works surprisingly well – it sweeps the charcoal grains without smearing.
For a budget‑friendly option, you can even repurpose a clean cotton swab; the key is to keep the tool dry and free of oils.
Real‑world example: sketching a mango in a Mumbai kitchen
Picture yourself at a bustling kitchen counter, a ripe mango half‑cut in front of you. You start with a light 2H‑like line to mark the outer curve. Next, you use a 3B for the subtle blush on the skin, hatching lightly around the stem. When the curve deepens, you grab a 4B, lay a few cross‑hatch strokes, and finally blend with a stump to mimic the glossy sheen.
Notice how the highlight stays bright because you lifted it with a kneaded eraser after blending. The result looks like a photograph, yet you only used three grades of charcoal pencil – exactly the kind of workflow we champion for beginners.
Tool checklist for flawless blending
- Blending stump or tortillon – choose a size that fits the area you’re working on (blending stumps at Blick).
- Kneaded eraser – the only eraser that lifts without grinding the paper.
- Rag or tissue – handy for wiping hands and preventing accidental smudges.
- Workable fixative (optional) – a light mist after the first tonal layer locks the dust in place.
Step‑by‑step shading workflow you can practice in 15 minutes
- Sketch a simple shape (a sphere, a cup, or a fruit) with a light side‑hold stroke.
- Apply a base layer using a hard (H) grade – keep the pressure feather‑light.
- Build the mid‑tone with a medium (HB) grade, using hatching or stippling.
- Deepen the darkest shadow with a soft (B) grade, adding cross‑hatching for texture.
- Blend the transition zones with a stump, then lift the brightest highlights with a kneaded eraser.
- Spritz a quick mist of fixative if you plan to add more layers later.
Do this routine daily, and you’ll start to see those smooth gradients appear almost automatically. It’s the same “muscle memory” that turns a shaky line into a confident mark.
Quick expert tip you won’t find in a textbook
When you hit a stubborn, gritty patch, pause and tap the pencil tip on a scrap piece of paper. A tiny “reset” clears excess charcoal from the lead, giving you a cleaner stroke for the next pass.
And remember – every mistake is a data point. If a blend turns too gray, lift a bit more, or add another layer of light hatching. The process is iterative, not final.
With these shading and blending methods in your toolbox, charcoal pencils for beginners become a reliable partner rather than a temperamental foe. Keep experimenting, stay playful, and let the charcoal do the talking.
Step 5: Finishing Touches and Fixatives
Alright, you’ve built the values, blended the shadows, and your charcoal pencils for beginners are finally starting to look like a real drawing. The next question most of us ask is, “How do I keep this from turning into a smudge‑fest the minute I set it down?” The answer lives in the finishing touches – mainly a little spray, a gentle brush, and a bit of patience.
Why a fixative matters
Charcoal is beautiful, but it’s also fragile. One accidental finger, a gust of wind, or even a careless stack of sketchbooks can lift the graphite right off the paper. A fixative creates a thin, protective skin that locks the particles in place without turning your work into a glossy billboard.
Most artists treat fixative as the final “seal” – like a varnish on a painting. But you can also use a workable fixative mid‑process to give the paper extra tooth for later layers. It’s a tiny trick that lets you keep drawing white charcoal over dark areas without the paper getting too slick.
Choosing the right kind
| Fixative Type | Best For | Key Notes |
|---|---|---|
| Workable (spray) | Layering after the first mid‑tone | Leaves a matte surface; re‑spray for extra protection. |
| Permanent (aerosol) | Finished piece you’ll frame | Creates a durable seal; can darken values slightly. |
| Water‑based (e.g., SpectraFix) | Delicate papers or mixed‑media work | Non‑toxic, but test on a scrap first to avoid warping. |
In our experience teaching art students across Mumbai and Bengaluru, the workable spray is a lifesaver for those who love to keep adding details. If you’re working on a thinner sketchpad, the water‑based option is kinder to the paper, but you’ll want to tape the edges down first to stop any buckling.
Step‑by‑step: spraying like a pro
1. Prep your workspace. Open a window, or work outside if the spray says “use outdoors.” A simple cross‑ventilation trick keeps fumes away from your lungs.
2. Test on a scrap. Give the spray a quick puff on a corner of the same paper. Let it dry, then smudge with a fingertip. If the charcoal stays, you’re good to go.
3. Secure the drawing. Tape the back edge with painter’s tape, and if you can, mount the paper on a light board. This prevents warping and keeps the edges covered.
4. Shake the can. Most cans need a 2‑minute shake – you’ll hear a faint rattling. This mixes the formula and avoids clumps.
5. Spray distance. Hold the can about 30‑60 cm (12‑24 in) away. Move in a smooth, overlapping motion, sweeping left‑to‑right for the first coat.
6. Dry time. Let the paper rest for at least 30 minutes before touching it again. If you need more protection, repeat the spray from top‑to‑bottom for a second coat.
7. Final check. Once dry, give the surface a gentle brush with an ultra‑soft brush or a clean tissue to whisk away any stray particles.
Common pitfalls (and how to dodge them)
Ever sprayed and noticed the whole drawing got a little darker? That’s a typical side‑effect of permanent fixatives. The trick is to apply a very light first coat, then step back and decide if you need another. If you’re worried about darkening, stick with the workable spray until the piece is complete.
Another hiccup is paper warping. Thinner pads love to curl when wet. The fix is simple: use heavyweight, textured paper (90 lb/150 gsm or more) and always tape the edges before you spray. It’s a small step that saves you from a crinkled masterpiece.
Quick tip from the studio
When you’re about to add a final highlight with a white charcoal pencil, give the area a micro‑spritz of workable fixative first. It creates a “toothy” spot that grabs the white pigment better, so your highlight won’t get swallowed by the surrounding dark.
If you want to see the whole process in action, check out this concise step‑by‑step fixative guide video. It walks through the same steps we just described, with visual cues that are handy for visual learners.
Remember, the goal isn’t to lock your drawing in stone; it’s to give you confidence that the work you’ve poured hours into won’t vanish with a single touch. A light mist now, a careful dry‑down later, and you’ll have a piece that you can safely frame, transport, or even gift without the dreaded smudge.
And when you finally step back and see that finished charcoal drawing hold its own, you’ll know those finishing touches were the missing puzzle piece.
Conclusion
We’ve come full circle – from choosing the right 2B‑4B charcoal pencils for beginners, to priming your paper, mastering strokes, shading, and finally sealing the work with a light fixative spray.
What does all that mean for you? It means you now have a reliable roadmap that turns shaky first lines into confident, expressive sketches you can actually show off.
Remember, charcoal is forgiving, but the real magic happens when you give each layer a little pause, lift highlights with a kneaded eraser, and protect the surface before you move on.
So here’s a simple next step: set aside 15‑20 minutes three times a week, pick a quick subject – a mango, a coffee cup, a street corner – and run through the whole workflow without worrying about perfection.
When you see the gradual improvement, you’ll feel the same satisfaction we get when a beginner’s drawing finally holds its own in a gallery‑sized frame.
Ready to keep the momentum going? Dive deeper into our charcoal pencil resources at Drawing Pencils Guru and turn today’s practice into tomorrow’s masterpiece.
And don’t forget, the more you experiment with different grades and paper textures, the faster you’ll discover your own voice. Keep a sketchbook handy, and let every mark teach you something new.
FAQ
What are the best charcoal pencil grades for beginners?
For most newcomers, a 2B‑4B range hits the sweet spot. A 2B gives you light, lift‑able lines that are perfect for sketching the basic shape. Move up to a 3B or 4B when you need richer shadows or a velvety black. This progression lets you experiment without the pencil feeling too soft or too hard, and it matches the workflow we recommend at Drawing Pencils Guru.
How should I hold a charcoal pencil to avoid smudging?
Try a relaxed, side‑on grip for the first light layer – it spreads the charcoal gently and keeps your fingers away from the paper. When you get to darker values, flip the pencil to a tip‑hold and apply a little more pressure. Keep a clean rag or tissue handy and wipe your hands often; even a tiny oil film can turn a smooth blend into a greasy mess.
Do I need special paper for charcoal pencils for beginners?
Yes, the paper’s tooth matters. Look for a medium‑to‑heavyweight, cold‑press sheet (around 150 gsm or more). The texture gives the charcoal something to cling to, so your strokes stay where you put them. If you’re on a budget, a simple sketch pad with a slight tooth works fine, but avoid glossy printer paper – it’ll make every line disappear.
How often should I sharpen my charcoal pencils?
Sharpen whenever the tip feels dull or you start dragging across the surface. A quick sandpaper block can revive a blunt point without taking off too much wood. For beginners, a fresh tip every 5‑10 minutes during a session keeps the line quality consistent and prevents you from pressing harder than needed, which can fatigue your hand.
Can I blend charcoal without a blending stump?
Absolutely. A clean cotton swab, a soft paintbrush, or even a piece of rolled‑up paper towel works in a pinch. The key is to keep the tool dry – any moisture will cause the charcoal to clump. Light, circular motions over the mid‑tone area will smooth transitions without turning the whole drawing into a uniform gray.
When is the right time to use fixative?
Apply a light mist of workable fixative after you’ve built the first tonal layer. This locks the dust in place and stops later strokes from smearing the lighter values you’ve already set. Wait at least 30 seconds before you continue, then you can safely add darker layers or even a white charcoal highlight without worrying about accidental smudges.
How do I fix a mistake without ruining the whole drawing?
First, try lifting with a kneaded eraser – it picks up charcoal without grinding the paper. If the mark is stubborn, gently rub a clean tissue over the area to absorb excess particles. For larger errors, a tiny dab of fixative can seal the surrounding tones, letting you redraw the spot without the rest of the paper turning into a mess.
