
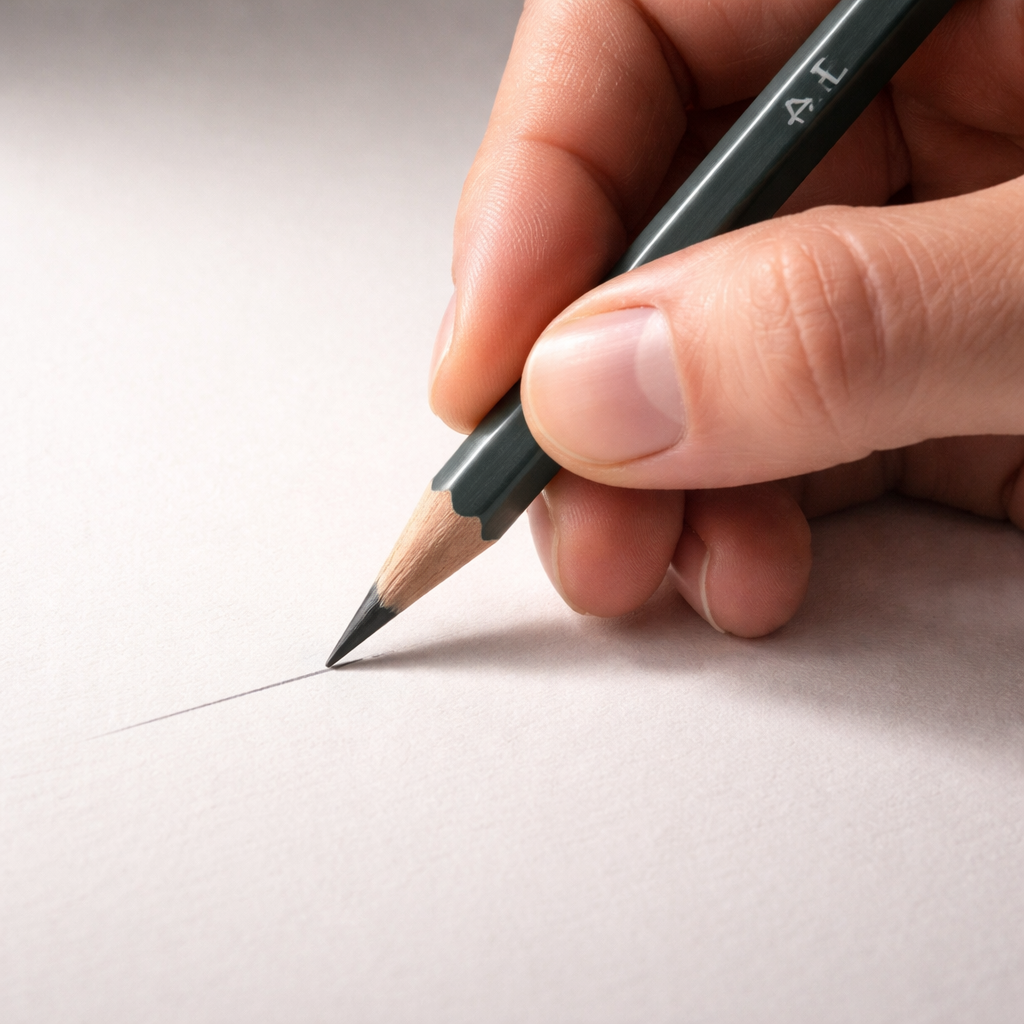
When you need razor‑thin lines, the right pencil can be the difference between a sketch that pops and one that looks fuzzy.
Most artists reach for a hard‑grade graphite, like an 8H, because it holds a sharp point and leaves barely any gray. But a hard lead can also feel brittle, so you’ll want a pencil that balances stiffness with a smooth feed.
Here’s a quick three‑step test you can try at home: first, draw a 2‑inch straight line with steady pressure. Second, tilt the pencil 45° and see if the line stays even. Third, shade a tiny circle and check if the lead smudges after a minute. If the line stays crisp and the smudge is minimal, you’ve likely found a solid candidate for detailed work.
In our experience, the best graphite pencil for fine line drawing consistently passes this test, offering a fine point that lasts longer than many budget options.
Even the best pencil can’t fix a wandering focus. Try working in 25‑minute bursts with short breaks – a rhythm many art students swear by. The Pomodoro timer guide from FocusKeeper walks you through setting up those intervals, so you can stay in the zone while you perfect every tiny stroke.
Understand Pencil Grades and Their Impact on Detail
When you chase razor‑thin lines, the grade of your graphite decides how sharp the point stays and how light the mark looks.
Pencil grades run from 9H (hard) to 9B (soft). The “H” side gives you a firm lead that snaps quickly, but it leaves almost no gray. The “B” side feels smooth and dark, yet it rounds off fast, making it hard to keep a tiny tip.
For the best pencil for detailed drawing, aim for a grade in the middle-hard range, usually 2H to 4H. These leads are stiff enough to hold a point under light pressure, but they still slide across smooth paper without catching.
Try this quick check at home: draw a straight 2‑inch line with steady pressure. Then tilt the pencil 45° and draw another line. If the second line stays even and the tip looks unchanged, you’ve got a good grade for fine work.
Next, shade a tiny circle for a few seconds. Let it sit for a minute. If the gray stays clean and doesn’t smudge, the lead is hard enough for precision.
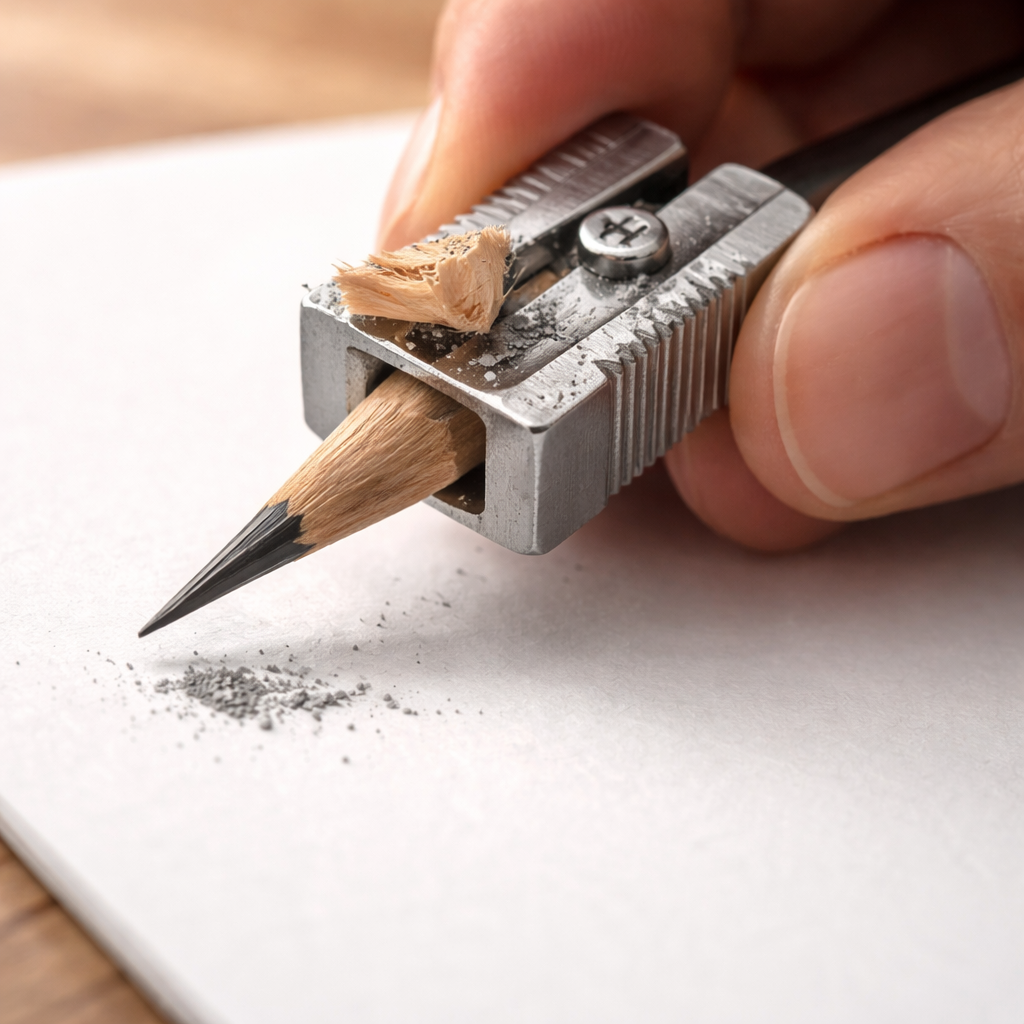
Sharpness matters too. A fresh, well‑sharpened tip lets you control line width like a pen. Use a rotary cutter or a metal hand‑sharpener set to a fine angle, about 30°. Keep the cutter clean so you don’t dull the lead.
After watching the video, grab a few grades side by side. Compare a 2H, a 4H, and a 6H on the same sheet. Notice how the 2H leaves a faint gray, while the 6H looks almost like a faint scratch. Pick the one that gives you a line you can see but can also erase cleanly.
When you mix the right grade with proper grip and steady breathing, those tiny strokes turn into crisp details that make your art pop.
Select the Right Lead and Wood Type for Precision
When you need a line that stays sharp for hours, the lead and the wood that holds it are the first things to check. A brittle lead will break, a soft wood will wobble, and your detail work suffers.
Pick a lead that matches your line weight
Grab a few grades 2H, 4H, 6H and draw a 2‑inch line with light pressure. The line should be faint but visible. If it looks too light, move to a softer grade; if it looks too dark, step up to a harder grade. The right hard lead will give you a clean gray that erases cleanly. This quick test lets you spot the grade that feels right for the different pencil grades used in detailed work.
Choose wood that feels steady
Wood affects balance and how the lead feeds. A tight‑grained cedar or basswood gives a smooth, even grip. Test the barrel by rolling it between your fingers, it should feel solid, not splintery. If the wood gives a little give, the lead may wobble and your strokes will wobble.
Artists in India often prefer a slightly lighter wood for long sessions because it reduces hand fatigue. For academic sketches, a fir‑based wood that snaps less when you press hard works well.
Combine lead and wood for the best pencil for detailed drawing
Match a hard lead (4H to 6H) with a firm, tight‑grained wood. This combo holds a fine point and lets you control pressure without the tip breaking. Keep a spare pencil of a softer grade nearby for shading or dark accents.
Quick checklist
- Test 2‑inch line with light pressure.
- Pick a grade that leaves a faint gray.
- Feel the wood, it should be smooth and solid.
- Pair hard lead with firm wood for precision.
Test Sharpening Techniques to Maximize Detail
Getting a razor‑thin tip is half the battle for the best pencil for detailed drawing.
If the point breaks or blunts before you finish a line, your work loses its crisp edge.
Two‑stage long point sharpener
Pick a sharpener that cuts the wood first, then the lead. The KUM long point model does exactly that. The first hole trims the cedar barrel, the second hole shapes a thin, break‑resistant tip. Because the lead never gets squeezed, you keep a long point that slides smoothly across the paper. Read more about this sharpener.
Sandpaper pointer trick
For mechanical leads, a tiny sandpaper block works wonders. Hold the lead in its holder, press the tip against the sandpaper, and give it a gentle twist. The grit files the graphite into a sharp needle without shaving off too much material. The Staedtler Mars Lead Pointer follows the same idea and is built for 2 mm leads. See the tool options.
Quick sharpening checklist
- Test a 2‑inch line after each sharpen. It should stay even.
- Look for a point that’s long but not flimsy.
- Feel the wood; it should be solid, not spongy.
- For mechanical leads, check the sandpaper tip for a clean, sharp edge.
Try these steps before you start a new sketch. A sharp tip lets you control pressure and line weight with confidence. It also means fewer breaks, so you spend more time drawing and less time swapping pencils.
Remember, the best pencil for detailed drawing only lives up to its promise when the point stays true. Sharpen smart, and your fine lines will stay crisp from start to finish.
Compare Top Recommended Pencils
When you hunt for the best pencil for detailed drawing, the brand you pick can change how steady your line feels.
Here’s a quick look at three pencils that keep a fine tip without breaking.
Faber‑Castell 9000 (hard‑grade range)
These pencils sit at 4H‑2H and give a light, crisp mark. The SV bonding means the lead runs the whole length of the wood, so you rarely get a snap while sharpening. Artists who need a clean, almost‑invisible line love them for hatching and tight cross‑hatching.
Staedtler Mars Lumograph (mid‑tone range)
Covering 6H‑4B, the Lumograph balances hardness and darkness. The lead is well‑bonded and stays sharp even after a few passes, which helps when you switch from a thin outline to a slightly darker tone without swapping tools.
Koh‑i‑Noor Hardtmuth Toison d’Or (budget‑friendly)
Its 4H‑8B span lets you start light and finish dark without buying another set. The matte black barrel feels solid, and the grade printed on each side saves you time hunting for the right shade.
So, which one fits your sketchbook?
| Pencil | Grade range | Detail strength |
|---|---|---|
| Faber‑Castell 9000 | 4H‑2H | Super steady tip, minimal breakage |
| Staedtler Mars Lumograph | 6H‑4B | Good for light to medium dark lines, holds point |
| Koh‑i‑Noor Toison d’Or | 4H‑8B | Wide range, reliable grip, budget‑smart |
In a side‑by‑side test, the 9000 held its point longest, the Lumograph gave the smoothest transition between grades, and the Toison d’Or offered the most bang for the buck. Pick the one that matches the pressure you use most – light hand, medium pressure, or a mix.
For a deeper dive into how these brands compare, see the full review by a UK portrait artist who tested each range in real sketches.Anna Bregman’s pencil brand review.
When you add color, the Wirecutter roundup notes that Prismacolor’s Premier set keeps a sharp tip even on softer wax cores.Wirecutter colored pencil guide.
Maintain and Store Your Pencils for Consistent Performance
Sharp pencils are the backbone of the best pencil for detailed drawing. When the tip stays fine, every line feels clean and you don’t waste time fixing smudges.
Sharpness matters
First, give your pencil a quick check before each sketch. Hold it at arm’s length and look for a clear point. If the tip looks dull, give it a brief shave with a single‑edge razor or a two‑hole long‑point sharpener. A razor‑sharp tip lets you trace tiny details without the lead bending or breaking.
Many artists notice that cheap sharpeners can crush the wood and snap the lead. The Toad Hollow Studio guide points out that a single‑blade sharpener often dulls fast and can chip the graphite, leading to uneven lines.Read more about proper sharpening.
Store in the right spot
Next, think about where you stash your pencils. Aim for a cool, dry drawer that stays between 60°F and 75°F with 40%–60% humidity. Too much heat makes the wood warp; too much moisture invites mold and makes the lead brittle.
The Haobin Art blog notes that keeping pencils away from heaters and bathrooms protects the wood casing and stops the graphite from expanding or contracting.Learn more about ideal storage conditions.
Organize by grade
Sort your pencils by hardness – put the hard ones (4H‑2H) in one slot, the softer shades (B‑4B) in another. A simple label or a small zip‑top bag does the trick. When you know exactly which lead you need, you skip the rummage and stay in the flow.
Does it feel odd to spend a minute labeling? Try it for a week and you’ll see how much smoother your work feels.
Protect the wood
Wrap the ends of pencils you’re not using in a soft cloth or a plastic sleeve. This stops dust from settling on the wood and keeps the tip from getting nicked.
Finally, give each pencil a quick brush with a soft art‑brush before you store it. A light sweep lifts graphite dust and keeps the surface clean for the next session.
Follow these habits and your pencils will stay ready, your lines will stay crisp, and you’ll get more out of each stick – a real win for anyone chasing that perfect detail.
FAQ
What pencil grade gives the best detail?
For razor‑thin lines you want a lead that stays hard enough to keep a point but still leaves a visible mark. Most artists find 2H to 4H works best. The lead is stiff, so it won’t round off quickly, and the gray is light enough to erase cleanly. Test it by drawing a 2‑inch line; if the tip looks unchanged, you’ve got the right grade.
How often should I sharpen for fine lines?
Sharpness is the heart of detail work. We recommend sharpening right before you start each sketch, or whenever the tip looks dull. A rotary cutter set to about 30° gives a long, thin point without crushing the wood. If you use a two‑hole long‑point sharpener, check the line after each pass – it should stay even and crisp. A quick swipe with a single‑edge razor can also refresh the tip if you’re in a hurry.
Can a mechanical pencil replace a wooden one for detailed drawing?
Mechanical pencils can give you a steady line without the worry of breakage. They work well for fine detail if you choose a 0.5 mm or 0.7 mm lead and keep it hard, like a 2H. The lead stays the same size, so you don’t have to sharpen. Many artists in India love them for quick studies, but they may lack the tactile feel of wood.
What storage tips keep my pencils ready for detail work?
Store your pencils in a cool, dry spot, a drawer away from heaters works fine. Keep humidity around 40‑60 % to stop the wood from swelling. Wrap unused ends in a soft cloth or a plastic sleeve so dust can’t settle. Label each slot by grade; a quick glance saves you time and keeps your workflow smooth. You can also use a small zip‑top bag for a set of similar grades to keep them together.
How does paper choice affect the performance of the best pencil for detailed drawing?
The paper you draw on changes how the best pencil for detailed drawing behaves. Smooth, hot‑pressed paper lets the hard lead glide without catching, giving you clean lines. Rougher paper can drag the tip and cause it to flatten faster. Try a 200‑gsm Bristol board for line work and a slightly toothier sketch pad for shading. A good rule is to test a short stroke; if the line stays sharp, the paper is right.
Do I need different pencils for shading vs. line work?
Yes, most artists use at least two grades: a hard lead for outlines and a softer lead for shading. The hard pencil (2H‑4H) keeps the edge thin, so you can trace fine edges. Switch to a B‑grade when you need depth or dark tones; the softer lead lays down more graphite without extra pressure. Keeping both handy lets you move fast between line and tone.
Conclusion
Finding the best pencil for detailed drawing isn’t a mystery once you know what to look for.
Pick a hard grade like 2H-4H, match it with tight-grained wood, and keep the tip razor sharp.
Store your sticks in a cool, dry drawer and label each slot – a quick glance saves time and keeps your line work steady.
Test before you start: draw a 2-inch line, tilt the pencil, and check that the mark stays even. If it does, you’re ready to sketch fine details without fuss.
Remember, the tool is only as good as the habit you build. Sharpen smart, store smart, and let the pencil do the heavy lifting.
Ready to upgrade your sketch kit? Explore the picks on Drawing Pencils Guru and find the perfect match for your next masterpiece.
