
Getting realistic animal fur onto paper feels impossible for most artists. The truth is, the right pencil can turn that struggle into a smooth ride.
Soft graphite leads capture the subtle shifts of a cat’s whiskers, while a harder grade lays down the sleek shine of a horse’s coat. When you match lead softness to the fur type, the texture pops without endless smudging.
Here’s a quick way to test a pencil before you buy: grab a scrap of smooth drawing paper, press lightly, and draw a short stroke. If the line glides and lifts cleanly, you’ve got a good balance of hardness and smoothness for fur work.
A common mistake is using a charcoal stick for fine fur details. Charcoal is great for deep shadows but it blobs when you try to render individual hair strands. Stick with graphite or a soft colored pencil for those tiny lines.
Our step‑by‑step guide on how to draw fur with graphite pencils walks you through pressure control, layering, and blending tricks that work on everything from a fluffy rabbit to a sleek otter.
Once you’ve nailed the fur, you might think about where those drawings can live. Many artists turn their animal sketches into picture books, and a good partner is Lyndsey Crawford Publishing, which helps bring illustrated children’s books to market.
In this article you’ll see the top pencils that deliver soft, controllable strokes, learn how to keep the lead sharp for fine lines, and get a simple checklist to build a fur‑focused pencil kit without spending on unused tools.
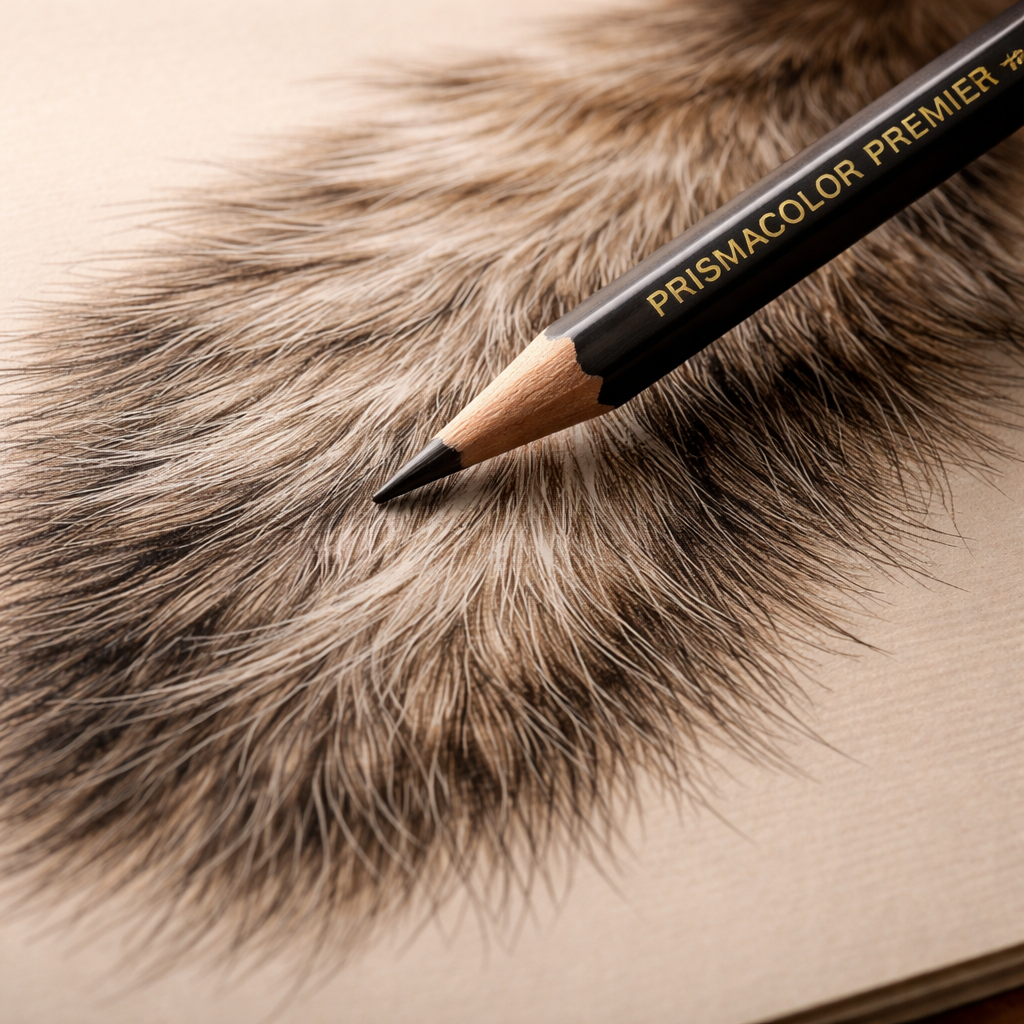
Our Pick: The #1 Pencil for Realistic Fur
When you want fur that looks like real hair, the right pencil matters more than any trick. That’s why our top pick is the Prismacolor Premier Soft Core #2. Its lead is soft enough to glide in tiny strokes, yet holds a point that lets you draw each whisker without breaking.
Why this pencil beats the rest? First, the graphite mix stays dark even when you layer it, so you can build depth without smudging too much. Second, the wood casing is smooth, so you can twist the pencil without snapping. Third, the eraser tip on the end lets you lift stray hairs cleanly, a small feature that saves time.
Try the test we mentioned earlier: draw a short line on smooth paper. With the Prismacolor #2 the line should feel buttery and lift off without grinding. If it feels gritty, look for a softer grade like #B or a different brand.
Many artists in India and elsewhere use this pencil for pet portraits, rabbit sketches, and even detailed bird feathers. It works well on both bright white sketch pads and toned paper, giving you flexibility no matter where you draw.
If you plan to turn your fur studies into prints, a good printing partner helps keep those delicate lines sharp. One service that many creators trust is Jiffy Print Online, which handles high resolution art prints without washing out fine detail.
And when you want to show your finished animal art alongside home décor, think about pairing it with coastal wood flower pieces. A guide on how to display coastal wood flower art gives simple ideas for framing your sketch in a living room.
Remember to keep your pencil sharp for those fine hairs. A tiny rotary sharpener works best, it trims the lead without crushing it.
How to Choose the Right Pencil Hardness for Animal Fur
Picking the right hardness is the first real step to making fur look alive. Too soft and the line blurs; too hard and the hair looks flat.
Know the coat type
If you’re drawing a fluffy rabbit, you want a soft lead like a 2B‑4B. The soft lead deposits more graphite, so each stroke can mimic the thick, downy hairs.
For sleek coats – think a horse or a cat’s back – a harder grade such as HB‑2H gives you thin, crisp lines that follow the smooth flow of the hair.
Three quick tests
1. Grab a scrap of smooth paper. Draw a short line with the pencil you’re testing.
2. Lightly shade over the line. If the graphite spreads too much, the lead is too soft for fine detail.
3. Lift the line with a kneaded eraser. A clean lift means the lead holds its shape, a sign of the right hardness for that fur texture.
Practical example
Imagine you’re sketching a Bengal tiger’s mane. Start with an HB for the base, then switch to a 2B for the darker, shaggy strands. The mix lets you keep the fine edges while adding depth where the hair is denser.
For a hypothetical squirrel tail, you might use a 4B to get those soft, fluffy edges, then finish the tip with a 2H to show the glossy shine.
Expert tip from Drawing Pencils Guru
Many artists find that keeping a small set of 2H, HB, 2B, and 4B covers 90% of animal fur jobs. Rotate the pencils as you work, never force a hard lead to make a soft hair – it will break or look wrong.
Another tip: sharpen each pencil to a fine point before you start. A sharp tip lets you draw individual hairs without extra pressure, which keeps the paper from darkening too fast.
Need a visual walk‑through? Check out this quick video tutorial that shows the switch between hard and soft grades while drawing a cat’s fur.
Follow these steps, and you’ll pick the right hardness for any animal coat, from the softest bunny to the sleekest otter.
Comparison of Top 5 Pencils for Fur Texturing
When you need to pull off soft fluff or crisp hair, the right pencil makes all the difference. Below is a quick look at the five picks that most artists trust for realistic animal fur.
Key factors
Sharp point for fine hairs, smooth lay‑down for smooth coats, and a colour range that reads like real fur. You’ll also want a price that fits your budget.
A good pencil lets you work fast and keep the paper clean.
Our top five
Prismacolor Premier: soft wax core, great for blending, perfect for fluffy coats like rabbit or fox.
Faber‑Castell Polychromos: oil‑based core, holds a fine tip, ideal for tight strands on a tiger’s mane.
Caran d’Ache Luminance: light‑fast oil core, balances blend and point, works well for sleek coats such as horse or cat.
Arteza Premium: affordable wax core, decent sharpness, good starter choice for beginners in India.
Derwent Coloursoft: very soft wax, excels at airy fur like a cloud‑like squirrel tail, but needs careful handling.
So, which one fits your next project? Think about the animal you’re drawing, the level of detail you need, and how much you want to spend.
| Pencil | Lead type | Best fur use | Price tier |
|---|---|---|---|
| Prismacolor Premier | Wax | Fluffy, layered fur | Mid |
| Faber‑Castell Polychromos | Oil | Fine strands, high detail | Mid‑high |
| Caran d’Ache Luminance | Oil | Sleek, shiny coats | High |
| Arteza Premium | Wax | Beginner projects, soft fur | Low |
| Derwent Coloursoft | Wax | Very soft, airy fur | Mid |
Remember, you don’t have to stick to one brand. Many artists mix a soft wax for bulk shading with an oil pencil for crisp edges. That blend lets you capture the full range of fur texture without breaking the tip.
For a deeper dive into how each lead behaves, check out Sarah Renae Clark’s colored pencil buying guide. It breaks down blend, sharpness, and lightfastness, all things that affect realistic fur.
Pick the pencil that matches the animal you’re drawing, sharpen it to a fine tip, and let the hair grow on the page. Give it a try and see the fur come alive in minutes.
Pro Tips: Techniques to Render Fur with These Pencils
Start with a light sketch of the animal’s shape. A loose outline lets you place the fur flow before the pencil meets the paper.
These tips show why the best pencils for drawing realistic animal fur often pair a soft wax core with an oil core.
Layer the tones
Pick a soft wax pencil for the under‑coat. Drag short, overlapping strokes in the direction the hair grows. Then grab an oil‑based pencil for the highlight strands. Lightly lay them on top. The contrast gives depth without smudging the whole area.
Control the pressure
Use a gentle hand for the fine hairs. Press harder only when you need a darker patch, like a shadow on a rabbit’s side. This keeps the paper from getting too dark too fast.
Blend with purpose
A soft blending stump works well with wax leads. Sweep it lightly, then step back and see where the fur still looks flat. Add a quick flick of the oil pencil to bring back the crisp edge of each strand.
Switch pencils on the fly
Many artists find it handy to keep a 2B and a 4H in the same holder. The 2B builds the fluffy bulk, the 4H draws the sleek shine on a horse’s mane. A quick tip: sharpen each to a fine point before you start. A sharp tip gives you hair‑like lines without extra pressure.
Practical example
Imagine you’re drawing a squirrel tail. Begin with a Derwent Coloursoft to lay down the airy base. Add a thin line of Prismacolor Premier for the darker, wind‑blown tips. The mix lets you see both softness and texture.
Need a visual reference? Check out this short video demo that walks through each step on rendering fur with colored pencils.
Finally, protect your work. A light spray of fixative keeps the layers from shifting as you add more detail. That way the fur stays crisp right up to the final highlight.
FAQ
What type of pencil lead works best for soft fur?
For fluffy coats like a rabbit or a kitten, a soft wax‑based colored pencil (around 2B‑4B) lays down a lot of pigment with little pressure. The soft lead lets you build up airy strokes that look like downy hair. A harder lead (HB‑2H) will give you thin, crisp lines for the shiny tips. Switching between the two as you work mimics the way real fur changes from soft to sleek.
How can I keep my pencil tip sharp for fine hair lines?
Use a small metal or rotary sharpener that lets you set a fine point. Rotate the pencil slowly and pull it out once the tip looks needle‑like. Keep a spare piece of sandpaper handy for quick touch‑ups. A quick test: draw a single hair on scrap paper; if it’s thin and even, the tip is ready. Sharpen often – the tip dulls fast when you work on dense fur.
Can I mix colored and graphite pencils for realistic fur?
Yes. Start with a light graphite grade (HB) to sketch the basic shape and lay down soft shadows. Then add a soft colored pencil for the main body of the fur – this gives you rich tone and easy blending. Finish with a harder colored lead for the bright tips or whiskers. The mix lets you capture both the subtle value shifts of graphite and the vivid colour of wax pencils.
What paper works best with the best pencils for drawing realistic animal fur?
Choose a smooth, heavyweight drawing paper (around 160‑200 gsm). A vellum or hot‑pressed surface lets the soft lead glide without tearing, while still holding enough pigment for deep tones. Avoid rough texture; it will catch the tip and make the hair look jagged. If you work with oil‑based colored pencils, a paper with a slight tooth helps the pigment grip and stay in place.
How many pencils should I keep in my kit for different animal coats?
A small core set of four pencils covers most fur types: a soft 2B or 4B for fluffy under‑coat, an HB for mid‑tone layers, a 2H for sleek highlights, and a colored wax pencil like Prismacolor Premier for colour depth. Add an oil‑based pencil if you want extra shine on horse mane or cat fur. This range lets you switch quickly without over‑loading your bag.
Do I need a fixative, and how should I apply it?
A light spray fixative helps lock in the layers so they don’t smudge when you add more detail. Choose a fixative made for colored pencils and work in a well‑ventilated room. Hold the can about a foot away and mist the drawing in thin, even coats. Let each coat dry for a minute before adding the next. One or two coats are enough for most fur work.
Conclusion
You’ve seen how the right lead can turn a fuzzy sketch into lifelike fur. Soft wax, oil, or a hard graphite tip each have a job, and picking the right one saves you time and frustration.
Our top pick, Prismacolor Premier soft wax, gives smooth strokes and stays sharp for tiny hairs. Pair it with a Faber‑Castell 9000 graphite for crisp highlights, and you have a kit that covers most animal coats without breaking the bank.
A quick test before you start: draw a short line on smooth paper, lift it, and check if the tip still feels round. If it does, you’re ready to layer, blend, and add the final shine.
Grab the pencils, sharpen to a needle point, and let your sketch grow fur by fur. Need a step‑by‑step guide? Our Drawing Pencils Guru tutorials break each stage down in plain language.
