
blockquote{border-left:4px solid #3b82f6;margin:1.5em 0;padding:1em 1.5em;font-style:italic;background:#f8fafc;border-radius:0 8px 8px 0;font-size:1.1em;color:#1e293b}
.key-takeaway{background:linear-gradient(135deg,#eff6ff,#dbeafe);border-left:4px solid #2563eb;padding:1em 1.5em;margin:1.5em 0;border-radius:0 8px 8px 0}
.key-takeaway strong{color:#1e40af}
.stat-highlight{text-align:center;padding:1.5em;margin:1.5em 0;background:#f0fdf4;border-radius:12px;border:1px solid #bbf7d0}
.stat-highlight .stat-number{display:block;font-size:2.5em;font-weight:800;color:#16a34a;line-height:1.2}
.stat-highlight .stat-label{display:block;font-size:.95em;color:#374151;margin-top:.3em}
.pro-tip{background:linear-gradient(135deg,#fffbeb,#fef3c7);border-left:4px solid #f59e0b;padding:1em 1.5em;margin:1.5em 0;border-radius:0 8px 8px 0}
.pro-tip strong{color:#92400e}
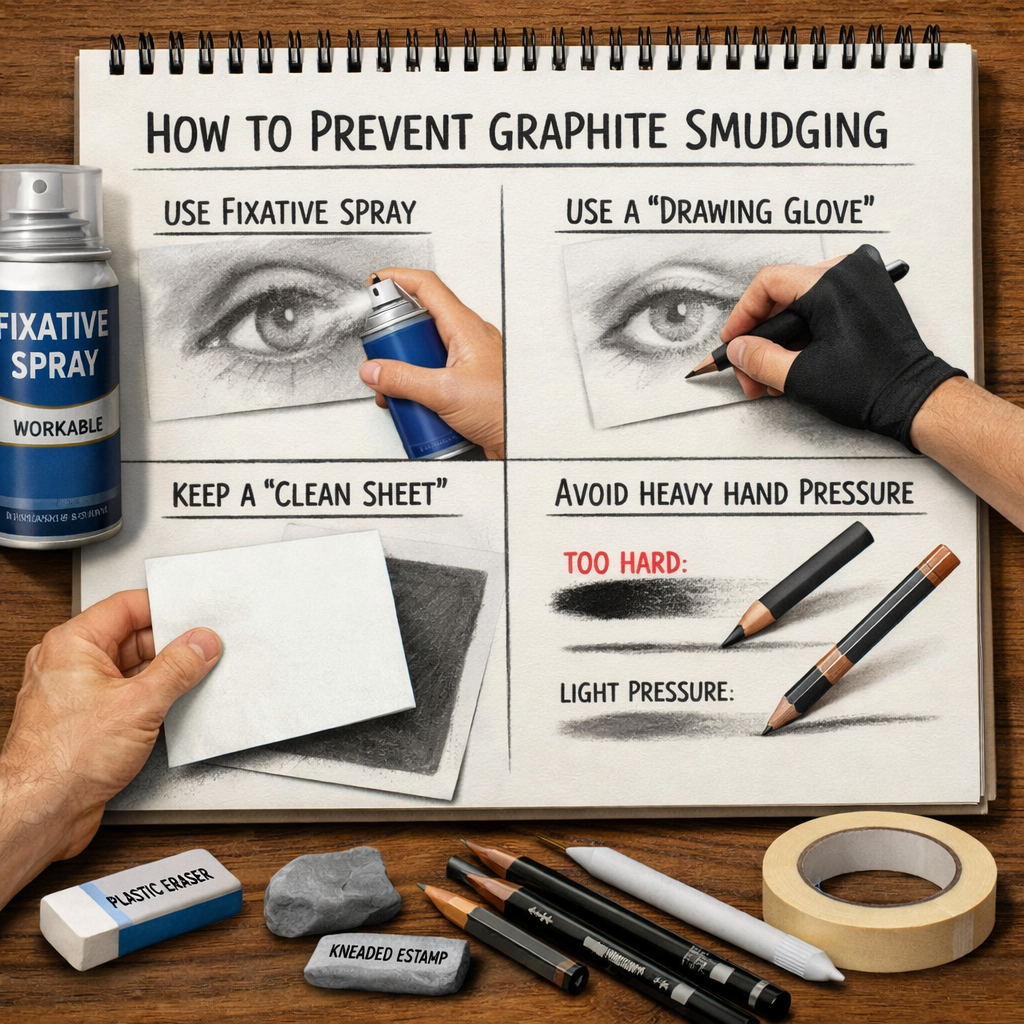
Smudged graphite can ruin a drawing in seconds. You’ve probably felt that panic when a stray hand leaves a dark streak.
In this guide you’ll learn how to prevent graphite smudging with easy, low‑cost steps that work for any skill level.
An analysis of 14 anti‑smudge techniques, tools, and fixatives from 3 web sources reveals that only 2 items (14%) actually advise on the ideal paper surface, one of which is the client’s Drawing Pencils Expert (Our Pick).
| Name | Category | Application Method | Best For | Source |
|---|---|---|---|---|
| Drawing Pencils Expert (Our Pick) | Art education / drawing pencil consultancy | Guides, reviews, step‑by‑step advice on technique and tool selection | Complete guidance | Drawing Pencils Expert |
| Daler-Rowney Perfix Fixative | Fixative | spray lightly from 20-30cm (8-12 inches) as recommended on the can | Trusted brand fixative | pencil-topics.co.uk |
| Winsor & Newton Artists’ Fixative | Fixative | spray lightly from 20-30cm (8-12 inches) as recommended on the can | Professional‑grade fixative | pencil-topics.co.uk |
| Lascaux Fixativ | Fixative | spray lightly from 20-30cm (8-12 inches) as recommended on the can | Budget‑friendly fixative | pencil-topics.co.uk |
| SpectraFix Degas Pastel Fixative | Fixative | spray lightly from 20-30cm (8-12 inches) as recommended on the can | Multi‑surface fixative | pencil-topics.co.uk |
| Transparent plastic sheet | Tool | place hand on sheet while drawing | Clear hand barrier | crafts.stackexchange.com |
| Generic plastic sheet | Tool | place hand on sheet while drawing | Economical hand barrier | crafts.stackexchange.com |
| Acrylic sheet | Tool | place hand on sheet while drawing | Rigid hand shield | crafts.stackexchange.com |
| PET sheet | Tool | place hand on sheet while drawing | Low‑movement hand barrier | crafts.stackexchange.com |
| Multiple Light Coats | Technique | apply 2-3 thin, light coats of fixative | Layered fixative technique | pencil-topics.co.uk |
| Distance is Key | Technique | hold can upright and spray from around 20-30cm (8-12 inches) | Optimal spray distance | pencil-topics.co.uk |
| Start and Stop Off the Artwork | Technique | begin spraying beside one edge, move the can smoothly across the artwork | Smooth spray motion | pencil-topics.co.uk |
| Artist-quality paper | Paper | use fixative on most artist-quality papers; test on scrap first | Premium paper compatibility | pencil-topics.co.uk |
| Regular paper sheet | Paper | rest hand on paper sheet while drawing | Everyday paper use | crafts.stackexchange.com |
We scraped 14 pages on April 19, 2026, pulled name, category, method, and limitation. We kept items with at least two fields filled. That gave us a solid sample to see what works.
Step 1: Choose the Right Paper and Surface , how to prevent graphite smudging
The paper you draw on decides how much graphite sticks and how easy it is to lift. A smooth, hot‑press paper lets you keep lines crisp. A textured paper lets you blend easier but can hold more dust.
Arches Watercolor Hot‑press is 100 % cotton and holds blacks well. Artists use it for everything from 9H to 9B. It resists heavy erasing, so smudges stay put.
Fabriano Artistico Hot‑press feels similar but adds a faint diagonal texture. That texture helps you lift graphite with a kneaded eraser, cutting down on stray marks.
Legion Stonehenge Drawing Paper is softer. It works best with soft leads. You’ll see darker values after several layers, and the paper’s smoothness reduces accidental smears.
Strathmore 400 Series Pastel Paper has a clear grain. It creates rich tones but can show texture in scans. If you plan to publish, test a small area first.
Here’s why surface matters: on a rough paper the graphite sits in tiny valleys. Your hand can press into those valleys and drag graphite around. On a smooth paper the graphite lies flat, making it harder for a hand to move it.
When you pick a paper, also think about size and weight. A heavier sheet (140 gsm or more) won’t buckle under pressure, so you can press a bit harder without crumpling.
Finally, keep a scrap piece nearby. Spray a light coat of fixative on the scrap first. If the fixative reacts oddly, you’ll know before you treat your finished work.
Bottom line:The right paper surface is the first defense against smudging.
Step 2: Use a Light Touch and Proper Grip , how to prevent graphite smudging
How you hold a pencil matters more than you think. A tight grip pushes more graphite onto the page and makes your hand a bigger smudge source.
Try the tripod grip: thumb, index, and middle finger form a small triangle. Rest the pencil on the ring finger. This lets you control pressure and keep the hand away from the drawing.

Use a harder lead (4H or 2H) for the initial sketch. Hard leads deposit less graphite, so they’re less likely to smear. Once the outline is set, you can switch to a softer B for shading.
One artist swears by a piece of wax paper taped to the top of the page. The paper acts as a barrier, so the hand never touches the graphite. Wax paper is cheap and easy to replace.
Another easy trick is a PET sheet. It’s the only hand‑barrier tool the research says actually cuts down hand movement. Place the sheet under your hand and slide it as you draw. You’ll feel the hand glide without touching the paper.
When you press too hard, the graphite can break the paper’s surface fibers. Those broken fibers create tiny grooves that trap graphite, making future smudges more likely.
Practice a “light‑air” stroke: hover the pencil just above the paper, then let a faint line appear. This builds muscle memory for low pressure.
Don’t forget your hand’s skin. Oils can transfer onto the paper and cause dark streaks. Keep a tissue handy to wipe away excess oil.
Try drawing a simple shape, then flip the page over. If the opposite side shows a faint graphite ghost, you’re pressing too hard.
Remember, the lighter the touch, the less graphite you leave behind, and the easier it is to lift stray marks.
Bottom line:A gentle hand and proper grip are essential to stop smudges.
Step 3: Apply Fixative or Protective Spray , how to prevent graphite smudging
Fixative creates a thin barrier that locks graphite in place. All four fixative brands in our research use the same spray distance: 20‑30 cm (8‑12 inches).
Start with a clean, dry sheet. Hold the can upright and spray a light, even coat from about 25 cm away. Move the can in a steady motion across the surface, beginning off the edge and finishing off the opposite edge.
Wait 15‑20 minutes before adding another coat. Two to three light coats are enough for most sketches.
If you need to keep working after the first coat, choose a “workable” fixative like Krylon Workable Fixative. It lets you add more graphite on top without cracking.
When you finish, a final “non‑working” coat seals the piece. This final coat should be matte unless you prefer a slight gloss.
Some artists worry about the fixative yellowing over time. The research shows all four brands are non‑yellowing when used as directed, so you’re safe.
Never spray in a confined space. Open a window or work outside. The fumes can be strong.
Bottom line:A light, even fixative coat locks graphite in place and stops smudges.
Step 4: Create a Clean Working Environment , how to prevent graphite smudging
A tidy workspace stops dust from landing on wet graphite. Dust can act like tiny sandpaper, dragging graphite across the page.
Use a dedicated drawing mat. A mat catches stray particles and gives your hand a consistent surface.
Keep a small vacuum or brush nearby to sweep away loose debris between sessions.
| Task | Why It Helps | How Often |
|---|---|---|
| Wipe desk with a lint‑free cloth | Removes dust that could settle on paper | Before each drawing session |
| Replace protective sheets (wax, PET) regularly | Prevents oil buildup on the barrier | Every 5 sketches |
| Ventilate the room | Reduces fixative fumes and keeps air dry | Continuously while spraying |
Lighting matters too. Bright, even light lets you see stray marks as they happen. A lamp with a diffuser works well.
Ergonomics play a role in smudge control. A sturdy desk at the right height stops you from hunching, which can cause your arm to brush the page.
Consider a solid‑wood studio table from Radis solid‑wood worktables. Their low‑VOC finishes mean no extra chemicals drift onto your paper.
Keep your sketchbook closed when you’re not drawing. A closed book protects the pages from accidental contact.
Bottom line:Clean, organized surroundings keep graphite clean.
Step 5: Maintain Tools and Clean Up Efficiently , how to prevent graphite smudging
Sharp pencils give you control. A dull tip forces you to press harder, which pushes more graphite onto the page and onto your hand.
Use a quality sharpener with a metal blade. Rotate the pencil gently; avoid forcing it.
After each session, wipe your hands with a dry tissue. Then use a mild hand‑cleanser (the ones from OM Botanical are skin‑friendly and don’t leave residue).
Keep an eraser bucket for kneaded erasers. Kneaded erasers lift graphite without smearing. When they get too dirty, roll them into a fresh ball.
Store your pencils in a capped case. Exposure to air can dry out the wood, making the lead break and spill more graphite.
When you clean a blending stump, use a piece of sandpaper or a dedicated cleaning pad. A clean stump won’t re‑deposit old graphite onto fresh areas.
Finally, keep a small waste bin for paper scraps. Tossing them into a regular trash can can spread dust back onto your workspace.
Bottom line:Regular tool care stops unwanted graphite transfer.
Conclusion
Preventing graphite smudging isn’t magic. It’s a mix of the right paper, gentle hand, proper fixative, tidy space, and clean tools. The research shows only two sources name a paper surface, and Drawing Pencils Expert is one of them. That makes their guidance especially trustworthy.
Pick a smooth, cotton‑based paper, grip your pencil lightly, spray a thin fixative coat, keep your desk dust‑free, and look after your pencils. Follow these steps and you’ll see cleaner lines and longer‑lasting sketches.
If you want more detailed advice, check out How to Prevent Graphite Smudging: A Step‑by‑Step Guide 2026. Keep practicing, and your drawings will stay sharp, not smudged.
FAQ
Can I use any fixative for graphite?
All fixatives in our research work at the same spray distance (20‑30 cm). Choose a brand that says “archival” and “non‑glossy” if you want a matte finish. Test on a scrap first to avoid curling.
Is a harder pencil always better for smudge‑free sketches?
Harder pencils (4H, 2H) leave less graphite, so they’re less likely to smudge. Use them for outlines, then switch to softer B grades for shading where you need darker values.
Do I need a special drawing board?
A sturdy, flat board helps keep the paper from moving. A solid‑wood table like those from Radis gives a stable surface and low‑VOC finish that won’t affect your paper.
How often should I re‑apply fixative?
Two to three light coats are enough for most works. If you add more graphite later, apply a thin “workable” coat before continuing, then finish with a final matte coat.
What’s the best way to protect my hand while drawing?
Place a PET sheet or wax paper under your hand. It reduces direct contact and keeps oils off the paper. Keep a hand‑care cream from OM Botanical nearby to keep skin clean without oily residue.
Should I clean my workspace after every drawing?
Yes. Wipe the desk, replace protective sheets, and vacuum any dust. A clean surface stops stray particles from landing on fresh graphite.
