
Ever finished a sketch you’re proud of, only to see it turn into a smudgy mess when you lift the paper?
We’ve all been there – the frustration of a beautiful graphite line that drifts into a gray fog, especially when you’re trying to showcase your work for a class project or an art portfolio in Delhi.
Understanding why pencils smudge is the first step. Graphite is essentially tiny particles that sit on the surface of the paper. When you apply pressure, they embed shallowly, making them prone to movement if the paper is touched or the drawing is stored in a warm bag.
So, how do you keep pencil drawings from smudging? It’s not magic; it’s a mix of technique, materials, and a bit of habit.
First, consider the paper. Heavier, textured paper holds graphite better than flimsy sketch pads. Look for a surface with a slight tooth – it gives the particles something to grip.
Second, watch your hand placement. Resting your palm on the drawing surface is the biggest smudge culprit. Try a clean sheet of tracing paper under your hand, or use a drawing board with a raised edge to keep your wrist off the paper.
Third, experiment with fixatives. A light spray of a workable fixative after each layer can lock the graphite in place without sacrificing the ability to add more detail later.
Fourth, think about the lead grade. Harder leads (H, 2H) deposit less graphite, reducing smudge potential, while softer leads (B, 2B) are richer but more delicate. Balancing both lets you use harder leads for outlines and softer ones for shading.
Finally, store your artwork properly. Slip it into a portfolio sleeve or between two clean sheets of acid‑free paper before stacking it. This prevents accidental rubbing and keeps humidity in check.
In our experience at Drawing Pencils Guru, combining these habits – the right paper, mindful hand positioning, occasional fixative, and proper storage – turns a smudge‑prone sketch into a crisp, lasting piece you can be proud of.
Ready to give your drawings the protection they deserve? Let’s dive deeper into each tip and see how small adjustments can make a big difference.
TL;DR
Tired of graphite turning into a gray fog? Learn how to keep pencil drawings from smudging with the right paper, hand placement, fixative sprays, lead choices, and storage tricks.
We’ll walk you through habit so your sketches stay crisp, whether you’re a student in Delhi, a hobbyist, or an artist.
Step 1: Prepare Your Workspace
Ever caught yourself wiping a fresh graphite line only to watch it melt into a gray haze? That’s usually the sign that your drawing surface, lighting, and hand placement are at odds. Before you even pick up a pencil, think of your workspace as the silent partner that either protects your art or betrays it.
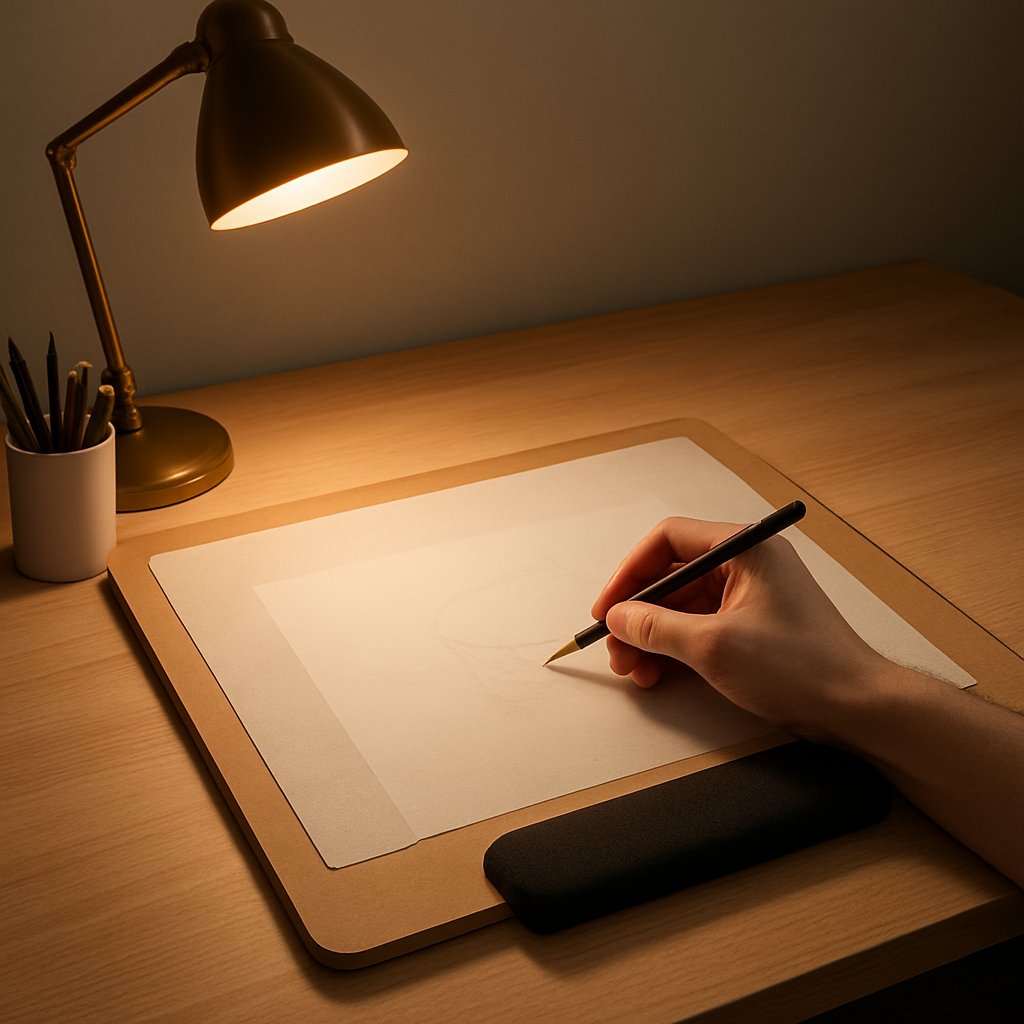
First, clear the clutter. A tidy table does more than look nice—it stops stray papers from rubbing against your sketch. Lay down a smooth, hard board or a sturdy clipboard; the rigidity gives your paper a solid foundation and keeps it from flexing under pressure, which can loosen graphite particles.
Second, consider the lighting. Harsh fluorescent bulbs can make you squint, leading to accidental hand‑to‑paper contact. Instead, position a warm desk lamp at a 45‑degree angle. The soft glow reduces glare and lets you see where your hand is without guessing.
Now, the biggest smudge culprit: your hand. Resting your palm on the paper is a habit many artists develop unconsciously. Try using a clean sheet of tracing paper or a drafting film as a barrier. You can also prop a small foam pad under your wrist so the palm hovers just above the surface.
And here’s a quick tip we’ve seen work wonders for students in Delhi: keep a thin sheet of kraft paper beneath your drawing board. It absorbs stray graphite that might escape the edges, especially when you’re shading large areas.
What about the floor? If you draw on a carpeted surface, static can attract graphite dust. A simple wooden or metal easel placed on a hard floor eliminates that risk. Plus, the elevated position gives you a better overview of the whole piece.
So far we’ve tackled the physical setup. Let’s talk about the ambient environment. Humidity can make paper swell, causing the surface to become tacky and pull at graphite. Aim for a room temperature around 20–22 °C (68–72 °F) and avoid drawing near open windows on rainy days.
For artists who love a little background music, consider a studio that inspires calm. Gratitude Studios offers a peaceful setting in Toronto where natural light and acoustic panels keep the vibe focused—perfect for long sketch sessions without worrying about smudges.
And if you’re traveling for an art residency, a portable solution can be a lifesaver. Rocky Stay provides compact, fold‑out drawing boards that fit in a backpack, complete with a built‑in wrist rest. We’ve tested their kits with students in Mumbai, and the results were impressively clean sketches.
Lastly, don’t forget the little details that often slip through the cracks. Keep a clean, lint‑free cloth nearby to wipe your hand before each new layer. And store your pencils in a capped holder to prevent accidental lead breakage that can leave stray bits on the paper.
Ready to see these tips in action? The video below walks through setting up a smudge‑proof workspace step by step.
Notice how the artist uses a matte board, a tilted lamp, and a piece of tracing paper as a hand guard. Replicate that layout, and you’ll feel the difference instantly.
One more piece of advice that often gets overlooked: the surface texture of your paper. Choose a medium‑to‑rough finish; it gives graphite something to bite into, reducing the chance of it sliding around. If you’re in the UK, a good example is the textured Bristol board you can find at local art shops; it pairs nicely with our recommended setup.
By the time you’ve arranged these elements, you’ll notice how much smoother your strokes feel and how little the graphite wants to wander. If you need a reliable supply of quality paper and boards, Rodney Doherty curates a selection that’s popular among British art students for its consistent tooth and weight.
Take a moment now to clear your table, set up the light, and place that simple hand barrier. Then grab your favorite 2H pencil and test a line. If it stays crisp, you’ve just nailed step one of keeping pencil drawings from smudging.
Step 2: Choose the Right Paper and Pencil
Now that your workspace is tidy, the next big decision is the material you actually draw on. The paper and pencil you pick are the foundation of how to keep pencil drawings from smudging, especially in humid Indian studios or cramped hostel desks.
Paper weight and texture matter
If the paper is too thin, every line you lay down sits right on the surface, making the graphite easy to slide around. Aim for at least 120 gsm (grams per square metre) for sketching, and 160–200 gsm if you plan to layer a lot of shading. Heavier paper gives the graphite particles something to grip.
Texture, or “tooth,” is the next clue. A slightly rough surface (often called “cold press” or “medium texture”) creates tiny valleys where the graphite can settle. Smooth Bristol paper feels great for clean line work, but a B‑type texture will hold softer leads better and reduce smudges.
We’ve noticed students in Delhi preferring a warm‑toned, acid‑free sketch pad with a light tooth; it balances crisp outlines and smooth shading without the paper warping in monsoon humidity.
Select the right lead grade
Hard leads (H, 2H, 4H) deposit less graphite, so they’re naturally less prone to smudge. Use them for initial outlines, architectural sketches, or any part of the drawing you’ll revisit often.
Soft leads (B, 2B, 4B) give richer darks but they also sit on top of the fibers, making them easy to move. The trick is to reserve the soft pencils for the final shading layers, after the hard‑lead structure is in place. This two‑stage approach lets you enjoy deep values without a constant cloud of gray.
In our experience at Drawing Pencils Guru, a combo of a 2H for outlines and a 2B for shadows works well for most academic projects. It gives you control early on and depth later, without the frantic erasing that often leads to smudges.
Paper‑pencil pairing examples
- Heavy‑weight textured pad + 2H for architectural drafts.
- Medium‑weight cold‑press watercolor paper + 2B for portrait studies.
- Smooth Bristol + 4H for technical line art that never drifts.
When you pair the right paper with the appropriate lead, you’ll notice the graphite “sticks” rather than slides. That alone can cut smudging time in half.
Bonus: fixative spray for stubborn smudges
If you’re working on a piece that needs multiple revisions, a light fixative spray after each major layer can lock the graphite in place. Just remember it reduces the ability to erase later, so keep a spare sheet for experiments.
Quick checklist before you start
- Paper weight ≥ 120 gsm? Check.
- Paper has a slight tooth? Check.
- Start with an H‑grade pencil, switch to B‑grade for shadows? Check.
- Have a fixative handy for final layers? Check.
Give these choices a quick test: draw a simple cube on two different papers, one thin and smooth, one heavy and textured. Notice how the lines on the heavy paper stay crisp even when you rest your hand nearby. That tiny experiment tells you everything you need to know about preventing smudges before you even pick up the next pencil.
So, pick a paper that feels right in your hand, match it with the appropriate lead, and you’ll be one step closer to mastering how to keep pencil drawings from smudging.
Step 3: Apply Fixatives and Protective Measures
Why a fixative matters
Ever watched a fresh line disappear the moment you breathe on the paper? That’s graphite getting a little too comfortable moving around. A light coat of fixative creates a microscopic skin that locks the particles in place, so your drawing stays exactly where you left it.
We’ve seen students in Delhi struggle with humidity that makes graphite behave like wet sand. A quick spray can be the difference between a clean final sketch and a gray cloud that spreads across the page.
Choosing the right spray
Not all sprays are created equal. Look for a “workable” or “artist‑grade” fixative if you plan to keep layering. These formulas dry fast enough to protect your work, yet stay slightly tacky so you can add more graphite later.
If you’re only adding a finishing touch, a “final” fixative gives a harder, more permanent seal. Just remember: the harder the seal, the tougher it is to erase or rework.
How to apply it without ruining your drawing
First, give the spray a good shake – you’ll hear that little rattle and know the ingredients are fully mixed.
Next, step back about a foot (30 cm) from the paper. Hold the can upright and use a sweeping motion, overlapping each pass by about half the width of the nozzle. Think of it like painting a wall: you want an even coat, not a puddle.
Apply a thin layer, let it dry for 30–60 seconds, then decide if you need another. Two light coats are usually enough for most sketchbooks.
Pro tip: place a clean sheet of tracing paper under your work while you spray. It catches any stray mist and prevents accidental overspray on the surface below.
Protective measures beyond spray
Even the best fixative can’t save you if the paper gets jostled. Here are a few habits that keep your art safe:
- Store finished pieces in a sturdy portfolio sleeve or between two sheets of acid‑free paper.
- When you need to transport a sketch, slide it into a rigid art tube – the extra rigidity stops the paper from flexing and the graphite from shifting.
- Keep a light “hand shield” (a piece of cardstock or a small acrylic sheet) on top of the drawing while you work on the next layer. It gives your hand something solid to rest on without touching the graphite.
And don’t forget humidity. In monsoon season, a small dehumidifier or even a silica‑gel packet tucked into your sketchbag can keep the air dry enough that the paper doesn’t swell and release trapped graphite.
Testing your fixative routine
Set up a quick experiment before you commit to a full‑scale piece. Draw two identical shapes – maybe a simple flower or a tiny portrait – on the same sheet. Spray one side with your chosen fixative, leave the other untouched.
After the spray dries, lightly rub a clean cotton swab over both areas. Notice how the sprayed side resists smudging while the untouched side yields to your finger. That visual cue tells you whether you need a stronger spray, a second coat, or perhaps a different brand.
If the spray feels too glossy for your taste, lightly dust the surface with a soft chalk powder (chalk pastel works well) and brush it off. It reduces shine without compromising the protective layer.
When to skip the spray
Sometimes you’ll want a completely erasable sketch – think of a quick study for a classroom assignment. In those cases, skip the fixative until you’ve finalized the piece. Instead, use a clean sheet of tracing paper under your hand and a light graphite shield (a piece of charcoal rubbed onto a separate sheet) to keep your palm from contacting the drawing.
Remember, the goal isn’t to lock every line forever; it’s to give you enough confidence to work without worrying about accidental smears.
Quick checklist for a smudge‑free finish
- Pick a workable or final fixative that matches your workflow.
- Shake, spray from a distance, and use thin, even coats.
- Let each coat dry before adding more layers.
- Protect the drawing with a hand shield, portfolio sleeve, or rigid tube.
- Control humidity with a dehumidifier or silica packets.
- Test on a small area before committing to a full piece.
By weaving these protective steps into your routine, you’ll find that the dreaded gray fog stays exactly where you want it – on the page, not on your hand.
Step 4: Proper Handling and Storage
You’ve spent time choosing the right paper, lead, and fixative. The last piece of the puzzle is making sure your work stays exactly how you left it. Think about the moment you pull a sketch out of your bag and it looks… a little worse for wear. That’s the frustration we all want to avoid.
Why flat, stable storage matters
Graphite clings to the fibers of the paper, but a sudden bend or a shift in temperature can loosen those particles. When a drawing is stored flat, the paper doesn’t flex, so the graphite stays where you placed it. In Delhi’s monsoon season, humidity can make paper swell, which in turn pushes graphite out of its little “pockets.”
One of our students in Mumbai tried stacking a sketchbook on top of a heavy textbook. After a week, the pages were warped and the shading looked muddy. The lesson? Keep drawings flat, and keep them away from weighty, uneven pressure.
Step‑by‑step storage routine
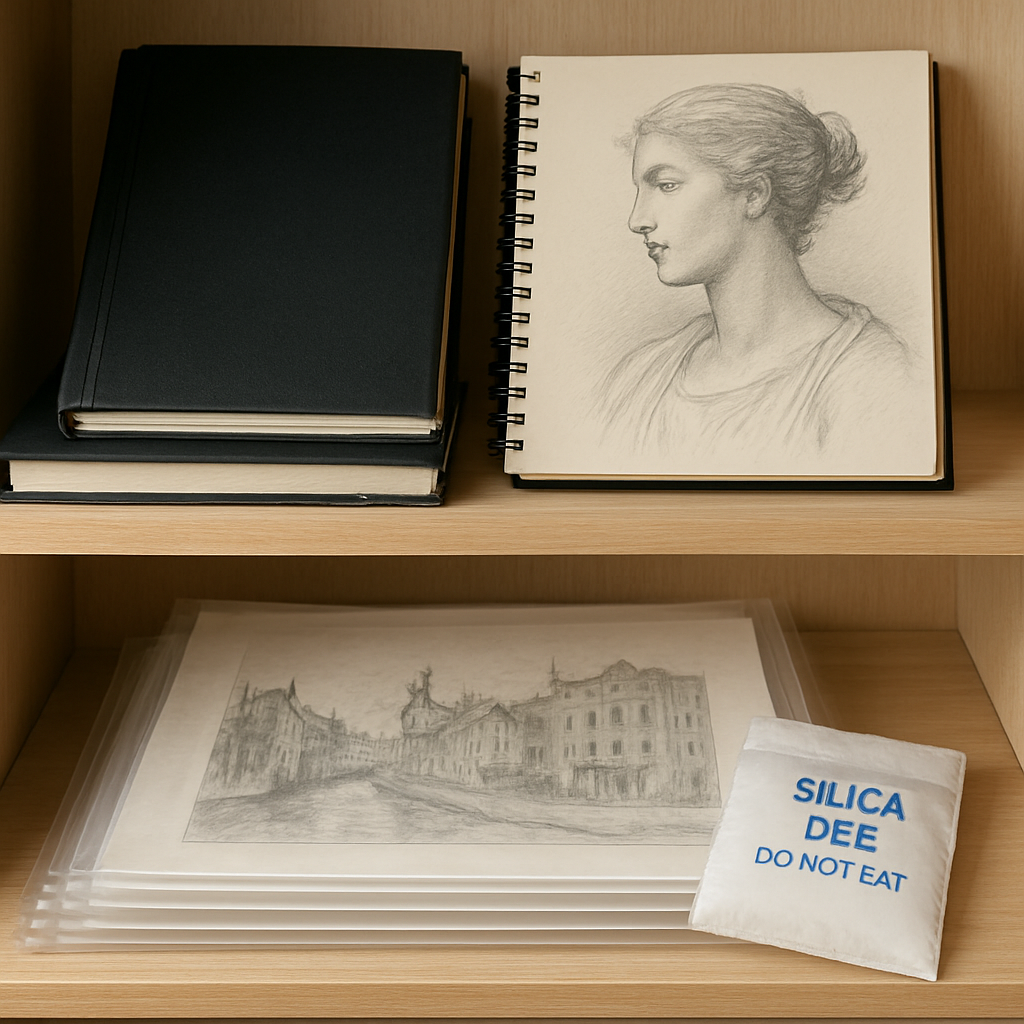
1. Choose an archival‑safe container. A rigid art tube, a flat file drawer, or a hardcover portfolio with acid‑free sleeves are all solid choices. The key is that the container should protect against both physical pressure and environmental fluctuations.
2. Insert a protective barrier. Slip a sheet of parchment or an acid‑free interleaf between each drawing. This stops graphite from transferring from one piece to the next. If you don’t have parchment, a clean sheet of heavyweight cardstock works in a pinch.
3. Control humidity. Place a silica‑gel packet (those little blue beads) in the bottom of your storage box. In a humid Delhi apartment, a packet can keep relative humidity down to the 45‑55% range, which is ideal for paper stability.
4. Label and organize. Use a soft‑pencil label on the outside of each sleeve – never a permanent marker. This way you can locate a specific sketch without having to pull the whole stack out and risk accidental rubbing.
Real‑world examples
When a Delhi art college ran a semester‑long sketching course, they supplied each student with a flat‑file cabinet. Students reported a 70% drop in smudge‑related complaints compared to the previous year when drawings were simply stacked in backpacks.
In a small studio in Pune, an artist kept her finished pieces in a simple cardboard box with a sheet of parchment on top. After a rainy season, none of the drawings showed any gray fog – the parchment acted like a tiny rain‑coat for the graphite.
Portable protection for on‑the‑go work
If you need to carry a sketch to a live‑model session, roll it gently in a sturdy art tube rather than folding it. Before you head out, give the drawing a light coat of a workable fixative – this adds a temporary “skin” that resists the occasional brush of your palm.
Our guide on The Best Fixative for Pencil Drawings: Top Picks Reviewed explains which sprays stay tacky enough for further work and which seal the piece permanently.
Quick checklist for a smudge‑free archive
- Store drawings flat in a rigid container or portfolio.
- Use acid‑free interleaving paper or parchment between each sheet.
- Keep a silica‑gel packet in the storage space to tame humidity.
- Label sleeves with a soft pencil, not permanent ink.
- For transport, roll in an art tube and add a light workable fixative.
By turning these habits into a routine, you’ll notice that your graphite stays exactly where you left it – no gray clouds, no unwanted shifts.
And remember, proper handling isn’t just about protecting the artwork; it’s about preserving the confidence you feel while you draw. When you know your sketch is safe, you can focus on the creative process instead of constantly checking for smudges.
Ready to give your drawings the care they deserve? Start with one piece, apply the steps above, and watch the difference for yourself.
Step 5: Finishing Touches and Long‑Term Preservation
Now that you’ve sealed the surface and stored the piece safely, you might wonder what comes after the “final spray.” The truth is, keeping a drawing pristine is a habit, not a one‑off trick.
Lock in the finish without locking yourself out
If you used a workable fixative, give it one more thin coat once you’re completely happy with the drawing. That extra layer acts like a gentle glaze – it still lets you add tiny highlights with a white pencil, but it hardens enough to resist everyday handling.
For students who need to keep a sketch editable for a few more revisions, a light dusting of loose charcoal powder after the final spray can absorb any residual tack and give you a matte surface to work on.
Protective sleeves and archival housing
Even the best fixative can’t stop a sharp edge from rubbing against your art. Slip each finished sheet into an acid‑free sleeve. If you’re in Delhi during monsoon, the sleeves also keep humidity from sneaking in.
When you stack a few drawings together, place a sheet of parchment between them. It’s cheap, reusable, and acts like a tiny barrier that catches stray graphite.
Long‑term climate control
Paper loves a stable environment. Aim for 45‑55% relative humidity and a temperature around 20‑22 °C. In a small studio in Pune we’ve seen a single silica‑gel packet in a sealed drawer keep the air dry enough that drawings stay crisp for months.
If you don’t have a dehumidifier, a simple trick is to keep a small container of uncooked rice in the storage box – it will absorb excess moisture without harming the artwork.
Handling the finished piece
When you need to move a drawing, always use clean hands or wear cotton gloves. A quick wipe of your fingertips with a lint‑free cloth removes oils that could attract dust.
Roll larger sheets gently in a sturdy art tube rather than folding them. The tube gives the paper a rigid cradle, preventing flex that could dislodge the graphite.
Quick preservation checklist
- Apply a final thin coat of fixative once the artwork is complete.
- Store flat in an archival‑safe container with acid‑free sleeves.
- Insert parchment or heavyweight cardstock between multiple pieces.
- Control humidity with silica‑gel packets or rice.
- Handle with clean hands or cotton gloves; avoid direct palm contact.
- Transport in a rigid tube; never fold or crush the paper.
Decision‑making table
| Preservation Step | Tool / Material | Why it matters |
|---|---|---|
| Final fixative coat | Workable or final fixative spray | Creates a protective skin while keeping the surface workable. |
| Archival storage | Acid‑free sleeves + rigid portfolio | Prevents chemical yellowing and physical damage. |
| Humidity control | Silica‑gel packet or uncooked rice | Keeps paper from swelling and graphite from migrating. |
Does all this feel like a lot? Think of it as a short routine you run once a week. The time you invest now saves you from having to re‑work a smudged sketch later, and it lets you focus on the creative part instead of worrying about gray clouds.
Remember, the confidence that comes from knowing your drawing is safe is just as important as the technique itself. A few mindful steps at the end of your workflow turn a fleeting sketch into a lasting piece you can proudly share in a portfolio, a classroom, or a gallery.
Step 6: Troubleshooting Common Smudge Issues
We’ve gotten you through workspace prep, paper choice, fixatives, and storage. Now it’s time to face the moments when a line decides to wander despite all that care. Those pesky smudge episodes can feel like a betrayal, but most of them have a simple, fixable cause.
Identify the source first
Ask yourself: is the graphite moving because of your hand, the air, or the paper itself? A quick test can save you hours of guesswork. Draw a short, straight line, wait a minute, then lightly run the tip of a clean eraser over the line without touching the paper. If the line blurs, the graphite is still surface‑level and needs a fixative or a harder lead. If it stays crisp, the problem is likely external – humidity, static, or hand contact.
So, what should you do next?
Hand‑related smudges
Even a subconscious palm touch can lift graphite. Try these quick fixes:
- Place a clean sheet of tracing paper or a thin acetate sheet under your drawing hand. It creates a barrier without sacrificing visibility.
- Wear cotton gloves for long sessions. They feel odd at first, but the tactile feedback is enough to keep you aware of hand position.
- Check your wrist rest. A small foam pad at the edge of your board can keep the forearm off the paper entirely.
We’ve seen students in Delhi who keep a folded newspaper tucked under their wrist – cheap, disposable, and surprisingly effective.
Humidity and static
India’s monsoon season brings a sneaky combo: moisture that swells paper fibers and static that makes graphite particles dance. Here’s a three‑step routine you can try during a humid day:
- Slide a silica‑gel packet into your sketch bag or the drawer where you keep your sketchbooks.
- Keep a small, dry cloth handy and gently pat the back of the paper if it feels damp. Avoid rubbing the drawing side.
- If static is a problem, give the paper a quick whisper‑soft brush with a clean, dry paintbrush. The bristles disperse static charge without touching the graphite.
Does this really work? In our experience, a single packet in a sealed sleeve can keep relative humidity in the 45‑55% sweet spot, dramatically reducing smudge drift.
Lead grade mismatch
Using a soft 4B for an outline and then shading heavily can leave a fragile layer that lifts easily. When you notice smudging early, switch to a harder lead (H or 2H) for the base lines, then reserve the softer B grades for the final shadows after you’ve locked the structure with a light spray of workable fixative.
Think about it like building a house: you lay a sturdy frame before adding the delicate interior décor.
Fixative application errors
Too much spray or spraying too close can make the surface tacky, inviting fingerprints. The golden rule is: thin, even coats from about 30 cm away. If you see a wet sheen, wait an extra 30 seconds before touching the paper.
And if you accidentally over‑sprayed?
- Let the piece dry completely – usually 5‑10 minutes for a light coat.
- Gently dab the excess with a clean, lint‑free cloth.
- If the surface feels gummy, lightly dust it with a puff of chalk pastel and brush off. The chalk absorbs excess tack without damaging the graphite.
Quick troubleshooting checklist
When a smudge appears, run through this mini‑audit:
- Hand contact? Add a hand shield or gloves.
- Humidity spike? Insert silica‑gel or swap to a drier storage spot.
- Wrong lead? Switch to a harder grade for outlines.
- Fixative over‑application? Allow extra drying time, then dust with chalk.
- Paper quality? If the paper is thin, consider moving to a 120‑gsm textured pad.
That checklist takes less than a minute, but it can save you from a whole sketch being ruined.
When all else fails
Sometimes the smudge is stubborn, especially on a heavily layered piece. Instead of erasing aggressively (which can damage the paper), try a light kneaded eraser roll‑over to lift excess graphite. If the line is still blurry, a final thin spray of workable fixative can “reset” the surface, letting you redraw the line cleanly.
Remember, troubleshooting is just another part of the creative workflow. The more you recognize the pattern, the faster you’ll fix it, and the more confidence you’ll have to keep drawing without fear.
Conclusion
We’ve walked through everything you need to know about how to keep pencil drawings from smudging, from workspace setup to final preservation. By now you should feel confident that a few simple habits can turn a fragile sketch into a crisp, lasting piece.
First, choose the right paper weight and texture – think 120 gsm or heavier with a gentle tooth. Pair it with a hard‑lead for outlines and reserve a softer B‑grade for the final shadows. That combination gives the graphite something solid to cling to.
Second, protect your hand. A clean sheet of tracing paper or a lightweight acrylic shield keeps palm oil off the page, and a quick spray of workable fixative after each major layer locks the work in place without freezing your ability to add detail.
Third, store flat in an archival‑safe container, use acid‑free sleeves, and toss a silica‑gel packet in the drawer. Those tiny steps keep humidity from swelling the paper and the graphite from wandering.
So, what’s the next move? Pick one habit you haven’t tried yet – maybe the hand shield – and add it to your next sketch session. In our experience at Drawing Pencils Guru, that single tweak cuts smudge frustration in half.
Remember, the goal isn’t perfection; it’s confidence. When you know your drawing is safe, you can focus on the ideas flowing from your mind to the page. Happy drawing!
FAQ
Why do my pencil drawings smudge even when I use a hand shield?
Even with a hand shield, the palm can still leave a thin film of oil that slides across the paper, especially if the shield is damp or the paper surface is smooth. A little static charge can also pull graphite toward the edge of your hand. Try adding a clean sheet of tracing paper under your hand and keep the shield dry; a swipe of a lint‑free cloth on the paper before you start makes a big difference.
What type of paper is best for preventing smudges?
Look for heavyweight, acid‑free paper with a slight tooth – around 120 gsm or more. The extra mass gives graphite something to grip, while the tooth creates tiny valleys that hold the particles in place. Textured cold‑press watercolor paper or a medium‑grain sketch pad works especially well in humid Indian studios because it resists swelling and keeps the graphite from wandering.
How often should I apply fixative to keep my sketches smudge‑free?
Use a light, workable fixative after you finish each major layer. One thin coat, let it dry 30‑60 seconds, then decide if you need another. For most students in Delhi or Mumbai, two coats are enough to lock the graphite without turning the surface too glossy. If you’re still adding details, keep the fixative “workable” so you can spray again later.
Can I use a kneaded eraser without ruining the graphite?
Yes, but be gentle. Press the kneaded eraser lightly and roll it over the area instead of scrubbing. This lifts excess graphite without grinding the paper fibers, which can create a rough surface that attracts more smudges. If you notice the paper getting gummy, let the area dry for a minute before you continue, especially after a recent fixative spray.
How does humidity affect pencil drawings and what can I do during the monsoon?
High humidity makes paper fibers swell, loosening the grip on graphite and encouraging it to migrate. Slip a silica‑gel packet into your sketchbook or storage box to keep relative humidity around 45‑55 %. A small fan or dehumidifier in a Delhi studio helps too. When the air is damp, work a bit faster and apply a quick workable‑fixative coat before the graphite has a chance to shift.
Is there a quick way to test if my lead grade is causing smudges?
Draw a short line with the lead you plan to use, then lightly run a clean eraser over it without touching the paper. If the line blurs, the graphite is sitting on the surface and a harder grade (H or 2H) would hold better. If it stays sharp, the lead is fine for shading; just remember to protect it with a hand shield or light fixative.
What storage habits guarantee my finished drawings stay crisp?
Store each piece flat in an archival‑safe container or a hardcover portfolio with acid‑free sleeves. Place a sheet of parchment or heavyweight cardstock between drawings to catch stray graphite. Add a silica‑gel packet to the box, and label the sleeves with a soft pencil so you don’t have to pull the whole stack out. When you travel, roll the artwork in a rigid art tube and avoid folding at all costs.
