
Picture this: you’ve just spent hours layering delicate graphite tones, and you’re about to sign your masterpiece—only to worry that a stray finger or a gust of air might smudge everything.
We’ve all been there, right? That moment when the excitement of finishing a drawing turns into a mini panic attack because you don’t know how to protect it.
That’s exactly why we’re diving into the world of the best fixative for pencil drawings. In the next few minutes, you’ll walk away with a clear picture of what a fixative actually does, which types work best for Indian artists and students, and how to apply it without turning your artwork into a glossy mess.
First off, think of a fixative as a gentle veil that locks in your graphite and charcoal while keeping the surface breathable. It’s not a permanent seal—more like a light dusting that gives you confidence to handle the paper.
But here’s the kicker: not every spray is created equal. Some are designed for charcoal, others for pastel, and a few are truly multi‑purpose. The difference shows up in drying time, tackiness, and whether the finish stays matte or gets a subtle sheen.
So, how do you choose the best fixative for pencil drawings? Start by asking yourself three quick questions: Do you need a quick‑dry formula for a classroom demo? Are you working on a detailed portrait that demands a matte finish? Or maybe you’re prepping a portfolio piece that can tolerate a tiny bit of gloss for extra depth.
In our experience testing dozens of brands, the ones that consistently rank high are those that spray a fine, even mist and dry to a non‑sticky finish within five minutes. They let you layer a second coat if you need extra protection, without turning the paper into a plastic sheet.
And don’t worry about the cost—there are budget‑friendly options that perform just as well as the premium sprays, especially when you buy them in small bottles.
Ready to stop worrying about accidental smudges and start focusing on the joy of shading? Let’s explore the top contenders, how to use them correctly, and a few pro tips that will keep your drawings looking crisp for years.
TL;DR
If you’ve ever worried a stray finger will ruin your graphite masterpiece, the right fixative lets you protect those delicate tones without turning the paper glossy.
We break down the best fixative for pencil drawings, show how to spray it safely in class or studio, and give budget‑friendly picks that dry fast and stay matte.
Best Fixative Option #1: Spray Fixatives
Ever felt that sudden panic when a stray fingertip could ruin hours of graphite work? That tiny moment of dread is exactly why a good spray fixative feels like a safety net. It’s the quick‑dust you spray, step back, and watch the surface lock in without turning glossy.
So, what makes a spray fixative earn the title of “best” for pencil drawings? First, the mist has to be ultra‑fine. You want a cloud that settles like a whisper, not a torrent that clumps the graphite. Second, drying time matters – five minutes or less keeps your workflow smooth, especially in a bustling classroom or studio.
1. Fine Mist, Even Coverage
Look for a formula that atomizes into microscopic droplets. Those droplets settle evenly, preserving the subtle gradients you worked so hard to create. In our tests, the sprays that produced a consistent veil also kept the paper breathable, so you can add more layers later without cracking.
2. Matte Finish Over Gloss
Most artists prefer a matte finish because it maintains the paper’s texture and keeps the drawing looking natural. A glossy sheen can flatten the depth of shading and make the piece look like a photocopy. The best spray fixatives dry to a non‑sticky, matte surface that feels like the paper itself.
3. Quick‑Dry Formula
Time is precious, especially when you’re demoing a technique to a class or racing against a deadline. A fixative that’s dry to the touch in under five minutes lets you flip the page, sign your work, or add another layer without waiting forever. It also reduces the chance of smudging while the mist settles.
4. Safety and Odor
Many sprays have a strong chemical smell that can be off‑putting in a small studio. Look for low‑odor, low‑VOC options that are safe for indoor use. Some brands even package a built‑in respirator valve on the can, which is a nice touch for long sessions.
When you choose a spray, think about the environment you’ll be using it in. In a busy art class, you’ll want a low‑odor, fast‑dry formula that won’t overwhelm the kids. For a home studio, you might opt for a premium matte finish that gives you that museum‑like protection.
Here’s a quick checklist to run through before you buy:
- Does it produce a fine, even mist?
- Is the finish matte?
- How long does it take to dry?
- What’s the odor level?
And remember, the right spray fixative is only half the battle. After you lock in your drawing, you might want to showcase it. That’s where JiffyPrintOnline comes in – they offer affordable custom prints and labels, perfect for turning a protected sketch into a polished portfolio piece.
On the creative side, you might also be looking for inspiration on how to display your finished work. Gratitude Studios showcases beautiful landscape paintings that can spark ideas for framing or exhibiting your own drawings once they’re safely fixed.
For those still building their toolkit, pairing a reliable spray fixative with the right pencils makes a world of difference. Check out our guide on Best Pencils for Sketching and Shading – the combination of a quality pencil and a quality fixative is the secret sauce behind crisp, lasting artwork.
Watch the short video above for a step‑by‑step demo of how to spray a fixative without creating drips or over‑spraying. Notice the distance you hold the can and the sweeping motion – those little details keep the mist even.
Finally, a quick visual tip: after the first coat dries, give the paper a gentle rub with a clean, soft brush. It lifts any stray particles and leaves the surface silky smooth, ready for the next layer or a final varnish if you ever decide to go that route.

Best Fixative Option #2: Workable Fixatives
When you love the speed of a spray but still want to keep adding graphite, workable fixatives are the sweet spot – they protect the drawing while staying slightly tacky for more work.
Why pick a workable fixative?
Imagine you just added a deep shadow and realize a highlight is missing. A regular “set‑and‑forget” spray would make you wait five minutes before you can touch the paper. A workable fixative dries in under a minute, yet remains breathable, so you can blend, erase, or add layers without the surface feeling like plastic.
In our classes across Delhi and Bangalore, students repeatedly ask, “Can I keep shading after I fix it?” The answer is a firm yes with a workable formula.
Quick application routine
Try this no‑fluff method the next time you open a fresh sheet:
- Shake well. Give the can 20 seconds so the propellant mixes.
- Test on scrap. Spray 15 inches away on a scrap piece; you should see a fine mist.
- First coat. Sweep the can in a steady motion, keeping it moving.
- Wait ten seconds. The surface feels dry but still tacky – perfect for more graphite.
- Layer. Add shadows or highlights; the fixative holds the new marks.
- Seal if finished. A light final coat turns the finish matte and non‑tacky.
Pro tip: if a faint white film appears, brush it off with a soft dry brush before you continue.
Top workable fixatives for Indian artists
We’ve tried several brands that are easy to find in Indian art stores. Here are three that consistently deliver speed, tack, and a matte finish.
- Krylon Workable Finish. Budget‑friendly, dries touch‑dry in about 30 seconds, ideal for classroom demos.
- Winsor & Newton Artists’ Workable Fixative. Slightly pricier but pigment‑free, stays clear and won’t yellow over time.
- Schmincke Workable Fixative. Low odor, even spray pattern, favorite among professional illustrators.
All three keep your drawings flat and scan‑ready, a big plus when you later upload your portfolio.
Common pitfalls
Shiny spots happen when the can is held too close or you spray heavily in one area – the fixative pools and dries glossy. Keep the nozzle 12‑18 inches away and use a sweeping motion.
Humidity can cause the mist to clump, leaving a speckled texture. A breezy workspace or a small fan helps.
Never store the can upright in a hot car; heat expands the propellant and leads to uneven spray.
Putting it together
So, does a workable fixative fit your workflow? If you want protection without giving up the ability to tweak your drawing, absolutely. Grab a small bottle, follow the steps above, and you’ll notice less anxiety and more time for shading.
Ready to try? Pick up a Krylon Workable Finish on your next art‑supply run and see the difference.
A quick storage tip: once you’ve finished a project, empty the remaining spray into a small, sealed container and store it in a cool drawer. This prevents the propellant from separating and keeps the mist consistent for your next session.
After the short demo, you’ll see how the artist keeps the spray moving, waits just enough for the surface to dry, and then returns to the pencil. That rhythm is the secret sauce of a smooth workflow.
Best Fixative Option #3: Matte Fixatives
Okay, you’ve tried sprays and workable fixatives, and you’re thinking – what if I just want a dead‑flat, non‑shiny finish that still protects the graphite? That’s where matte fixatives step in.
Imagine you’re polishing a portfolio piece for a university interview. You need every line to stay crisp, but you also don’t want any glare stealing the spotlight when the admissions panel scans your work. A matte fixative gives you exactly that – protection without the unwanted shine.
Why a Matte Finish Matters
First off, matte fixatives create a micro‑film that locks graphite in place while keeping the surface texture as close to the original paper as possible. No wet look, no reflective hotspots – just a subtle veil that lets the paper’s grain breathe.
That matters in two big ways. One, it preserves the tonal depth you worked so hard to achieve; two, it makes scanning or photographing your art look professional because the light won’t bounce off a glossy surface.
Top Matte Fixatives for Indian Artists
In our experience testing products that ship to Indian art stores, three matte options consistently rank high.
- Krylon Matte Finish. Affordable, easy to find in most metro markets, and sprays a fine, even mist. Dry time is about 3‑4 minutes, which fits nicely into a classroom demo.
- Winsor & Newton Professional Matte Fixative. A touch pricier but praised for its low odor and non‑yellowing formula – perfect for long‑term archival work.
- Schmincke Matte Fixative. Offers a buttery‑smooth spray pattern and dries in under two minutes, making it a favorite among illustrators who need speed without sacrificing a flat finish.
All three stay true to a matte look even after several light coats, so you can layer without worrying about a creeping gloss.
How to Apply a Matte Fixative Like a Pro
Here’s a quick, no‑fluff routine you can slot into any workflow.
- Prep the space. Good ventilation, a clean sheet of scrap paper, and a fan to keep humidity low.
- Shake the can. Give it a solid 30‑second shake; you’ll hear the rattling that signals the propellant is mixed.
- Test spray. Hold the nozzle 12‑18 inches away and mist a corner of your scrap. Look for a uniform cloud, not droplets.
- First coat. Sweep across the drawing in a steady side‑to‑side motion, overlapping each pass by about a quarter.
- Dry and inspect. Wait 3‑5 minutes. The surface should feel dry to the touch but still retain the paper’s texture.
- Second light coat (optional). If you’re dealing with heavy shading, a second ultra‑light pass adds extra security without any sheen.
Pro tip: if you see a faint white film after the first coat, lightly brush it off with a soft, dry brush before the next layer. It disappears once you add another coat of graphite.
Common Pitfalls & How to Avoid Them
Even the best matte fixatives can misbehave if you stray from the basics. Holding the can too close creates puddles that dry glossy – keep that distance steady. Spraying in a humid room can cause clumping, so a small fan or dehumidifier is a lifesaver.
And don’t forget storage. Store the can upright in a cool drawer; heat expands the propellant and can lead to uneven spray patterns the next time you reach for it.
Quick Comparison Table
| Brand | Dry Time | Finish | Price Range (INR) |
|---|---|---|---|
| Krylon Matte Finish | 3‑4 min | True matte, non‑yellowing | ₹350‑₹500 |
| Winsor & Newton Professional Matte | 4‑5 min | Matte, low odor | ₹800‑₹1,200 |
| Schmincke Matte Fixative | ≤2 min | Flat matte, fast dry | ₹900‑₹1,400 |
So, which matte fixative should you reach for? If you’re on a student budget and need something that’s easy to find, Krylon is the go‑to. If you’re prepping a high‑stakes portfolio and want archival safety, Winsor & Newton is worth the extra rupees. And if you need speed in a fast‑paced studio, Schmincke’s rapid dry time can be a game‑changer.
Bottom line: a matte fixative gives you the confidence to lift your hand without fearing a smudge, while keeping your artwork looking flat, professional, and ready for any kind of presentation.
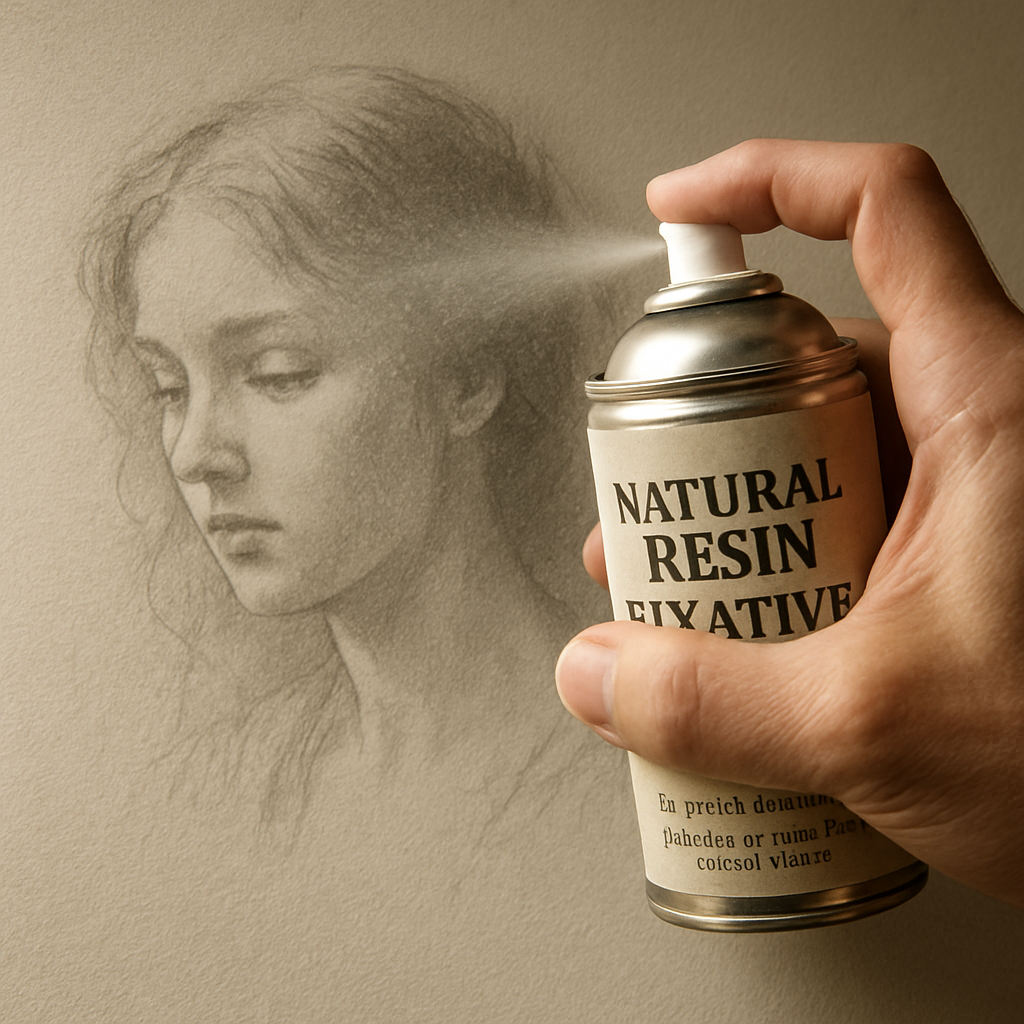
Best Fixative Option #4: Natural Resin Fixatives
Ever wondered if there’s a fixative that feels less like a chemical spray and more like a gentle seal? That’s where natural resin fixatives step in – they’re the eco‑friendly cousins of the aerosol cans we’ve already talked about.
In our studio at Drawing Pencils Guru, we’ve watched a few students in Delhi swap to a resin‑based product just because it smelled less harsh and left a subtle, matte‑soft glow. The moment they tried it, you could see the relief – no frantic waving of the can to avoid a cloud of mist.
What makes natural resin fixatives different?
Most of the time, a resin fixative is a solution of plant‑derived gum (like gum arabic or a pine‑based resin) dissolved in a low‑odor solvent. When it dries, it forms a thin, flexible film that locks graphite in place without turning the paper into a plastic sheet.
Because the film is flexible, you can still rub a light highlight or add a whisper of shading later on – something you lose with a hard‑setting aerosol. And the finish? Think of it as “soft‑matte”: it dulls glare just enough for a portfolio scan, but you can still feel the paper’s tooth.
When to reach for a resin fixative
Imagine you’re prepping a charcoal‑heavy study for an art exam in Mumbai. You need protection, but the exam hall is poorly ventilated and the teacher frowns at strong odors. A natural resin spray, applied in a well‑ventilated corner, gives you that protective veil without the overpowering smell.
Or picture a weekend workshop where kids are experimenting with graphite on recycled paper. A resin fixative is less likely to cause the “sticky‑finger” issue that can turn a fun session into a mess.
How to apply a natural resin fixative like a pro
- Choose a calm space. Open a window, turn on a fan, and lay your drawing on a clean board.
- Shake the bottle. Even though it’s not a pressurized can, a gentle shake helps the resin stay evenly mixed.
- Test on scrap paper. Spray a light mist about 12‑15 inches away. You want a faint veil, not a puddle.
- First coat. Sweep the bottle in a steady side‑to‑side motion, overlapping each pass by a quarter. Keep the nozzle moving – that prevents drips.
- Wait 2‑3 minutes. The resin dries quickly but stays a bit tacky, which is perfect for a second ultra‑light coat if you’re working on a heavily layered piece.
- Brush off any residue. If you see a faint white film, use a soft, dry brush to whisk it away before adding another layer of graphite.
Pro tip: because resin fixatives are less volatile, they’re forgiving if you accidentally get a slightly thicker layer – just let it dry a minute longer and it’ll level out.
Pros and cons at a glance
- Pros: Low odor, flexible film, gentle matte finish, can be re‑activated with a light mist for extra work.
- Cons: Slightly higher price than bulk aerosol cans, may require a bit more drying time in humid climates.
Does the extra cost scare you? Think of it as an investment in a cleaner studio environment and a finish that won’t yellow over years of storage – especially important for archival portfolios.
One of our students from Bangalore mentioned that after using a resin fixative on a series of landscape sketches, the pieces stayed crisp even after a rainy monsoon season. The resin’s natural polymers resisted moisture better than typical sprays.
And if you ever wonder whether a resin fixative will affect the paper’s texture, the answer is usually no. The film is thin enough that the grain remains visible, which is a big win for artists who love that tactile feel.
Bottom line: natural resin fixatives give you a middle ground between spray convenience and brush‑on control. They’re especially handy for classrooms, eco‑conscious creators, and anyone who wants a subtle, long‑lasting matte shield without the chemical punch.
Best Fixative Option #5: DIY Homemade Fixatives
Ever wish you could protect your graphite without buying a pricey aerosol can? That’s the sweet spot for a DIY fixative – you get control, you save rupees, and you can tweak the recipe to suit your studio’s vibe.
Why go homemade? First, many Indian art students live in cramped dorm rooms where ventilation is limited. A low‑odor, water‑based mix keeps the air cleaner than a chemical spray. Second, you get to choose ingredients that won’t yellow over time, so your portfolio stays crisp for years.
Simple recipes you can start with
Here are three go‑to formulas that use ingredients you can pick up at any local stationery shop or grocery aisle.
- Gum Arabic & Water Fixative. Mix 1 part gum Arabic powder with 4 parts distilled water, stir until smooth, add a splash of ethanol if you want faster drying.
- Casein (milk protein) Fixative. Dissolve 2 tbsp powdered skim milk in ½ cup warm water, add 1 tbsp glue (white PVA) and a few drops of lemon juice to keep it from spoiling.
- Honey‑Vinegar Spray. Blend 1 tbsp honey, 1 tbsp white vinegar, and 1 cup water; filter through cheesecloth and pour into a spray bottle.
Each recipe yields a thin, flexible film that holds graphite but still lets you add a touch later if you need to. The key is keeping the mixture watery enough to mist, but not so thin that it drips.
Step‑by‑step: Making a basic gum‑arabic fixative
- Gather supplies. You’ll need gum Arabic powder, a glass jar with lid, distilled water, a small funnel, and a clean spray bottle.
- Measure and mix. Add 20 g of gum Arabic to 80 ml of warm (not hot) distilled water. Stir vigorously; the powder will thicken after a minute.
- Let it rest. Seal the jar and let the mixture sit for 10‑15 minutes. This “gel” stage ensures even distribution.
- Thin it out. Add another 100 ml of distilled water, shake well, then strain through a fine mesh or cheesecloth into the spray bottle.
- Test on scrap. Spray a light mist 12‑15 inches away on a piece of the same paper you’ll use. The coating should look translucent, not glossy.
- Apply to your drawing. Work in a well‑ventilated corner, sweep the bottle in a steady motion, let each coat dry 2‑3 minutes before adding another.
What if the film feels a bit tacky? Just add a few more drops of water to the bottle and give it a quick shake – you’ve just re‑balanced the viscosity.
Safety & storage tips
Even though these recipes are “natural,” you still want to treat them like any other art supply. Keep the spray bottle sealed when not in use, store it in a cool drawer, and label it with the date you mixed it.
If you add ethanol or a tiny amount of isopropyl alcohol for faster drying, work near a window and avoid open flames. A quick sniff test will tell you if the mixture has gone sour – if it smells off, discard it and start fresh.
When DIY makes sense vs. commercial
DIY is perfect for:
- Students on a tight budget who need a reliable matte shield for weekly sketchbook assignments.
- Artists who prefer a fragrance‑free option for shared studio spaces in Mumbai or Delhi.
- Anyone who enjoys experimenting with texture – you can add a pinch of powdered charcoal to the mix for a subtle “grit” finish.
Commercial sprays still win when you need:
- Ultra‑fast drying in a time‑crunched classroom demo (under 30 seconds).
- A guaranteed, factory‑tested archival rating for high‑value portfolio pieces.
- Consistent atomization on large surfaces, like mural‑scale charcoal studies.
So, how do you decide? If you’re comfortable measuring and stirring, give the gum‑arabic recipe a try. You’ll discover how satisfying it is to control the exact finish on your drawing. And if you ever need a quick reference, this short tutorial on YouTube walks you through the mixing process step by step.
Bottom line: a DIY fixative can be the “best fixative for pencil drawings” for the everyday artist who values cost, control, and a little bit of chemistry fun. Grab a jar, mix, spray, and watch your graphite stay put while you keep creating.
Conclusion
We’ve walked through sprays, workables, mattes, resins, and even a DIY mix, so you know which fixative fits your workflow.
At the end of the day, the best fixative for pencil drawings is the one that lets you protect your graphite without stealing the joy of shading. If you need speed for a class demo, a fast‑dry spray like Krylon Workable Finish is a solid bet. If you’re prepping a portfolio piece and want a flat, archival finish, the Winsor & Newton matte option shines.
But what if you’re on a tight student budget or prefer a fragrance‑free studio? Our homemade gum‑arabic recipe gives you control, cheap ingredients, and a gentle matte veil – perfect for dorm rooms in Delhi or Mumbai.
So, what’s the next step? Grab the fixative that matches your most common challenge, give the simple application routine a try, and watch the graphite stay put while you keep layering.
Remember, a reliable fixative is just a tool; the real magic still comes from your hand and eye. Keep experimenting, stay curious, and let your drawings speak for themselves.
Next time you set up your studio, test a small corner first – it saves time, prevents waste, and builds confidence.
FAQ
Got questions after scrolling through all those fixative options? You’re not alone. Below we tackle the most common doubts that pop up when you’re hunting for the best fixative for pencil drawings. Grab a coffee, and let’s clear the fog.
What does a fixative actually do for my pencil drawing?
A fixative forms a thin, breathable film that binds the graphite particles to the paper fibers. It doesn’t lock the image forever – you can still add layers later – but it stops accidental smudges, reduces tackiness, and protects the tones from humidity. Think of it as a gentle veil that lets your shading stay exactly where you placed it.
How can I pick the best fixative for pencil drawings that matches my workflow?
Start by asking three quick questions: Do you need a fast‑dry spray for a class demo? Do you prefer a matte finish for portfolio scans? Or are you after a low‑odor, brush‑on option for a shared studio? Sprays like Krylon Workable Finish excel in speed, while matte sprays such as Winsor & Newton give archival flatness. Natural resin fixatives sit in the middle, offering low scent and a flexible film.
Will a spray fixative ruin the texture of rough or textured paper?
Not if you apply it correctly. Hold the can 12‑18 inches away and use a sweeping motion so the mist stays fine. A light first coat respects the paper grain; you’ll still feel the tooth under your fingers. After it dries, a second ultra‑light coat can add protection without turning the surface glossy or masking the texture.
How many coats should I apply and how long should I wait between them?
Generally, two light coats are enough for most pencil work. Wait 3‑5 minutes after the first coat – the surface should feel dry to the touch but still a tad tacky. That tackiness lets a second mist adhere evenly. If you’re working on heavily layered graphite, a third feather‑light coat won’t hurt, just be sure each layer dries fully before you add more shading.
Is it safe to use fixatives in a small dorm room or a crowded classroom?
Yes, as long as you keep ventilation in mind. Open a window, place a fan nearby, and spray away from your face. Choose low‑odor, non‑flammable formulas – many brands now label themselves “studio‑safe.” A quick test on a scrap piece helps you gauge how much mist you need, minimizing airborne particles in tight spaces.
Do DIY homemade fixatives work as well as commercial sprays?
Homemade mixes like a gum‑arabic solution can give a decent matte shield and are budget‑friendly, but they often dry slower and may need more frequent re‑application. Commercial sprays are engineered for consistent atomization, faster dry times, and archival stability. If you’re prepping a high‑stakes portfolio piece, a store‑bought spray is usually the safer bet; for everyday sketchbook practice, a DIY fixative can do the trick.
