
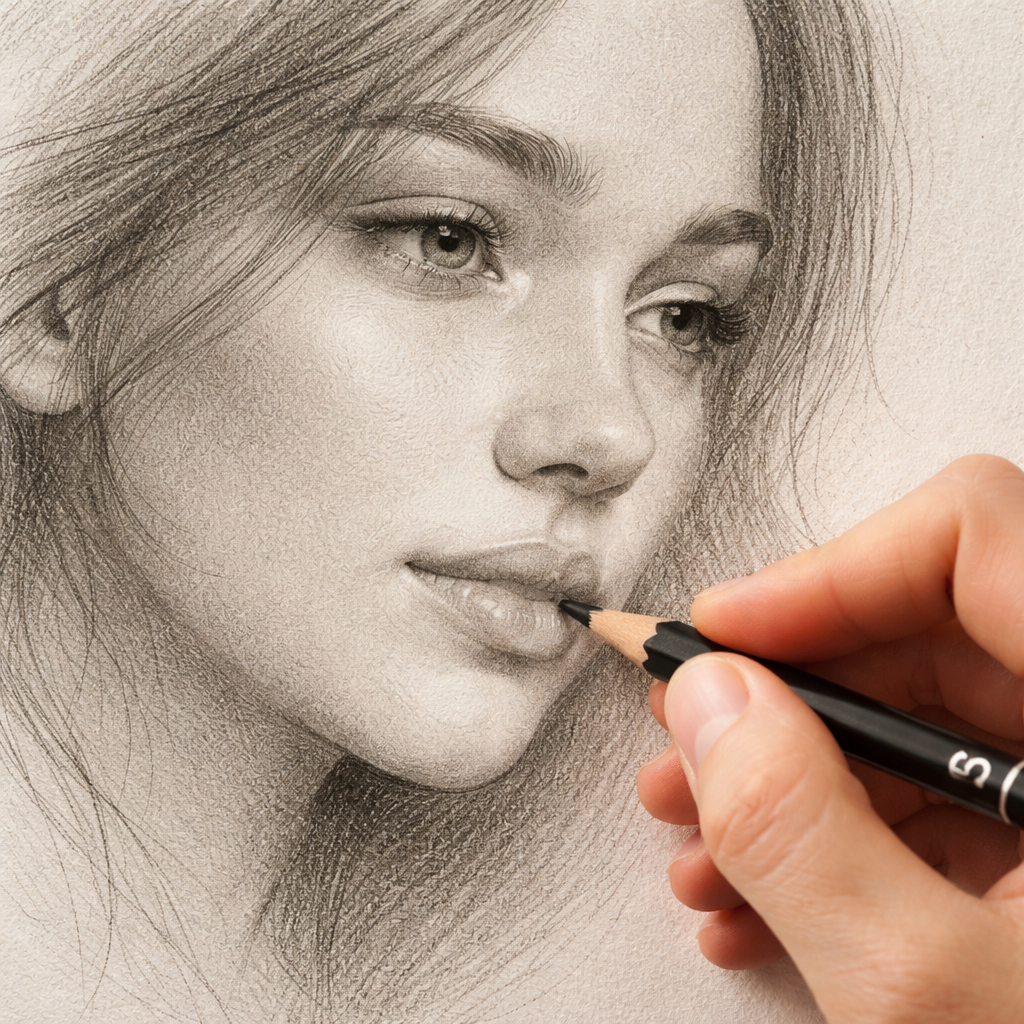
Ever stared at a portrait and felt that the skin just looks flat, like a paper doll? I’ve been there, squinting at the subtle transitions between light and shadow, wondering why my graphite just isn’t catching the warmth of real flesh.
What we’re really after is that soft, lifelike glow you see in the best portrait drawings – the way a cheek catches a hint of sunlight or how a shadow deepens under a jawline. It’s not magic; it’s a handful of deliberate techniques, the right pressure, and a little patience.
First, think about the paper. A slightly toothy surface (around 120‑140 g/m²) gives the graphite something to grip, letting you build layers without the lead slipping off. In our experience, artists who switch from slick printer paper to a textured drawing pad see a noticeable boost in tonal control within a single practice session.
Next, choose the pencil grades wisely. A 2B or 4B works wonders for the base skin tone because it’s soft enough to lay down a rich, even layer, yet you can still lift off with a kneaded eraser for highlights. For the deeper shadows, a 6B or even an 8B gives you that velvety depth without needing to press hard and risk crushing the lead.
Here’s a quick, actionable three‑step routine you can try right now:
- Start with a light 2B layer, using a circular motion to mimic the natural irregularities of skin.
- Blend gently with a tortillon or a soft brush – avoid over‑blending, which can flatten the texture.
- Introduce deeper values with a 6B, applying short, directional strokes that follow the contour of the face, then lift highlights back with a kneaded eraser.
Pro tip: work in short, focused bursts (say, 20‑minute intervals) and step back often. That pause lets your eyes reset and spot where the tones need tweaking.
If you’re looking for a solid set of pencils to experiment with, check out Best Pencils for Sketching and Shading: Top 5 Picks Reviewed. The guide breaks down which brands hold up best under repeated blending – a real time‑saver for anyone juggling coursework, commissions, or personal practice.
Remember, mastering skin tones is less about mastering a single trick and more about building a habit of observation, layering, and subtle correction. Grab a fresh sheet, set a timer, and give these steps a go. You’ll start seeing that gentle transition from ivory to shadow before you know it.
TL;DR
If you’ve struggled to make graphite portraits look alive, this guide shows exactly how to shade skin tones with graphite pencils using simple layers, pressure control, and blending tricks.
Follow our quick three‑step routine, pick the right grades, and practice short bursts so you’ll see natural glow and depth in every face you draw.
Step 1: Choose the Right Graphite Pencils
Okay, let’s talk pencils. It sounds simple, but picking the right graphite grades is the foundation of every believable skin tone you’ll ever draw.
First, ask yourself: do you want a smooth, buttery base or a bit of bite that lets you sculpt shadows quickly? The answer will guide whether you reach for a 2B, 4B, or even a softer 6B.
In our experience at Drawing Pencils Guru, beginners in India often start with a 2B for the lightest areas because it lays down a gentle veil that’s easy to lift. If you’re an academic art student working on a life‑drawing exam, you might appreciate how a 4B gives you a richer mid‑tone without feeling too mushy.
Why a 2B is your workhorse
A 2B has enough softness to create that subtle flesh‑like glow, yet it retains enough hardness to keep your lines crisp. Think of it as the “everyday jeans” of graphite – versatile, reliable, and comfortable for long practice sessions.
When you start a portrait, use light circular motions with a 2B to build up the initial skin plane. You’ll notice the graphite clinging to the tooth of a 120‑140 g/m² drawing paper just the way you want – not too slick, not too gritty.
When to reach for a 4B or 6B
As the cheekbones dip and the jawline recedes, you’ll need a deeper value. That’s where a 4B or 6B steps in. A 4B still lets you lift highlights with a kneaded eraser, while a 6B gives you that velvety darkness for the deepest shadows without forcing you to press hard enough to crush the lead.
Pro tip: keep a tiny wedge of a 6B in your pencil case for those moments when the light disappears behind a hat or a strand of hair. It’s like having a secret weapon in your art kit.
But here’s a little secret many artists overlook: the difference between a brand’s “softness” can be subtle. A 4B from one manufacturer might feel closer to a 2B from another. That’s why we recommend testing a few leads on a scrap sheet before you commit to a whole set.
Managing your pencil set like a pro
Once you’ve settled on the grades, think about how you store them. A simple metal case with individual slots prevents the leads from rubbing against each other, which can cause unwanted breakage – especially if you’re juggling a 6B and a 2B side by side.
And don’t forget the eraser. A soft kneaded eraser is your best friend for pulling back highlights without leaving a ghostly mark. If you need a crisp line or a precise correction, a vinyl eraser works well, but keep it separate from the kneaded one to avoid cross‑contamination of graphite dust.
Now, a quick workflow tip that’s helped many students stay focused: set a timer for 20‑minute drawing bursts, then step back for a minute. It forces you to see the paper with fresh eyes and spot tonal imbalances before they become ingrained.
That rhythm of work‑pause‑review is a small habit, but it makes a huge difference when you’re layering skin tones. You’ll find yourself naturally adjusting pressure and blending direction, which is exactly what we’re after in realistic portrait work.
Below is a short video that walks through the first layer of skin using a 2B – it’s a good visual reference for the motions we just described.
After you’ve got the base down, you’ll be ready to move on to the next step: shaping the light and shadow with a softer lead.
Step 2: Prepare Your Paper and Layout
Alright, you’ve got your pencils sorted, now it’s time to think about the surface you’re drawing on. Paper isn’t just a blank canvas – it’s an active partner in how you’ll shade skin tones with graphite pencils.
Feel the tooth, feel the difference
When I first tried to render a smooth‑faced portrait on a heavily textured pad, the graphite just slipped into the pits and the values looked patchy. The opposite problem shows up on ultra‑slick printer paper: the lead slides around, and you end up with a greasy wash that never holds a clear edge.
In practice, a medium‑tooth paper (about 120‑140 g/m²) hits the sweet spot. The tiny teeth give the lead something to grip so you can build layers without crushing the graphite, yet the surface stays supple enough for gentle blending. For Indian art students who juggle classroom work and commissions, this balance saves a lot of frustration.
Match paper texture to the skin you’re drawing
If you’re aiming for a flawless, porcelain‑like complexion, reach for a smoother sheet. A smooth surface lets you glide the 2B base across the cheek with long, even strokes and keep the transition soft.
Conversely, when you need to suggest age lines, pores, or a weathered male face, a slightly rougher texture can do a lot of the heavy lifting. The tooth catches the darker 6B strokes, making wrinkles pop with less effort.
Ioanna Ladopoulou explains this nicely in her guide on choosing the right paper for graphite skin tones. She notes that a semi‑textured sheet works as a versatile middle ground for mixed‑tone studies.
Set up your layout before you start
Take a moment to sketch a light construction grid. A simple 1‑inch square grid helps you place facial features proportionally and keeps your eye from wandering too far from the focal area. It also gives you a roadmap for where the darkest shadows will sit, so you can reserve the right amount of paper for those heavy 6B layers.
Here’s a quick three‑step layout routine you can try:
- Lightly draw the overall shape of the head with a hard 2H pencil – just enough to see the outline.
- Mark the major planes (cheekbone, nose bridge, jawline) using short diagonal lines. These become your value guides.
- Shade a thin value map: 1 B for the lightest areas, 3B for mid‑tones, and leave the deepest zones blank for now.
When you flip back to the paper later, those faint marks will tell you exactly where to lay down a 2B base, where to blend, and where to drop a 6B for depth.
Test your paper before you commit
Grab a scrap corner of the same pad and do a mini tonal strip: lay down a smooth 2B wash, add a 4B layer, then deepen with 6B. Lift a highlight with a kneaded eraser. If the tones transition cleanly and the eraser picks up graphite without tearing the surface, you’re good to go.
If the paper eats too much lead or the graphite smudges too easily, switch to a slightly heavier weight or a different brand. The goal is to spend less time fighting the surface and more time shaping the skin’s subtle glow.
Practical tips for the Indian classroom
Many art schools in Mumbai and Delhi provide a standard drawing block that leans toward the smoother side. I recommend keeping a spare pad of medium‑tooth Bristol on hand for portrait work – it’s affordable and fits easily into a student’s bag.
Also, humid climates can cause paper to warp. Store your sheets flat between heavy books, and if you notice a slight curl, lightly mist the back with a spray bottle and let it dry under a clean weight. The paper will flatten out, and you’ll avoid unwanted ridges in your skin tones.
Wrap‑up
Choosing the right paper and laying out your composition are the invisible scaffolding that lets you focus on the real magic: building those lifelike skin tones. With a medium‑tooth surface, a quick value map, and a short paper test, you’ll find yourself spending more time blending subtle transitions and less time fixing a wonky base.
Next up, we’ll dive into the actual shading process, where you’ll see how those paper choices pay off in the final portrait.
Step 3: Build Base Tones
Choose the right lead for the base
We usually start with a 2B or a soft 3B because it’s soft enough to lay down a smooth, even layer, yet still responsive when you need to lift highlights. If you’re working on a darker lighting scheme, a 4B can give you a richer starting point without having to press too hard.
In our experience at Drawing Pencils Guru, the sweet spot is a mid‑soft lead on medium‑tooth paper – the graphite sticks, the paper doesn’t grind it down, and you keep the texture of skin intact.
Apply the base with controlled pressure
Start by shading the largest planes of the face – the forehead, cheekbones, and chin – using a gentle circular motion. Think of the pencil tip as a tiny brush that follows the natural grain of skin. Keep your hand relaxed; the pressure should be just enough to leave a light, uniform gray.
Here’s a quick, three‑step routine you can try right now:
- Set a timer for 5 minutes and sketch a loose oval for the head.
- Using a 2B, fill the oval with overlapping circles, moving from the top of the forehead down to the jaw. Avoid straight lines; let the circles blend into each other.
- Step back, look at the overall value. If any area feels too light, go over it again with a slightly firmer hand, but never crush the lead.
Notice how the base tone begins to look like a warm parchment rather than a flat sheet of gray.
Check and refine the value map
Before you add deeper shadows, pause and compare your drawing to a simple grayscale reference. You can create a quick tonal strip on a scrap corner: 1 B for the lightest highlight, 2B for the base, 4B for mid‑tones, and 6B for the darkest shadow.
If the base you just laid matches the middle shade of that strip, you’re on track. If it leans too light, add another thin layer of 2B. If it’s already pushing into the mid‑tone range, lighten it with a kneaded eraser – gently roll the eraser over the area to lift a bit of graphite without smudging.
Real‑world example: a classroom portrait
Imagine you’re a second‑year art student in Delhi, tasked with a quick portrait of a classmate for a weekly critique. You have a 2B, a 4B, a kneaded eraser, and a medium‑tooth Bristol pad.
First, you draw a light outline with a hard 2H. Then, following the steps above, you lay a 2B base across the cheeks and nose. After a brief glance, you see the left cheek looks a shade lighter than the right – a common issue when the paper’s tooth isn’t uniform.
To fix it, you lightly go over the lighter side with a soft 3B, using the same circular motion. The extra graphite adheres to the slightly rougher tooth, evening out the tone. Finally, you lift a tiny highlight on the bridge of the nose with a kneaded eraser, and the face suddenly pops with three‑dimensionality.
Tips from the Drawing Pencils Guru
• Work in short bursts (15‑20 minutes). Your eyes get tired, and a fresh look will reveal uneven base tones faster.
• Keep a piece of scrap paper under your drawing hand. It prevents unwanted smudges and lets you glide smoothly.
• If the graphite feels too “dusty,” tap the side of your pencil against the edge of your sketchbook to knock off excess lead – this keeps the tip sharp and the line clean.
One more nuance: when you’re shading a darker complexion, start the base a shade lighter than you think you need. That extra room lets you build depth later without over‑compressing the paper.
Want a visual walk‑through? Check out this video demonstration of layering graphite for skin tones. The artist shows the same circular‑motion technique we just described, and you can pause at each stage to compare your own work.
And if you’re curious about how to transition from the base to the final highlight, the follow‑up tutorial covers blending and erasing tricks for a lifelike glow – it’s a great companion to this step.
When you finish the base, you should see a warm, even gray that feels like the underlying flesh of a real face. From here, the deeper shadows and delicate highlights will sit naturally, and you’ll spend less time fighting the surface and more time sculpting that subtle, three‑dimensional glow.
Step 4: Blend and Layer for Realistic Skin
Let’s be honest: this is where you stop chasing texture and start letting skin feel alive. Blending and layering aren’t magic tricks; they’re a careful conversation between pencil, paper, and light.
If you’re wondering how to shade skin tones with graphite pencils that actually look real, here’s the rhythm I’ve seen work best. Start with a light base, then build depth in stages. It sounds simple, but the effect is powerful when you respect the paper’s tooth and the lead’s softness.
Think about the face in planes—not a flat surface. Forehead, cheek, nose bridge, chin—the transitions between them are where the life hides. You’ll blend along those contours, not across them. This helps the skin glow rather than look chalky.
Now, let’s talk pressure. You want the motion to feel like slow breathing. Gentle, steady, never brute-forced. With graphite, pressure is your control lever for depth without crushing the surface.
Layering strategy is your best friend. Start with a light 2B base to establish warmth. Add midtones with a 4B, letting strokes follow the face’s natural curves. For the deepest shadows, bring in a 6B or 8B, but always in small increments. The goal isn’t darkness for its own sake; it’s nuance—the subtle shifts that say, this is real skin, not a flat shade.
Here’s a quick mental checklist as you work: keep the paper grain intact, avoid hard edges unless they’re intentional, and let the lightest areas breathe. Circular motions help blend the texture; they also mimic the irregularities you see in real skin. If you chase a perfectly even tone, you’ll lose the personality of the portrait.
After you lay the base, you’ll want to refine textures. Use a tortillon or a soft blending stump to merge transitions. Lightly roll the tool, following the direction of the grain. If you over-blend, you’ll flatten the tiny bumps that give skin its life. Less is more here.
Blending isn’t your only tool—lifting is crucial too. A kneaded eraser lets you pick out highlights with precision. Tap or dab to lift tiny specks, especially around the cheekbone or the cupid’s bow, where light naturally lands. Don’t swipe; lift. It’s a small move, but it makes highlights pop without looking fake.
Slow, deliberate practice beats marathon sessions. Work in short bursts of 15–20 minutes, then step back and compare with a grayscale reference. If a region feels off, adjust with a faint extra pass of 2B or 4B, then re-lift where necessary. This is how you keep the glow believable rather than generic.
Does this approach feel manageable? It should. The beauty of graphite is that you’re layering the story of the skin, not just coloring it in. Keep your goal in sight: a portrait that reads as warm, dimensional, and true to life.
In our experience at Drawing Pencils Guru, consistency is the magic ingredient. Regular practice with the same setup—paper, pencils, and technique—lets you visibly improve skin tones across different complexions and lighting situations you’ll encounter in Indian classrooms and studios.
So, what’s next? Set up a simple three-layer map for each face you draw: base warmth (2B), midtones (4B), and deepest shadows (6B). Practice applying them along the planes, then lift highlights to finish. It sounds straightforward, and with a little repetition, it becomes second nature.
Step 5: Add Highlights and Fine Details
Now that you’ve laid the groundwork for warmth and depth, it’s time to bring skin to life with highlights and fine details. Highlights are where light lands, not just where you pretend it’s bright. Get these right and the portrait stops looking flat and starts breathing.
Think about the light’s path on a real face: a soft gleam along the cheekbone, a tiny bright point on the cupid’s bow, a glint along the nose bridge. Those moments aren’t big; they’re tiny, precise touches. Here’s how to reproduce them with graphite without turning the drawing into a glarefest.
So, what should you do next? Lift highlights with control.
Lift highlights with control
Use a kneaded eraser like a gentle sponge. Press lightly, then roll, not swipe. Flip the page often and check the edge softness at the highlight. If the edge looks harsh, go back with a clean 2B and re-blend slightly to soften.
In practice, you’ll create a small, bright patch where light hits: the cheekbone peak, the top of the lip, and the brow arc. You don’t erase large areas; you carve tiny slivers that catch the eye. That restraint is what makes it look real.
Does this really work? It does when you stay patient and tiny. A couple of micro touches can transform a flat plane into something that reads as real skin, not a graphite slab.
Refine texture with micro-details
Skin isn’t perfectly smooth. Add micro-texture like pores, faint freckles, or a whisper of stubble by using a very sharp pencil tip and a light touch. Tap-dots or hairline strokes in the direction of the skin’s grain, then lift with the kneaded eraser to keep intent crisp but not stark.
Move slowly. The goal is to suggest texture, not paint every pore. If texture reads too busy, soften with a light pass of the blending stump, then re-sharpen the highlight by lifting again.
Think about this trend in real life portraits you’ve seen. The best ones don’t shout; they hint at texture and warmth. You’ll know you’ve nailed it when the eye catches a tiny glint that makes the whole face feel alive.
Maintain tonal balance across the face
Always compare against a grayscale reference. If a highlighted area pulls too far, reduce surrounding midtones with a careful 2B pass and re-lift as needed. The spectrum of values should read as a natural skin glow, not a mirror reflect.
And: warmth matters. Even in grayscale, place slightly richer midtones in areas like the cheeks where the light caresses the skin. You don’t need color to imply warmth; you create it with value shifts.
From our testing at Drawing Pencils Guru, these steps hold up across Indian classrooms and studios where students juggle practice and deadlines. The tiny adjustments add up to a portrait that feels alive.
Table: quick decision helpers for highlights and details
| Feature | Option / Tool | Notes |
|---|---|---|
| Highlight lifting | Kneaded eraser vs precision vinyl eraser | Gently lift small patches; avoid smudging; kneaded erasers allow soft edges |
| Texture refinement | Tortillon / blending stump | Blend lightly along grain; over-blending kills life |
| Edge management | Sharp pencil for micro-details | Keep edges soft around highlights; use tiny strokes |
| Paper texture effect | Medium-tooth Bristol vs smooth sheets | Tooth holds highlight pop; smooth sheets require careful layering |
Step 6: Comparison of Graphite Grades and Tools
Let’s get real about graphite grades and tools. It’s not a mystery, but small choices add up to how the skin glows on the page. You’ll feel the difference when you run through the comparisons with your own sketchbook.
Understanding pencil grades is the first move. Soft leads like 2B and 4B lay down warmth quickly and are easy to layer. For the deepest shadows, 6B or 8B push the darkness without you having to press like a maniac. So what should you start with for a believable base? Think mid-soft to begin, then build from there.
In our experience, a base in the 2B–4B range on a medium-tooth paper gives you the right balance of grip and control. You can add layers, lift highlights, and refine edges without tearing the surface. Does this setup work for every skin tone? Not exactly. You’ll tailor by adjusting pressure, layer order, and even the paper texture you pair with your leads.
Tools matter just as much as grades. Blending stumps and tortillons help you smooth transitions, but beware the trap of over-blending — it can flatten the life out of the skin. A kneaded eraser is ideal for delicate highlights, while a precision vinyl eraser carves sharper light patches where you want them. Which combo gives you the most natural glow? The one that lets you lift, rework, and preserve texture without turning the portrait into a flat gray.
Paper texture is another player in the game. A slightly toothy surface holds midtones and texture better, letting pores and subtle pores feel tactile. Smooth paper works too, but you’ll lean harder on layering and edge control. For Indian classrooms and busy schedules, a balanced Bristol or watercolor-weight sheet often hits the sweet spot between control and forgiveness. What surface are you using today, and does it support the pencil range you rely on?
Now, let’s translate all this into practical guidance you can apply in minutes. Base shading benefits from 2B–4B to establish warmth and form. Deep shadows gain depth with 6B–8B, but build them in thin layers rather than one heavy sweep. Highlights come from lifting with a kneaded eraser or carefully placed light strokes with a sharp lead. This is the rhythm that keeps the skin feeling alive rather than chalky.
To help you decide on the fly, here’s a quick mental checklist: start with a mid-soft base, map your planes, layer gradually, and reserve the darkest strokes for the deepest wrinkles or contours. Always leave tiny zones of paper exposed for bright highlights so the light reads as natural. Ready to compare tools side by side? Let’s look at the essentials below in a concise table.
| Feature | Option / Tool | Notes |
|---|---|---|
| Base shade range | 2B–4B | Establish warmth and broad midtones without heavy pressure |
| Deep shadows | 6B–8B | Layer in thin passes to avoid paper crushing; keep edges soft where needed |
| Highlight lifting | Kneaded eraser vs precision vinyl eraser | Kneaded eraser creates soft edge highlights; vinyl gives crisp, bright punctuations |
| Blending tools | Tortillon / blending stump | Follow skin grain; gentle, short strokes prevent mud; over-blending kills life |
| Texture control | Paper choice (tooth) + light edging | Tooth affects grip and texture; adjust with edges and lift for micro-texture |
Does this approach hold across different skin tones and lighting? In practice, yes, with small adaptations. For darker complexions, you’ll start a touch lighter and push depth more gradually. For lighter tones, focus on smooth transitions and subtle edge control. The key is to practice with the same paper and pencil setup so you understand how each tweak shifts the glow.
As you practice, you’ll notice a simple truth: consistency beats bravado. Use the same set of pencils, same paper, and the same lifting technique for a week, and you’ll see the glow become a repeatable outcome. That’s the power of treating graphite like a conversation with the skin — you guide the light, not command it. And if you ever feel stuck, revisit the three-step rhythm: base warmth, midtone layering, and thought-out highlights.
Conclusion
If you’ve made it this far, you already know that shading skin tones with graphite pencils is less about magic tricks and more about a steady conversation between lead, paper, and light.
Remember the three‑step rhythm we kept coming back to: lay a warm 2B base, build mid‑tones with a 4B, then tease the deepest shadows with a soft 6B or 8B. A gentle kneaded eraser lifts those tiny highlights that turn a flat gray into a living face.
So, what should you do next? Grab the same set of pencils you used in the earlier steps, a sheet of medium‑tooth Bristol, and set a timer for 15 minutes. Sketch a quick portrait, follow the rhythm, and watch how the graphite starts to glow.
In our experience at Drawing Pencils Guru, artists who repeat this routine for a week notice a clear jump in confidence – the paper no longer fights the lead, and the highlights feel natural.
Don’t let perfection stall you. A few imperfect studies are better than waiting for the “perfect” setup. Each lift, each layer teaches your hand what pressure feels right.
Keep the process messy, keep the paper ready, and keep practicing. Soon the subtle shifts in tone will become second nature, and you’ll be able to render any complexion with confidence.
FAQ
Which graphite grades should I start with to get realistic skin tones?
In most cases a mid‑soft 2B or 3B works best for the base because it lays down a warm, even gray without demanding too much pressure. From there you can reach for a 4B or 5B to build mid‑tones, and reserve a soft 6B or 8B for the deepest shadows. The trick is to stay in the same grade family – you’ll avoid harsh jumps and keep the paper’s tooth happy. If you’re new, stick to 2B → 4B → 6B and adjust as you feel the paper respond.
How can I blend the layers without turning the skin flat?
Blend with purpose, not for the sake of smoothing everything out. Use a clean tortillon or a soft blending stump, and roll it along the direction of the facial planes – cheek to jaw, forehead to nose. Keep the strokes short and light; you want to merge edges, not erase the tiny bumps that give skin its life. If you notice the surface looking too uniform, go back with a light 2B pass to re‑introduce texture before lifting highlights.
What’s the most reliable way to lift highlights without smudging?
A kneaded eraser is your best friend for delicate highlights. Gently press a small dab of the eraser on the area you want brighter, then roll it sideways to lift graphite. Avoid dragging – that creates a cloudy edge. For pinpoint brilliance, shape the eraser into a point with your fingers and dab the tiniest spot on the nose bridge or cheekbone. Finish by feathering the surrounding area with a soft 2B stroke to keep the transition natural.
How many layers should I apply, and in what order?
Think of skin shading as a three‑step rhythm: start with a light 2B base across the whole face, add a mid‑tone layer with 4B where the form turns away from the light, and finally introduce the deepest shadows with a 6B or 8B in the corners of the eyes, under the chin, and along the hairline. Each layer should be thin – a single pass is enough – because you can always build more depth, but you can’t easily erase a heavy, crushed layer.
Which paper texture works best for students in Indian art classrooms?
Medium‑tooth Bristol (about 120‑140 g/m²) hits the sweet spot for most Indian classrooms. It grips the graphite enough to hold multiple layers, yet stays supple for gentle blending. If your school supplies only smooth printer paper, you’ll find the lead slides too much and highlights disappear. A quick test – sketch a tiny tonal strip on a scrap corner – will tell you if the paper can hold a 2B wash, a 4B overlay, and a lifted highlight without tearing.
How long should my practice sessions be to see real progress?
Short, focused bursts work best. Set a timer for 15‑20 minutes, choose a single facial feature – like an eye or a cheek – and work through the three‑step rhythm without distraction. After each session, step back and compare your drawing to a grayscale reference photo. This habit trains your eye and hand together, and most students notice steadier pressure control and cleaner transitions after a week of daily 20‑minute drills.
